

Blog videos have been around for decades, helping viewers learn something new and navigate their daily lives. From traveling and cooking to routines and other aspects, these videos can be educational and make your day or life more manageable. If you want to join this community and share your experiences, you’ve come to the right place.
We dove deep into the video blogging industry to provide this ultimate guide, showing you how to make a blog video and share your content with your audience. The guide is beginner-friendly, and you can start your journey by following the tips, tricks, and steps below.
In this article
What Is a Video Blog?
Video blogs, or vlogs for short, are videos where the content creator discusses a specific topic. For instance, a vlogger can review products, take you on a trip with them, share opinions, or simply provide long-form entertainment content. The creator usually has one niche they stick to on their channel and lets viewers know what they can expect from future videos.
Once the vlogger films and edits the video, they post it on streaming platforms (in most cases, YouTube) and make it publicly available. They can also post clips or ads about their upcoming videos on social media platforms like Instagram, Facebook, and X to promote their content.
How Are Video Blogs Different From Traditional Blogs?

Video blogs and traditional blog content have numerous differences. We’ll list some of them below to help you decide which blog type to choose.
- The format – Traditional blogs include textual content. On the other hand, video blogs require you to film clips, do voiceovers (or not), and add different optional elements, such as images.
- Accessibility and inclusivity – Vlogs are more accessible to the audience since most contain video, audio, and textual content (closed captions or subtitles). On the other hand, not too many blogs contain audio elements, making them less accessible to visually impaired people.
- Production time and complexity – Traditional blogs don’t take long to produce and deliver to the audience. If you’re educated about a topic, it shouldn’t take you more than a few hours for high-quality content. On the other hand, vlogs can take days to record and edit, especially when creating long-form content. Moreover, you’ll need to master editing skills to engage the audience and deliver fantastic vlogs.
As you can see, traditional blogs and vlogs differ in numerous aspects, so you can choose the one that best fits your preferences and style.
What You Need to Start a Video Blog
Below is a list of all the essential elements you should gather to start your video blogging journey and master the art of recording and editing.
Camera

The first and most crucial equipment piece is a high-quality recording camera. Purchase a camera with at least 1080p recording capabilities to keep up with the market and deliver excellent content. That will allow you to see the whole image and the details to keep up with your content and get proper visual elements.
Moreover, choose a camera according to your recording needs and vlogging preferences. For instance, if you plan to be a travel vlogger, we advise you to invest in a compact camera so you won’t have to carry additional weight on your trips.
Microphone

Investing in a microphone is necessary since you’ll have to talk during your vlogs. You should provide the viewers with crystal-clear audio to enhance the quality of your vlogs and reach a broader audience. Again, the type of microphone you select will depend on your preferences and vlogging style.
For instance, if you plan to film nature vlogs and want to capture the sound of nature, you can use a hypercardioid microphone. It will pick up all the sounds from all directions, contributing to sound and content quality.
Lighting

Although you may have an excellent recording camera, it won’t do the trick without proper lighting to make your videos pop and create the best vlogs. The best preparation step is to find natural lighting, so if you plan to be a nature vlogger, you won’t need to invest in advanced equipment.
On the other hand, if your vlogs will be home-based or if you plan to film in closed spaces, you should invest in lighting. Some equipment you may need include reflectors, flashes, and modifiers, but the pieces you purchase will again depend on the vlogging type.
Vlogging Platform

After gathering all the hardware, determine which vlogging platforms are the most suitable for your content and pick your favorite. For instance, if your target audience is teenagers and adolescents, the best vlogging platform may be YouTube, as millions of people within this age group visit the platform daily.
The platform you select will also depend on the content type. For example, if you’re interested in the gaming niche, you can try your luck on Twitch. You can also post your content on multiple platforms to gain the most viewers.
Video Recording & Editing Software
The most crucial steps on your video blogging journey include recording and editing your videos. While filming your content, you may have encountered issues you want to eliminate or simply improve the visuals to get professional results. However, mastering manual editing tools can take months or even years, and you can’t afford to lose that time to reach the final destination.
Instead, you can opt for easy-to-use yet highly efficient solutions like Wondershare DemoCreator. This platform provides numerous recording options, such as Screen and Camera, Camera, and Game recording, to provide the best experience. You can also customize the recording settings, such as the quality of your videos, to elevate your journey.

Once you finish recording, you’ll access various advanced editing features to take your videos to the next level. Some include removing background noise from your audio clips, changing the background in your videos, adding captions, and incorporating annotations. We’ll touch upon that topic in a minute.
The best part is that you don’t need experience to navigate and use this software efficiently. Most editing tools are automatic, so you can sit back, relax, and enjoy the show. Thus, download it from the official Wondershare DemoCreator website and start vlogging away.
How to Make a Blog Video
After gathering all the tools you need for successful blog video creation, you can jump to the steps below to learn how to create high-quality content and share it with your audience.
Create a Script for Your Blog Video

The first step to capturing fantastic blog videos is creating a script to bring viewers closer to the topic. For the best results, focus on the main subject and avoid details unrelated to the video. We also recommend always having a script by your side to remember the recording steps and make your visions come to life.
One of the best tricks to help you follow the script is to use a teleprompter during voiceovers and recordings. That will save you time and effort while recording, and you won’t have to remember an extensive text to explain the topic.
Set up Your Equipment and Software

Once you determine what content you’d like to record and prepare a script, set up your equipment and prepare the software solutions. First, set up your background and place the camera at the right angle to ensure you get the desired results. Once you determine the position, check the lighting.
We recommend making a few test recordings to check if the visuals are in order and ensure you can start recording for extended periods. Ensure everything is set according to your preferences before the vlogging starts.
Record Your Blog Video
The time has come for you to create your first blog video. Since the recording process may be overwhelming, we recommend using Wondershare DemoCreator to begin the vlogging journey. The platform will allow you to customize your recordings by selecting the output devices, frames, and other elements. Let’s check out how to activate the recording feature:
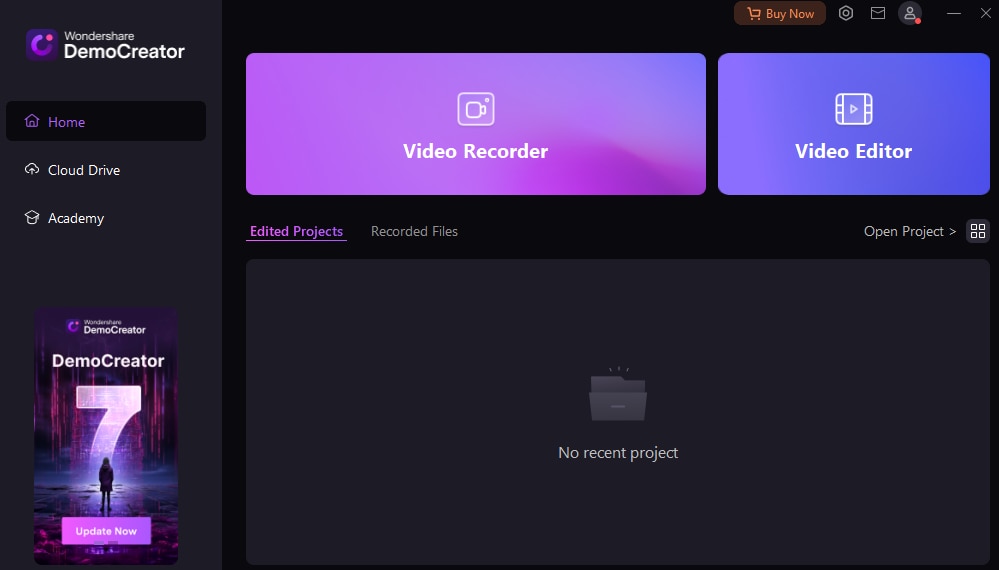
Step 1: Open DemoCreator and click the Video Recorder.
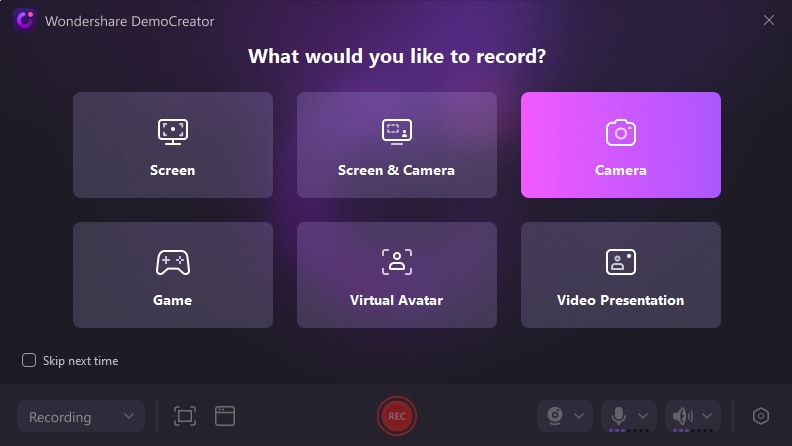
Step 2: Select Camera from the available recording modes.
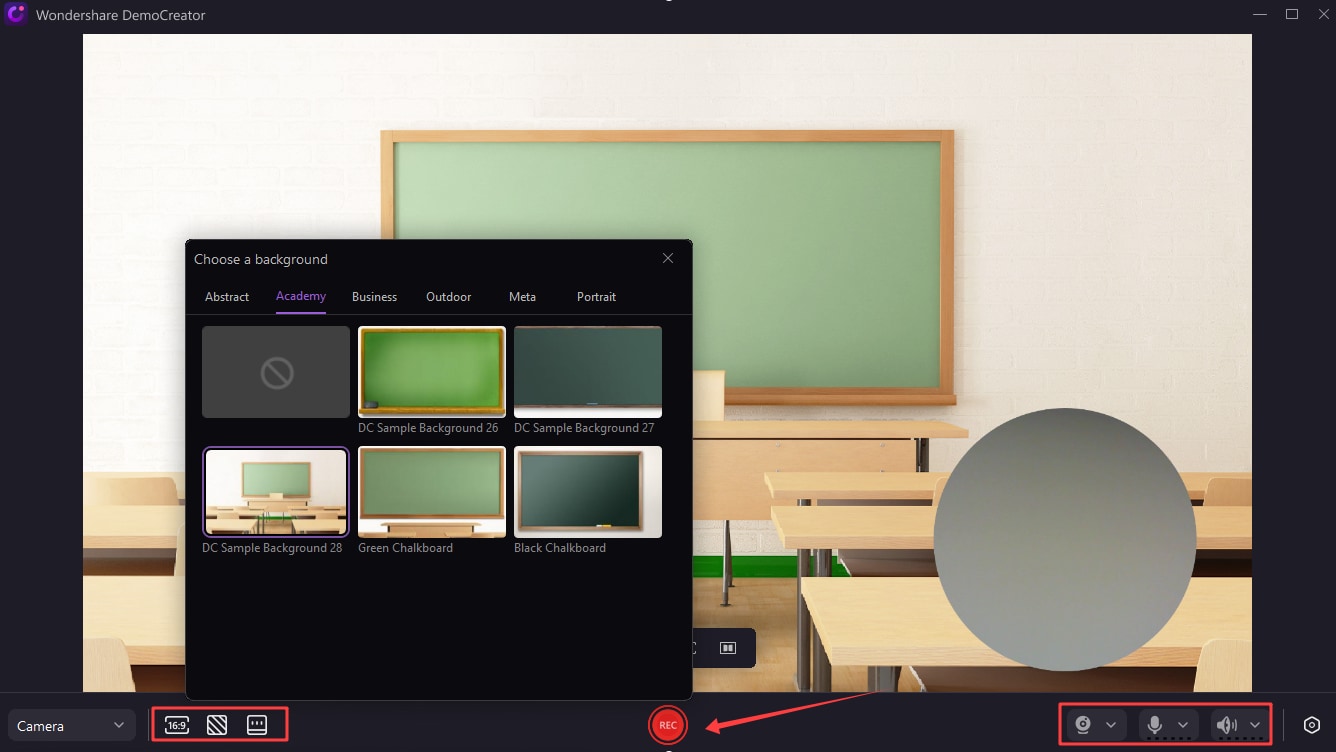
Step 3: Once you open the recorder, customize the recording settings, such as the background and screen size.
Step 4: Click the Teleprompter icon, paste your text, and customize the speed and opacity.
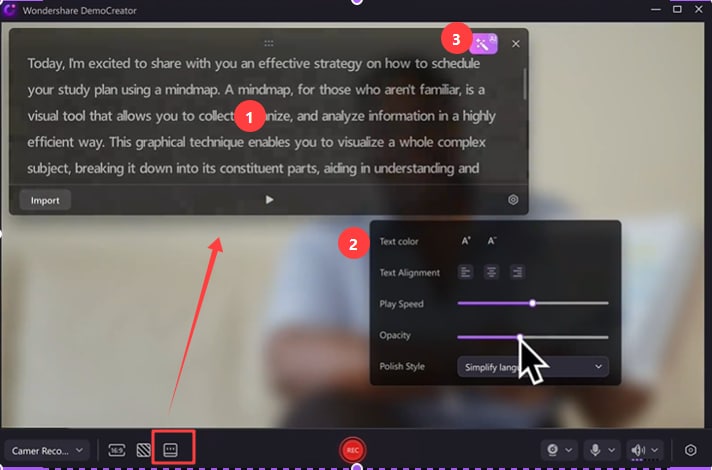
Step 6: Click the REC button to begin recording and the Play icon to start the teleprompter.
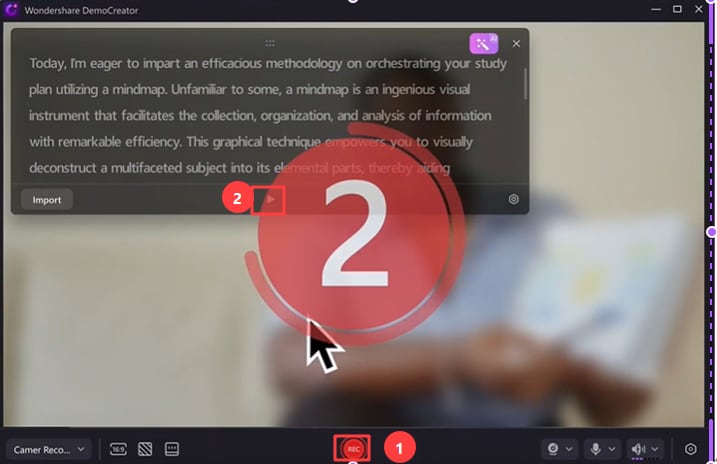
Now, you can follow the script and make the best vlog.
Edit Your Blog Video
After successfully recording your blog video, it’s time to add the finishing touches and make the content audience-ready. We’ll present several editing features in Wondershare DemoCreator to help you navigate the software:
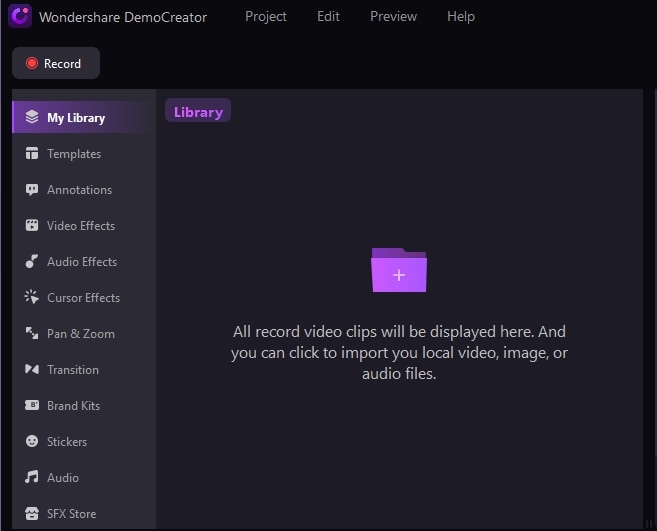
Step 1: Open Wondershare DemoCreator and click the Video Editor.
Step 2: Import your media by clicking the + icon or dragging and dropping the recording into the program.
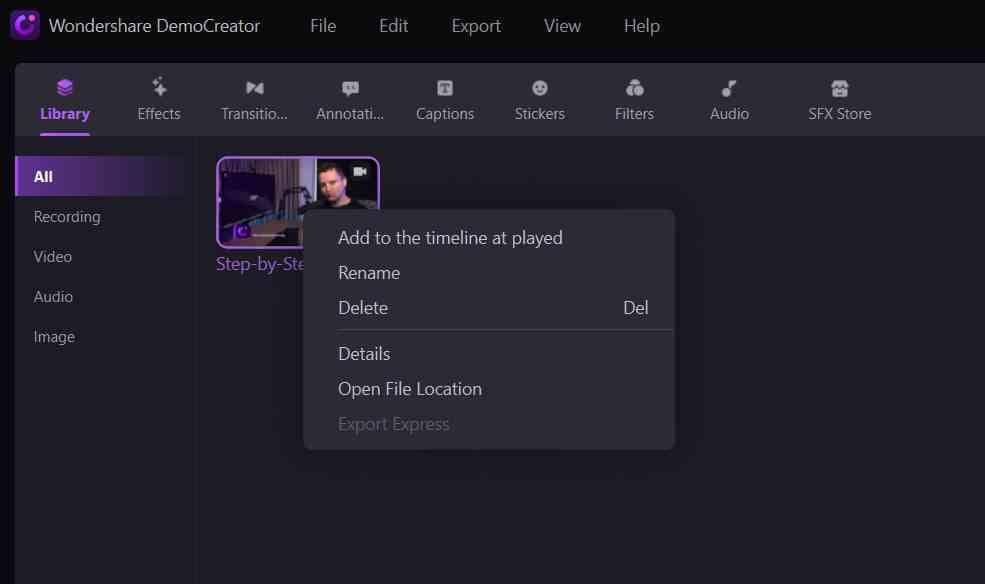
Step 3: Add the video to the timeline by right-clicking it and selecting Add to the Timeline at Played.
Step 4: Crop your video by clicking the Crop icon and selecting the ratio.

Step 5: You can split the video by right-clicking it and selecting Split in the context menu.
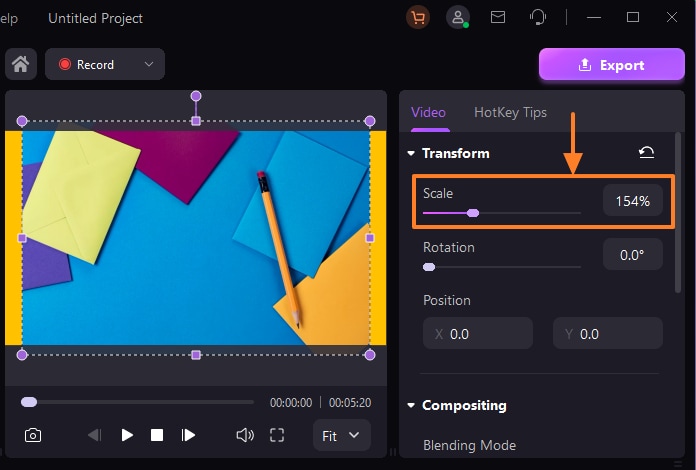
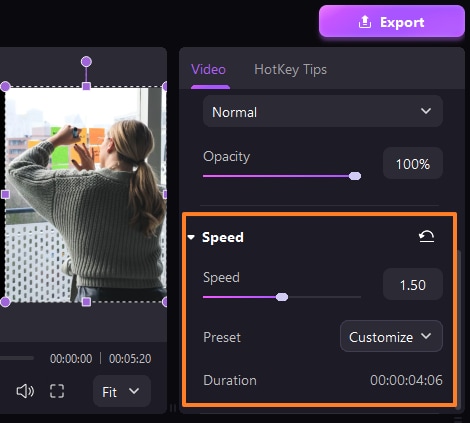
Step 6: Click the Video tab in the right-hand Properties panel and customize the Scale to resize your vlog.
Step 7: Change the speed by clicking Video and adjusting the speed bar.
Step 8: Right-click the video and select Freeze Frame in the context menu to freeze the frame.

Step 9: Go to the Audio tab in the Properties panel and toggle the Denoise button. That will remove background noise from your video.

Step 10: Switch to the Audio tab in the Toolbar and select an audio effect from the available options.

We’ve presented only some editing features in Wondershare DemoCreator. Check out the complete DemoCreator guide to see what else you can do.
Add Captions and Annotations to Your Blog Video
Wondershare DemoCreator also allows you to add automated captions and annotations to emphasize the importance of specific elements within your blog video and make the content more accessible to those who are hard of hearing. Here’s how to add automated captions and annotations to your videos.
Captions
Step 1: Log into your Wondershare account.

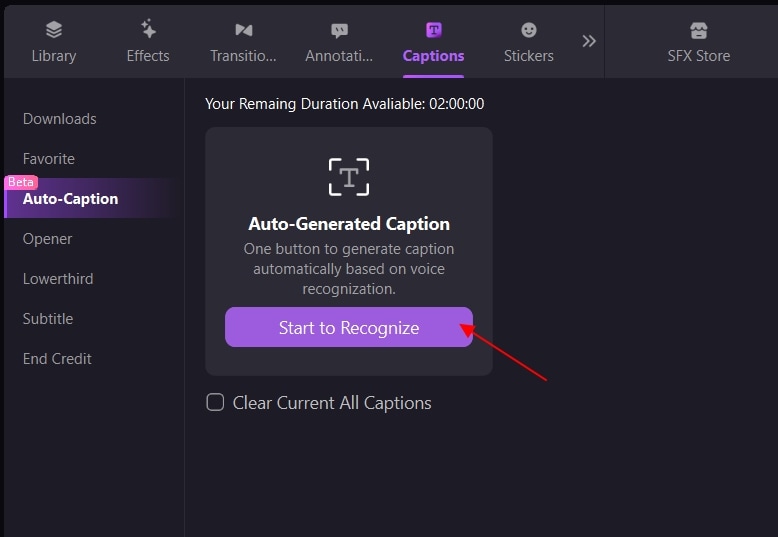
Step 2: While editing the video, click Captions > Auto-Caption.

Step 3: Click Start to Recognize.
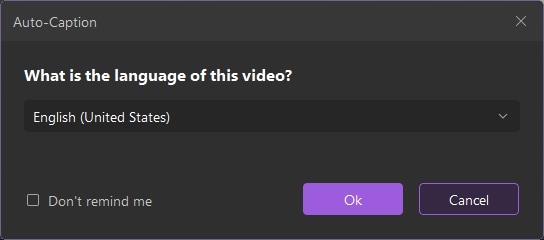
Step 5: Select the language.
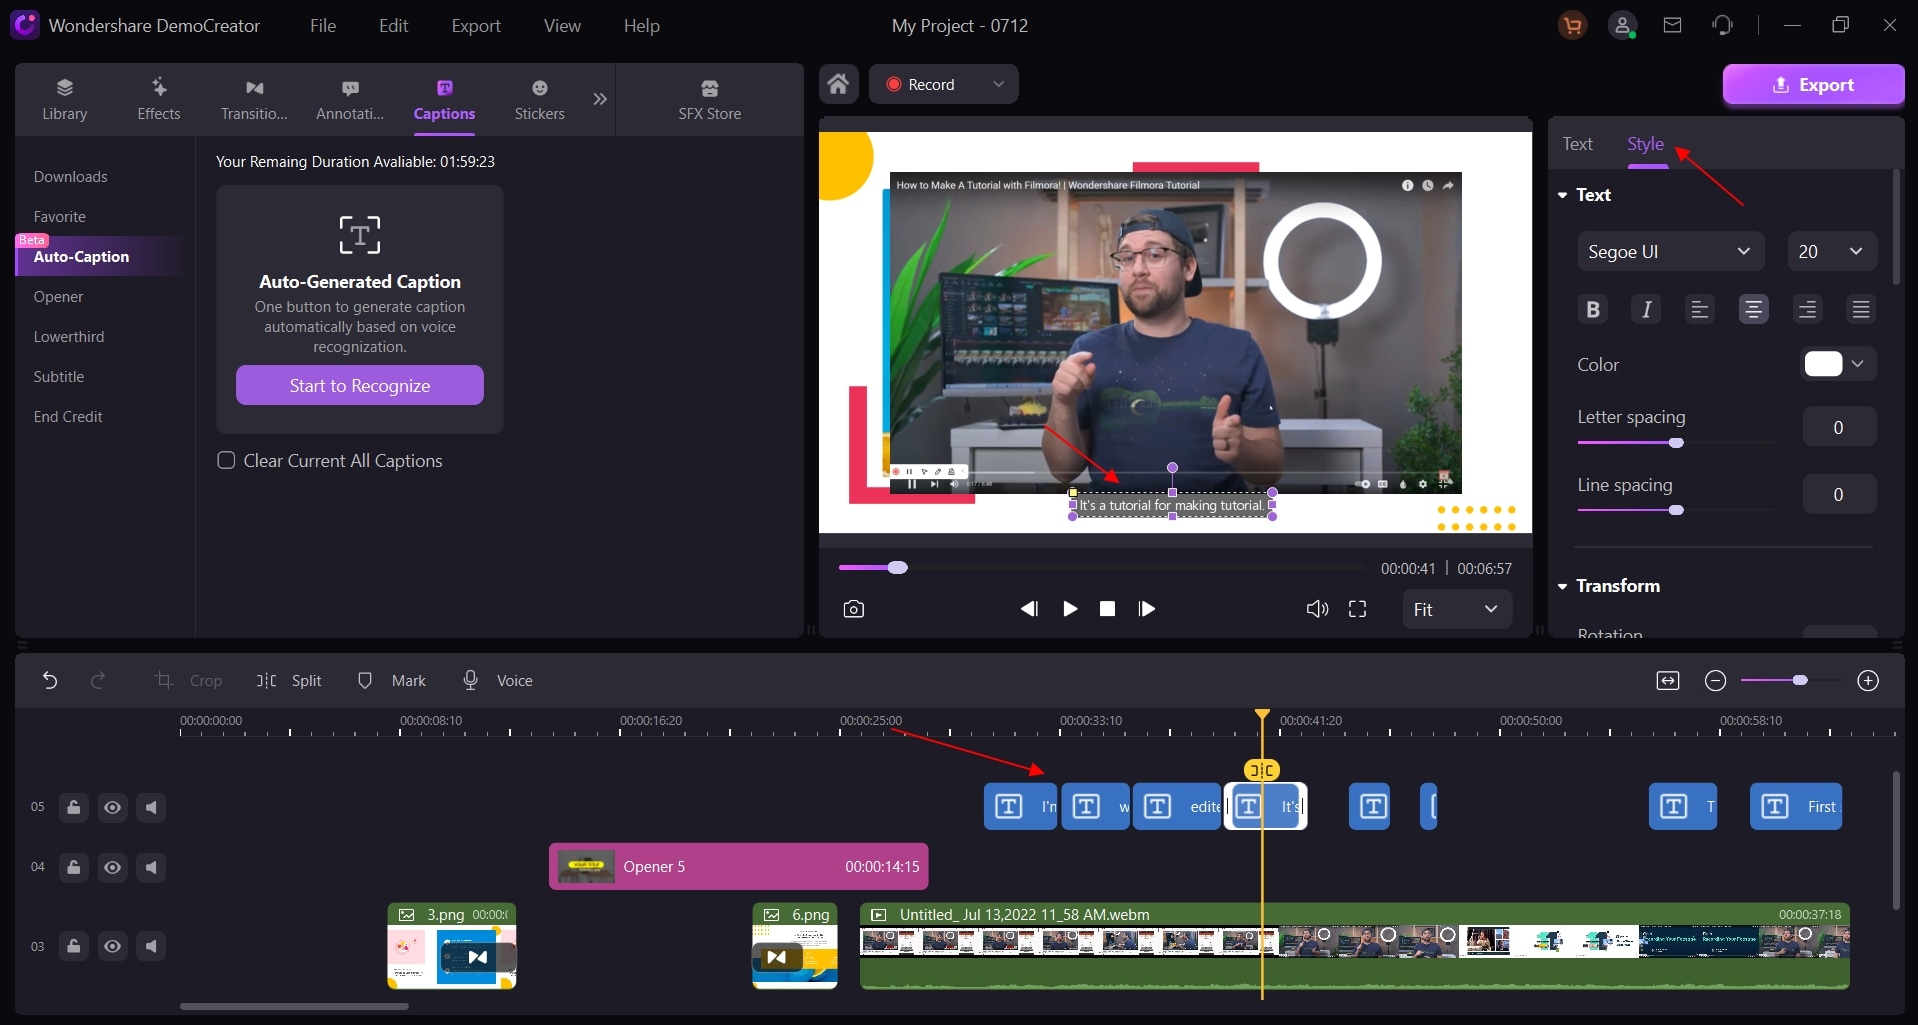
Step 6: Edit the style of your captions.
If you already have a script and don’t want to use the Auto-Caption option, you can manually add your text by following the steps below:
Step 1: Click Captions in the Toolbar and select Opener.

Step 2: Choose a template and drag it to the timeline.
Step 3: Customize the captions in the Video and Effect tabs in the Properties panel.

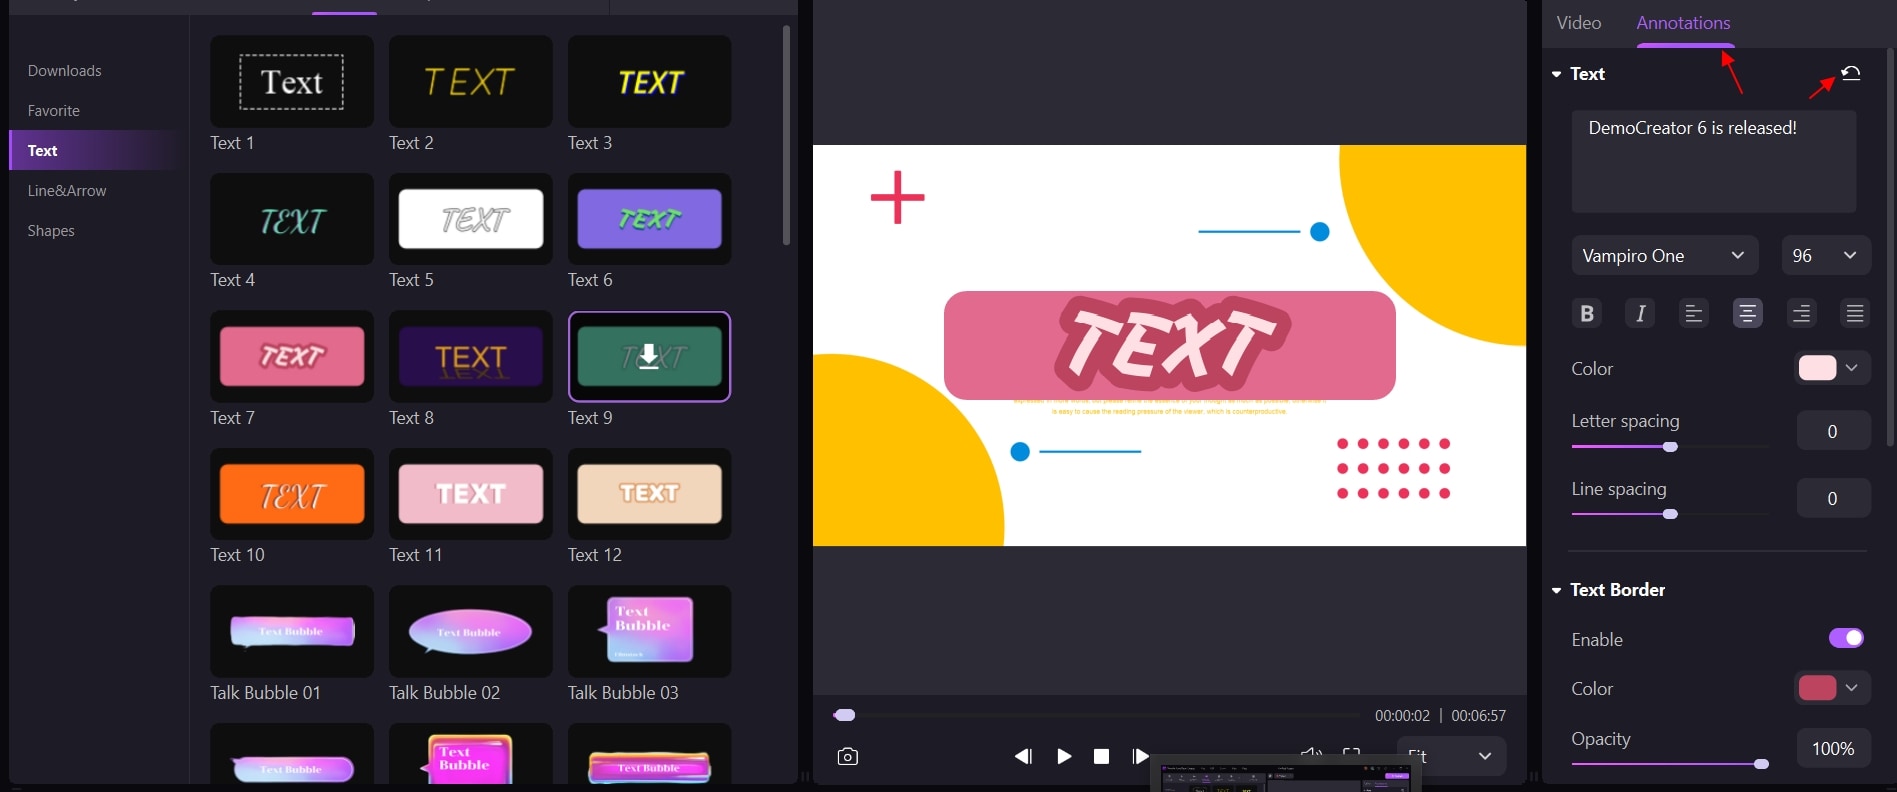
Annotations
Step 1: Click Annotations in the Toolbar and select the type to insert (text, line & arrow, shapes, and others).
Step 2: Drag the annotations to the timeline.
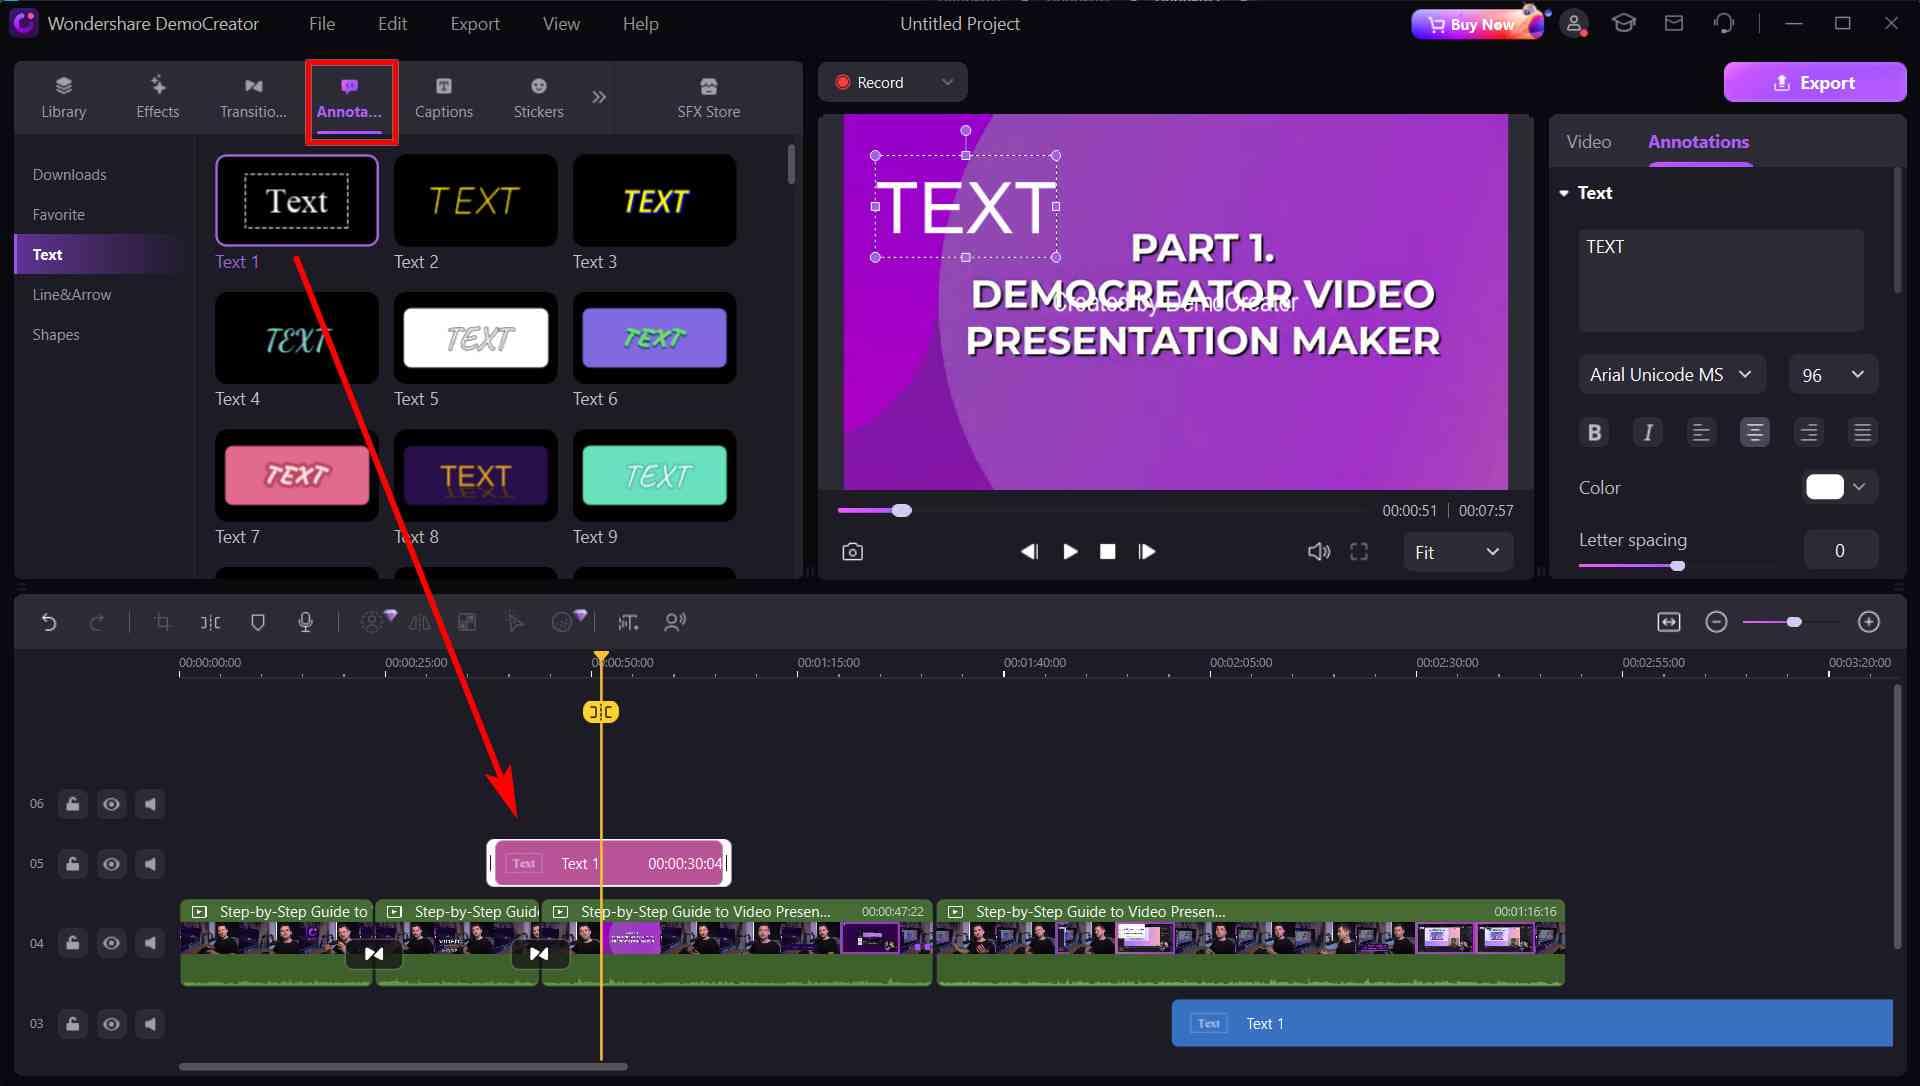
Step 3: Customize annotations, adjusting their shadows, spacing, opacity, and other characteristics.
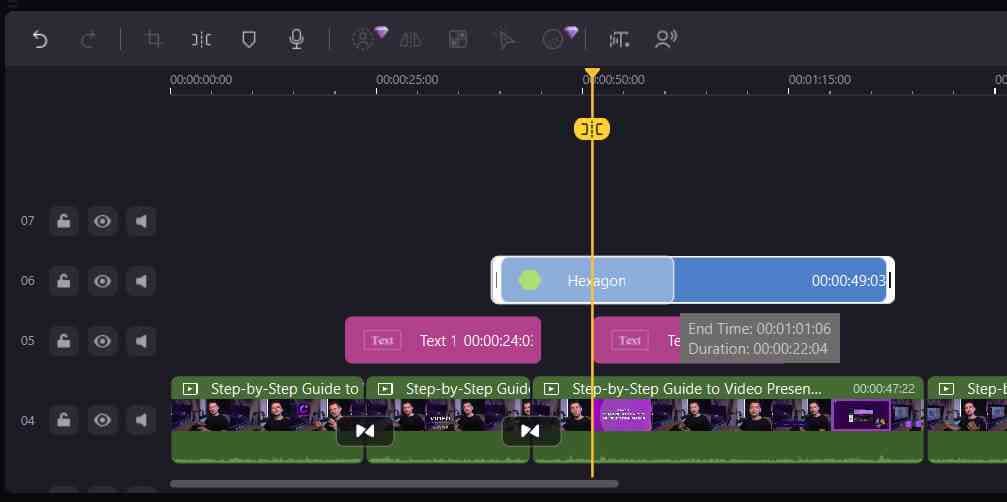
Step 4: Adjust the duration of your annotation by dragging its right or left edge.
Upload the Video to Your Platform

Now that you’ve mastered the art of recording and editing a blog video, you can export and upload it to the desired platform. Select a platform according to your vlogging preferences, target audience, and style to get the most views and engagement. You can also upload your videos to multiple platforms to maximize your reach and watch your channel grow.
The steps for uploading your videos will depend on the selected platform, so read guides or watch tutorials to learn how to upload your first blog video.
Tips for Creating Video Blogs
Creating video blogs can be challenging, especially if you’re new to the industry. Here are some tips to make the recording process more efficient and reach the target audience faster:
- Define your target audience – Before creating your video, determine the target audience and create content accordingly. Think about the story you want to tell and who you want to share it with to choose a suitable vlogging platform and gain recognition in the industry.
- Create unique content – Since the market is teeming with vloggers, make content that will stand out from the crowd and provide people with something different, something they have never seen before. That will give you the best chances for success.
- Use keywords – Optimizing your videos is crucial for reaching the target audience, so always explore high-ranking keywords and learn which to use to make it to the first pages of the desired streaming platform.
- Record in a quiet environment – Always deliver high-quality audio results to get your message across. If you can’t record in a noise-free environment, consider audio denoisers to clean the audio.
- Think ahead – Planning is critical for a successful vlogging journey. Prepare your scripts, think about where you’ll record your videos, and consider the additional elements you want to include in your videos to make the process time-efficient and productive.
By following these tips, you’ll become a video blog professional in no time and climb the competitive ladder.
Conclusion
The world of content creation and blog videos can be overwhelming, but it’s one of the most rewarding paths you can take. A vlogging career is ideal if you want to share your day-to-day life or teach people something new. If you plan to follow this path, this detailed guide is your excellent starting point because it explains all the elements you need to begin and make your way to the top.
One of the most helpful companions you can meet on this journey is Wondershare DemoCreator. This all-in-one tool allows you to record and edit your vlogs effortlessly, saving time and effort. It’s a beginner-friendly platform to help you reach your goals and succeed in the vlogging jungle.


