
Let's be honest—static slides can lose your audience's attention fast. The secret to an engaging presentation? Custom audio that matches your message and brand. While you could use generic background music, nothing beats the impact of personalized voiceovers and sound effects recorded specifically for your slides.
In this article
Part 1: Prepare your audio files
Why Record Your Own Audio?
-
Holds attention – A human voice feels more natural than text-heavy slides
-
Adds personality – Your tone and pacing make content more memorable
-
Perfect timing – Match audio exactly to slide transitions for seamless flow
Create Studio-Quality Audio with DemoCreator
Skip the hassle of piecing together mismatched tracks. With Wondershare DemoCreator, you get:
🎙️ One-Click Recording
-
Capture crystal-clear voiceovers directly through your mic
-
Remove background noise automatically for professional clarity
✂️ Smart Audio Editing
-
Visually edit waveforms like text (cut/trim mistakes instantly)
-
Add fade-ins/outs for smooth transitions between slides
🎚️ Precision Controls
-
Adjust volume levels per slide (e.g., softer for Q&A slides)
-
Layer sound effects (applause, notifications) for emphasis
"Presentations with custom audio see 40% longer audience retention" – HubSpot Research
Part 2: Insert audio into your Google Slides
Since Google Slides doesn’t support direct audio uploads, you’ll need to store your music file in Google Drive before inserting it into your presentation. This ensures that the audio is accessible from any device and plays smoothly within your slides. Follow these simple steps to upload and prepare your soundtrack for Google Slides.
Step 1Upload Your Audio File
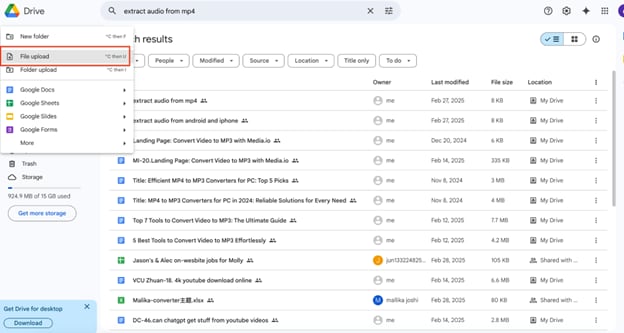
To begin, open Google Drive and click the + New button on the left-hand side. proceeding to the next step.

From the menu, select File Upload and choose your MP3, WAV, or AAC audio file from your computer. Once selected, the upload process will start automatically. Wait for the file to fully upload before
Step 2Adjust File Sharing Settings
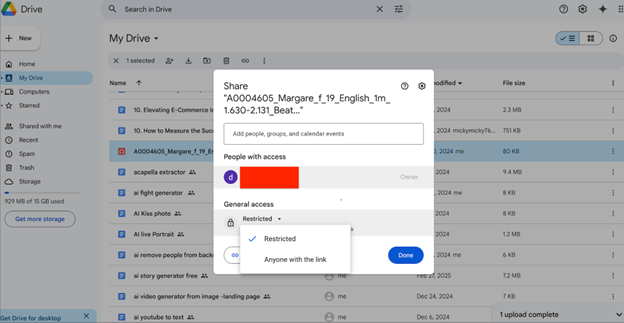
Once your music file is uploaded, right-click the file and select Get Link to open sharing settings. To ensure your music plays in Google Slides without restrictions, change the visibility settings to "Anyone with the link can view." This allows your audience to access the audio when the presentation is played. Finally, copy the shareable link, which will be needed when inserting the music into Google Slides.
Now, your audio file is successfully stored and ready to be added as background music in Google Slides!
Part 3: Enhance Your Presentation: Adding Music to Google Slides
Step 1Open Your Google Slides Presentation
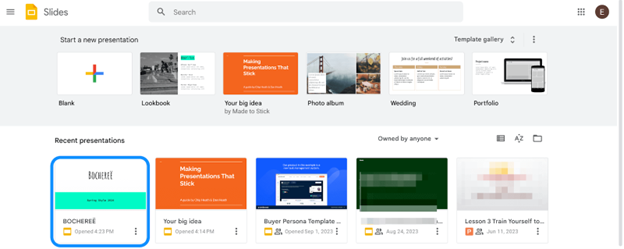
Start by opening Google Slides and selecting an existing presentation or creating a new one (+ New). Navigate to the specific slide where you want to insert audio. Ensure your audio file is uploaded to Google Drive, as Google Slides doesn’t support direct audio uploads.
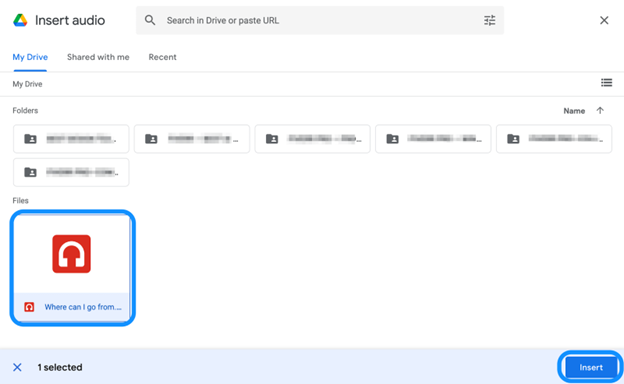
Step 2Insert the Audio File
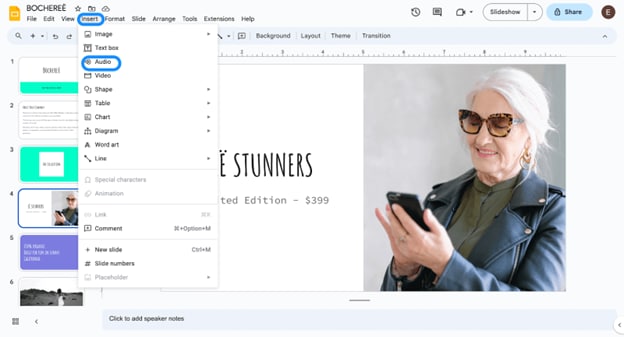
Click on Insert > Audio from the top menu bar. A pop-up window will appear, displaying the audio files available in your Google Drive. Locate and select the audio file you uploaded earlier, then click Insert. A speaker icon will now appear on your selected slide, indicating that the audio has been successfully added.
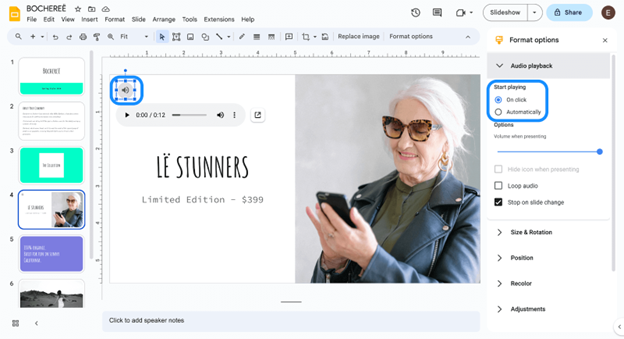
Step 3Adjust Audio Settings
Once the audio is inserted, a formatting menu will appear on the right-hand side. Here, you can modify playback settings such as "Play on Click" or "Play Automatically." You can also increase or decrease the volume level, enable looping, or change the speaker icon's appearance to match your slide design.
Step 4Position and Preview the Audio
Click on the speaker icon to play the audio and ensure it works properly. If necessary, drag the icon to any part of the slide where it fits best. Finally, preview your Google Slides presentation in full-screen mode to check how the audio integrates with your slides before finalizing your edits.
Part 4: Crafting Your Audio with Precision: Using Wondershare DemoCreator
Adding background music to Google Slides is a great way to enhance your presentation, but sometimes, simply inserting a track isn’t enough. If you want to fine-tune audio quality, trim sections, adjust volume, or mix multiple soundtracks, a dedicated audio editing tool like Wondershare DemoCreator can help. This software allows you to customize your audio with precision, ensuring it complements your slides perfectly. With advanced editing features, you can create a seamless and professional listening experience for your audience.
Key Features of Wondershare DemoCreator for Audio Editing
- Precise Audio Trimming & Cutting – Remove unwanted sections and keep only the most relevant parts of your music.
- Fade-In & Fade-Out Effects – Smoothly transition between slides without abrupt audio cuts.
- Volume Control & Noise Reduction – Adjust sound levels and reduce background noise for clear, professional-quality audio.
- Multi-Track Audio Mixing – Combine voiceovers, background music, and sound effects in one seamless track.
- Export in Multiple Formats – Save audio in MP3, WAV, or AAC for easy integration into Google Slides.
Step-by-Step Guide to Editing and Customizing Audio with Wondershare DemoCreator
Step 1Import Your Audio File
Open Wondershare DemoCreator and click on Import Media to upload your chosen audio file. You can select music, voiceovers, or sound effects in MP3, WAV, or AAC formats for precise editing.
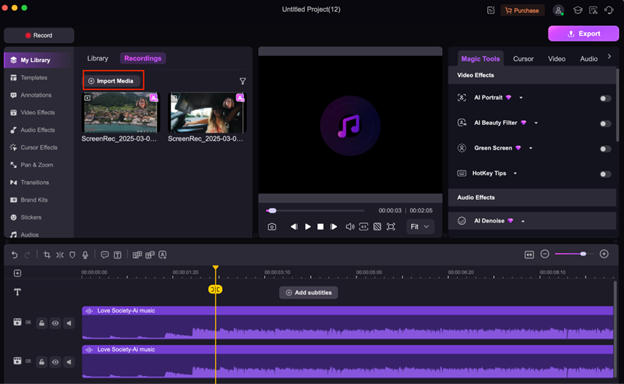
Step 2Trim and Cut Unwanted Sections
Once your file is imported, drag it onto the timeline editor. If your music is too long or contains unnecessary parts, use the trim and cut tool to remove unwanted sections, ensuring a clean and smooth transition.
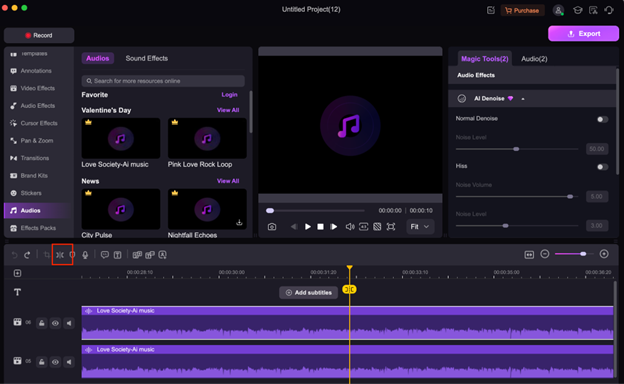
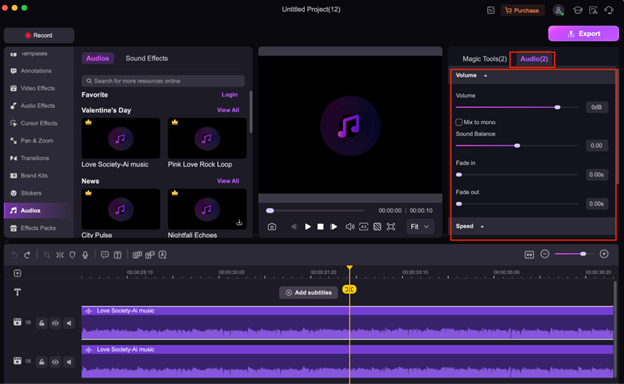
Step 3Adjust Audio Levels and Apply Effects
Balance the background music by adjusting the volume so it doesn’t overpower your narration or key presentation points. You can also apply fade-in and fade-out effects for seamless audio transitions between slides. If your presentation requires layered sound effects or multiple audio tracks, Wondershare DemoCreator lets you combine different tracks, sync them perfectly, and add background ambiance to enhance the overall experience.
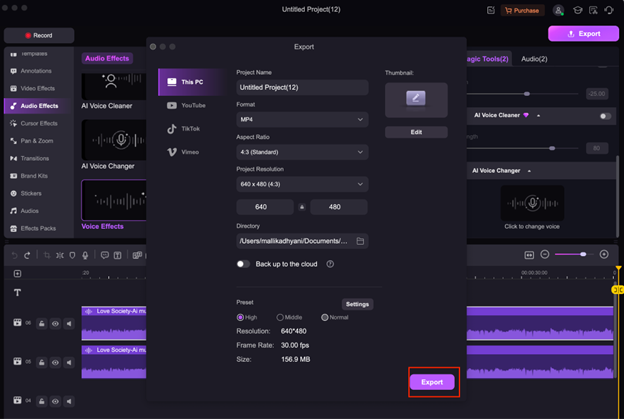
Step 4Export and Upload to Google Drive
Once you’ve customized the audio, export the final version in a compatible format (MP3, WAV, AAC). Upload the edited file to Google Drive, then insert it into your Google Slides presentation as background music.
Conclusion
Adding music to Google Slides is more than just a technical step—it’s a way to enhance engagement, evoke emotions, and create a memorable presentation. The right audio choice can set the tone, maintain audience attention, and improve storytelling, making your slides more impactful. Whether you’re working on a business pitch, educational lesson, or creative project, carefully selecting and customizing your background music can elevate the experience.
For those looking for more advanced audio customization, Wondershare DemoCreator offers an easy-to-use platform to edit, trim, and fine-tune music before adding it to your presentation. With features like multi-track audio mixing, volume control, and seamless fade effects, DemoCreator helps you perfectly integrate music into your slides for a polished, professional result.
FAQs
-
1. Can I add different music to different slides in Google Slides?
Yes, you can add different audio files to individual slides by inserting separate tracks for each slide. Just follow the same process of inserting audio from Google Drive and adjust playback settings accordingly. -
2. How do I make music play across all slides in Google Slides?
To ensure continuous playback, select the audio file, go to Format Options > Audio Playback, and choose “Play across slides”. This will keep the background music running throughout the presentation. -
3. Can I edit the audio directly in Google Slides?
No, Google Slides does not offer built-in audio editing tools. If you need to trim, adjust volume, or add effects, you can use Wondershare DemoCreator before uploading your audio to Google Drive. -
4. Will my audio play when I share my Google Slides presentation?
Yes, but make sure the audio file’s Google Drive sharing settings are set to “Anyone with the link can view.” Otherwise, viewers may not be able to access or hear the music. -
5. Can I use music from Spotify or YouTube in my Google Slides presentation?
No, Spotify and YouTube music are copyright-protected and cannot be directly inserted into Google Slides. Instead, use royalty-free music sources or edit your own audio tracks with Wondershare DemoCreator for a legally safe presentation.


