Did you know you could record audio from YouTube in Audacity? Besides external audio, this audio recording and editing software can help you make internal audio recordings in just a few steps.
We'll show you how to record audio from YouTube in Audacity on Mac and Windows devices below. We'll also introduce a worthy alternative, so keep reading.
In this article
How To Record Audio From YouTube Using Audacity on Windows
Audacity for Windows may seem overwhelming when you enable all the toolbars, but recording desktop audio with audacity is a walk in the park.
Here's how to record YouTube audio with Audacity on Windows:
- Download Audacity for Windows and install it on your PC.
- Launch the software and click View > Toolbars > Device Toolbar to enable the feature.

- Click Audio Setup > Host > Windows WASAPI. The Windows Audio Session API will send audio to your PC's output device (speakers).

- Click Audio Setup > Recording Device and choose your default speakers.

- Set the recording channel to 2 (Stereo).

- We recommend a split-screen mode for this step. Launch YouTube to find the desired video before recording. Then, hit the red Record button to record YouTube audio in Audacity and immediately play the YouTube video. Don't worry; you can trim the audio later to remove unwanted sections (e.g., the start and end).

- Click the Stop button whenever you wish to finish recording.

- Go to File > Export to save the recording to your PC. You can export the recorded audio from YouTube to MP3 with Audacity, but the WAV format provides better quality. You also have the OGG option, but it's inferior to WAV.

Further reading:
How To Record Audio From YouTube Using Audacity on a Mac
Audacity for Mac devices looks and works like its Windows counterpart. However, it requires a kernel extension to channel audio between apps and record internal sound. Most Mac users swear by Soundflower, so we'll use it in this step-by-step guide.
Here's how to record audio from YouTube on a Mac using Audacity:
- Download Soundflower for macOS, run the installer, and provide your admin password.
- If your Mac runs on macOS High Sierra, Mojave, or Catalina, you'll get a security alert telling you your Mac doesn't allow software from unidentified developers. Go to the Apple menu > System Preferences > Security & Privacy > General and click Allow.

- Return to the System Preferences, click Sound in the left sidebar, switch to the Output tab, and select Soundflower (2ch).

- Download and install Audacity for macOS.
- Launch the software and set Core Audio as the audio host, Soundflower (2ch) as the audio input and output, and 2 (Stereo) as the recording channel.

- Hit the Record button and immediately play the desired YouTube video. We recommend using the split-screen mode. Once you wish to finish recording, click the Stop button.

- Go to File > Export and choose the desired format to save the recording. We recommend saving it as MP3, since MP3 is the most compatible audio format.

Is Recording YouTube Audio With Audacity a Good Idea?
Audacity is excellent for recording and editing audio files. It's free, open-source software for Windows, macOS, Linux, and other Unix-based operating systems, making it ideal for everyone.
Its prominent editing tools include trimming, merging, splitting, click removal, noise reduction, and amplitude adjustments. That makes it perfect for professionals. However, it doesn't remove all clicks and popping sounds, and its noise reduction often damages the audio.
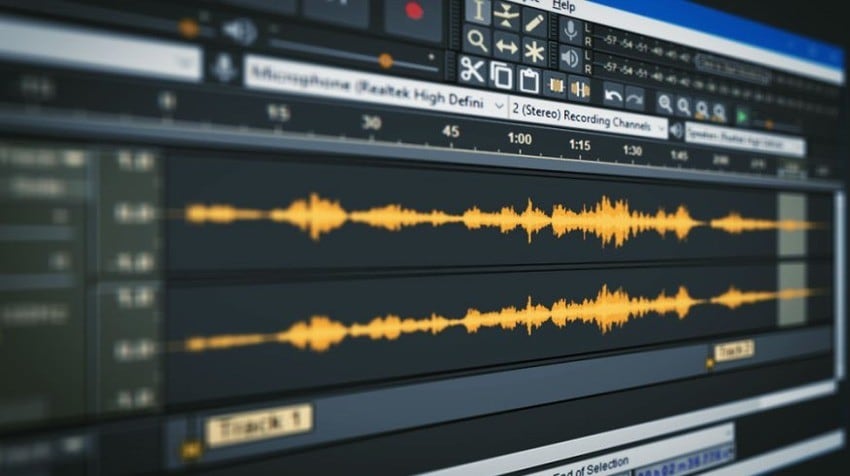
Additionally, newbies may find the user interface overwhelming. All the toolbars for setting up everything can be challenging to master.
Using Audacity to record YouTube audio is more straightforward on Windows than on Mac devices. After all, Windows users don't need to install an extension to record internal audio.
Moreover, some users experience issues with output devices, encountering errors that block recording. Another possible drawback is the software supports only three output formats: MP3, WAV, and OGG.
If you're a professional familiar with tools like Audacity, you'll find the software user-friendly. Otherwise, you may want to consider an alternative. Here's an excellent substitute for recording from YouTube with Audacity.
A More Sophisticated Alternative to Audacity: Wondershare DemoCreator
Wondershare DemoCreator is an advanced audio and video recorder and editor. It lets you record high-quality audio and videos, polish them with multiple tools, and share them seamlessly, even directly on social media.
However, it isn't available for Linux and other Unix-based operating systems. If you're a Windows or Mac user, here are the top reasons to choose Wondershare DemoCreator as an Audacity alternative.
Why Choose Wondershare DemoCreator as an Alternative to Audacity
Here's why Wondershare DemoCreator is a fantastic alternative to Audacity:
- User-friendly interface - The software doesn't make you jump through hoops to record and edit audio files.
- Many recording modes - The audio recorder lets you record internal and external audio, delivering high-quality results. You can also record your screen and enjoy 4K and 8K resolution.
- AI-powered tools - DemoCreator can denoise your audio and video files within seconds. Its AI speech enhancement feature can also improve voice quality.
- Multi-format support - The software supports MP4, MP3, M4A, MOV, MKV, AVI, WebM, WMV, MTS, FLV, AU, VOB, OGG, and GIF formats.
These features only scratch the surface, so download the software to see it in action.
How To Use DemoCreator to Record YouTube Audio
Using Wondershare DemoCreator to record YouTube audio is a breeze. Here's what to do:
- Download and install DemoCreator for Windows or macOS.
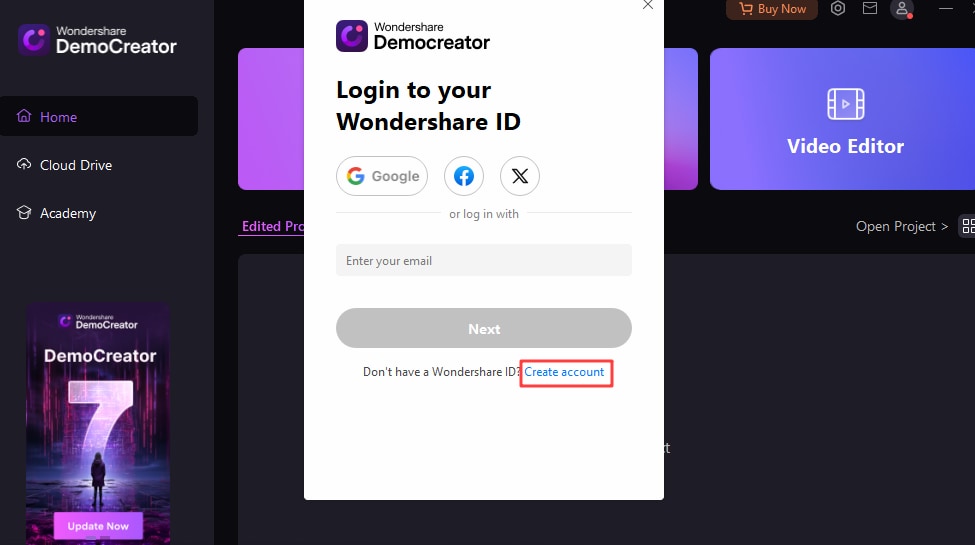
- Launch the program, click the Profile icon in the top right corner, and log in with your Wondershare ID. You can also create an account with Gmail.
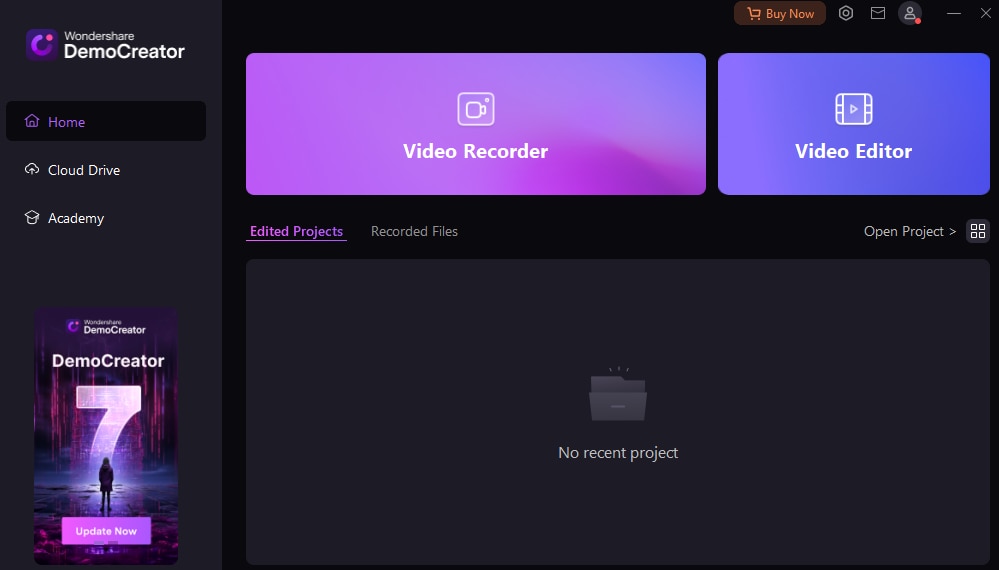
- Open the Video Recorder from the startup panel.
- Open the drop-down list under Capture Area and click “Don't record screen.”
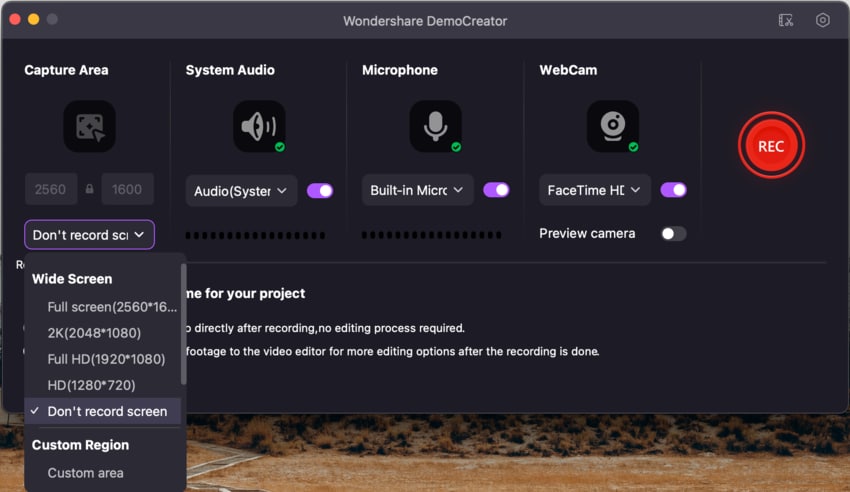
- Toggle the switch under Microphone to turn it off and select your default system audio. Then, choose a recording scheme: export the audio without editing or add it to the video editor after recording. Once you set everything, play your YouTube video and hit the red Rec button.
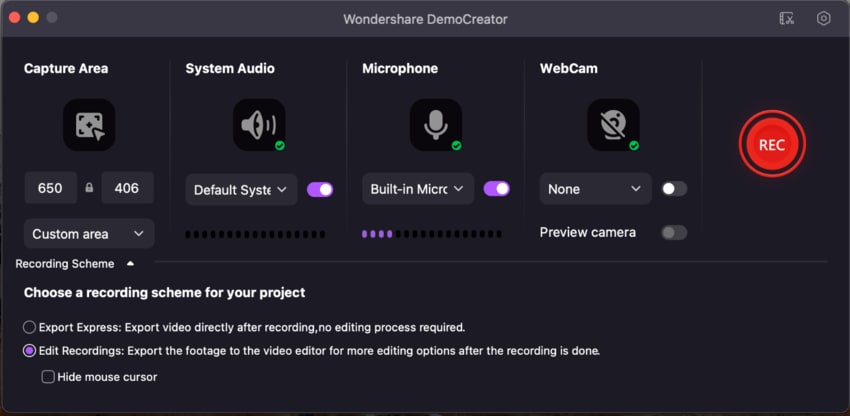
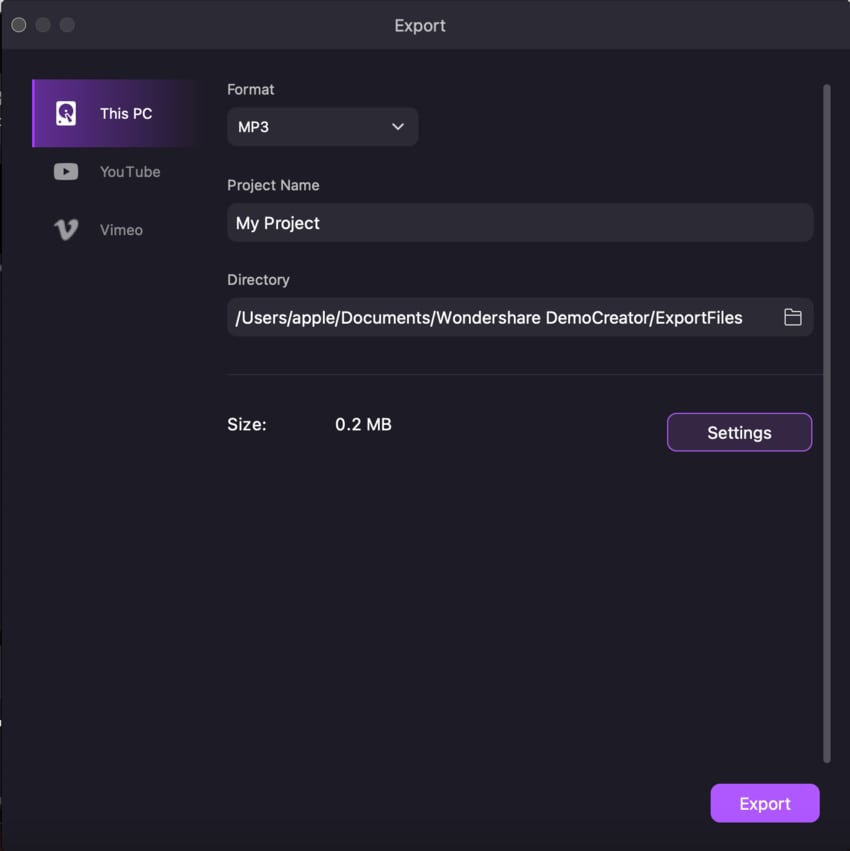
- When you wish to stop recording, click the Pause button and save the audio file to your computer. If you've chosen the Edit Recordings scheme, the video editor will launch, where you can denoise the audio and make additional adjustments. Once you do, click Export, choose the output format, and download the file to your device.
Conclusion
Recording YouTube audio with Audacity on Mac and Windows devices is excellent for seasoned users; newbies may need time to adjust to the interface. Issues with audio output devices, limited format support, poor-quality noise reduction, and the need to install an extension on Mac computers also don't go in its favor.
Wondershare DemoCreator is a more sophisticated alternative. Besides delivering high-quality audio, it can remove background noise while maintaining quality. It also supports 14 output formats and has many AI-powered tools. It may not be free, but the features are worth every dime.
FAQs
-
Can I record sound from YouTube with Audacity?
You can use Audacity to record YouTube audio. You only need to set the audio host, the recording device (your default speakers), and a stereo recording channel. They differ on Windows and macOS, so check the applicable steps above. -
Can you record audio directly to Audacity?
You can record audio directly to Audacity by choosing your microphone as the recording device and switching to a mono channel. -
Which settings should I use to record YouTube audio in Audacity?
Audacity settings to record from YouTube depend on the operating system. Windows users should choose Windows WASAPI as the audio host, use default speakers as the recording device, and set the recording channel to 2 (Stereo). Mac users should select Core Audio as the host, Soundflower (2ch) as the audio input and output, and 2 (Stereo) as the recording channel. However, they must first download the Soundflower extension. -
Can I convert YouTube videos to MP3 in Audacity?
Audacity supports MP3, WAV, and OGG output formats, meaning you can convert YouTube videos to supported audio after recording internal sound. -
Can Audacity record YouTube audio without downloading videos?
You don’t need to download YouTube videos to convert them to audio files. Audacity lets you record and save audio as MP3, WAV, or OGG. -
How do I record internal audio in Audacity on a Mac?
Recording internal audio in Audacity on a Mac requires downloading an extension like Soundflower. Once you install it, set Soundflower (2ch) (or another software you've installed) as the output device under System Preferences > Sound.Then, run Audacity, select Soundflower (2ch) as the recording and playback device, set the audio host to Core Audio, and choose a 2 (Stereo) channel. Finally, play the desired video or audio track, record it in Audacity, and save it to your device.


