

Adobe Premiere Pro is powerful software that will help you make incredible videos and edit them professionally. With the array of effects Premiere Pro offers, you can easily create videos that will help increase viewership to your channel. Fading out is one such effect that Premiere Pro offers to make the transitions look smooth and seamless. This article is all about how to fade audio in Premier Pro efficiently.
In this article
Part 1: Ways to Fade Out Audio in Premiere Pro
The following simple steps will help you with audio fade-out in Premiere Pro.
Step 1: Import clip
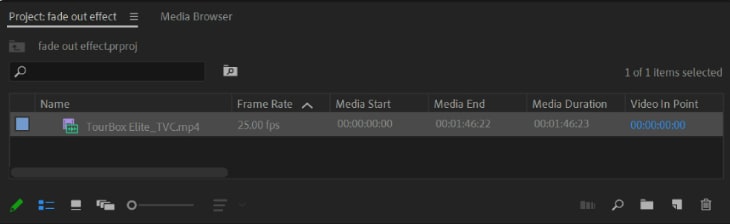
First, launch Adobe Premiere Pro on your PC. Then, create a new project by clicking File > New > Project. Rename your project, select your location to save it, and click OK. Now import the clip. To do so, click on File > Import > Select the location of your clip and click on Open. The video file will now appear under the Project Panel, as shown in the picture below.
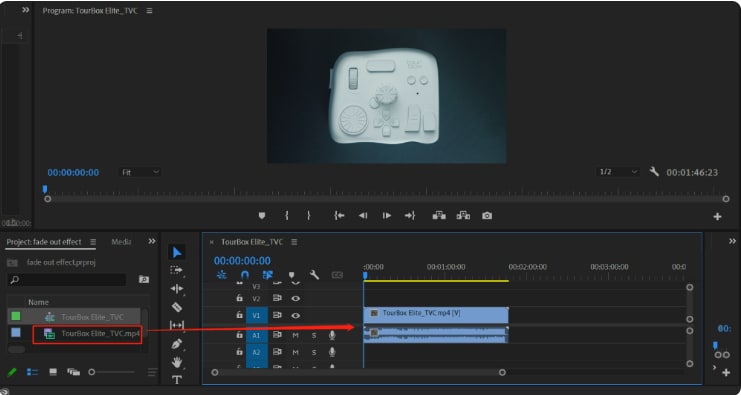
Step 2: Add an audio clip to the timeline
Drag the imported video file and drop it at the timeline.
Step 3: Fade out audio
Here are two ways that you can fade out audio in Premier Pro.
Method 1: Volume Keyframe
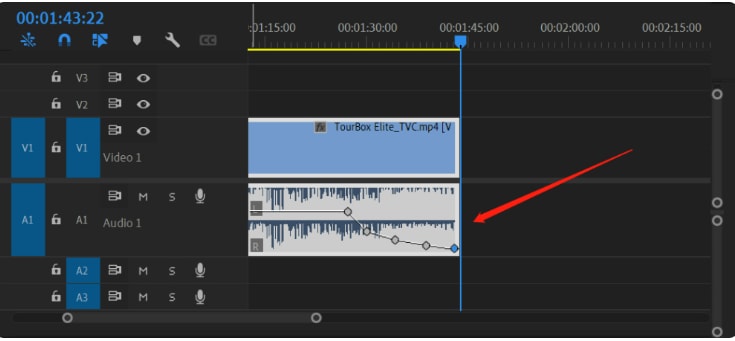
Volume Keyframes are the points where you can specify at what time on the clip you need to change the volume and at what volume level. To fade out audio in Premier Pro, we need to use two keyframes. The first will specify where the fade-out effect should start, and the second will determine where it will stop.
- To begin the Fade effect – On the effects panel, click on the right arrow triangle next to volume to increase the volume. Now position the play head on the timeline at the point where you want the fade-out effect to start.

- Now, move the play head to where you want the fade-out to end. Here, lower the volume level to your preferred level. Ideally, it should be—as shown in the picture below.

- When you Zoom in on the timeline, you can see two different keyframes. The first one shows the beginning of the fade-out, and the second one shows the end. You can adjust by dragging the second keyframe near or away from the timeline. Also, you can change the fading volume by moving the timeline up or down.

You can also add multiple keyframes in between using the same method as stated above to adjust the fade-out curve.
Method 2: Exponential fade
Fading out audio in Premier Pro by adjusting the volume keyframe may seem a little complicated for unprofessional users. However, you can also use the exponential fade feature to fade out audio in Premier Pro. This is a simpler and more commonly used method to create effects on videos.
- Go to the Effects panel on the right side of the screen and click on Exponential Fade. You will find it under the Audio Transitions > Crossfade > Exponential Fade.
 Note: If you are unable to see the Effects panel, you may need to enable it by going to Windows > Effects > Enable.
- The Exponential Fade can only be added at the beginning (fade-in) and end (fade-out) of the audio. So, if you are editing a long video and want to add fading effects at multiple places, crop the video into smaller sections using the Razor Tool and then apply Exponential Fade.

Part 2: Pro Tips to Fade Audio/Music Out in Premiere Pro
Here are some of the pro tips for Premiere Pro fade-out audio to work seamlessly.
- Use the Keyframes wisely – Adding too many keyframes may make the fade-out look choppy and unnatural.
- Try different fading options—Try the various fade options and understand the difference they make on the music tracks. This will help you decide which fade-out option to use and when.
- Listen and Adjust—Always listen to the fade-out in the context of the entire video to understand the effect. Many times, the fade-out might look appropriate while it's standalone but will look awkward when heard in the context of the complete video.
Part 3: An Easier Way to Fade Out Audio Than Premiere Pro
Adobe Premier Pro is advanced software that is very effective in editing and adding effects to video. However, the interface is a little complicated and may be difficult for novice users to understand. Many users may look for an alternative that is easier to use. Here we recommend Wondershare DemoCreator.
Key Features:
- Fade audio simply by customizing the fade-in and fade-out time in seconds.
- Trim and split unnecessary parts of the audio
- Powerful AI features to improve efficiency such as auto subtitles, AI speech enhancers, and removing background noise, or separating vocals and instrumentals from songs.
- High-quality editing using thousands of templates, annotation tools, animations, cursor effects, stickers, and more.
- Record your new voice directly.
- Cloud storage with free space.
- Share your work directly on social media sites.
How to Fade Out Audio Using DemoCreator?
Step 1: Download Wondershare DemoCreator from its website.
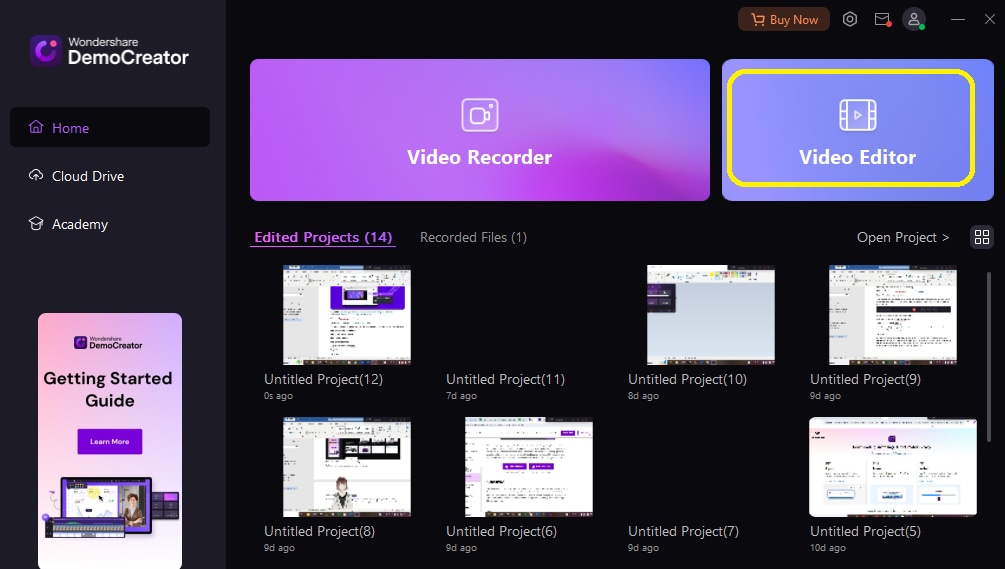
Step 2: Open it and click Video Editor.
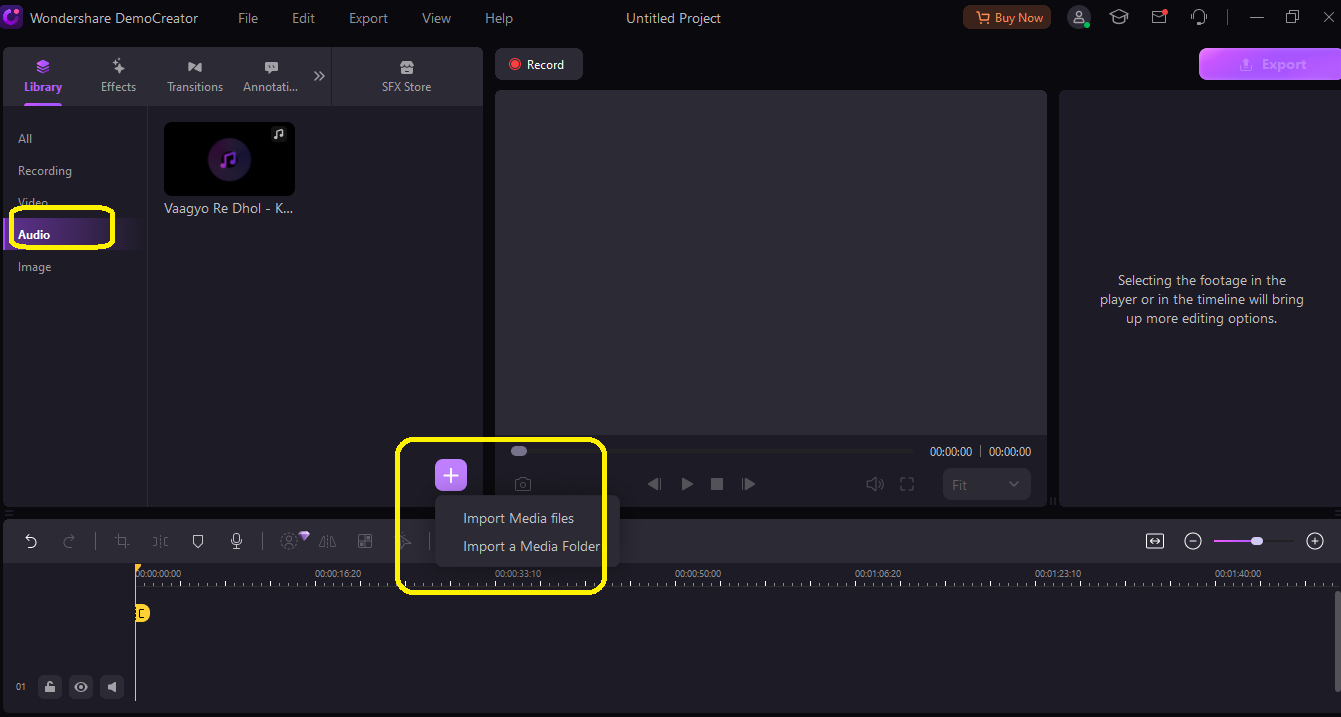
Step 3: Import the file you wish to edit and add the fading effect.
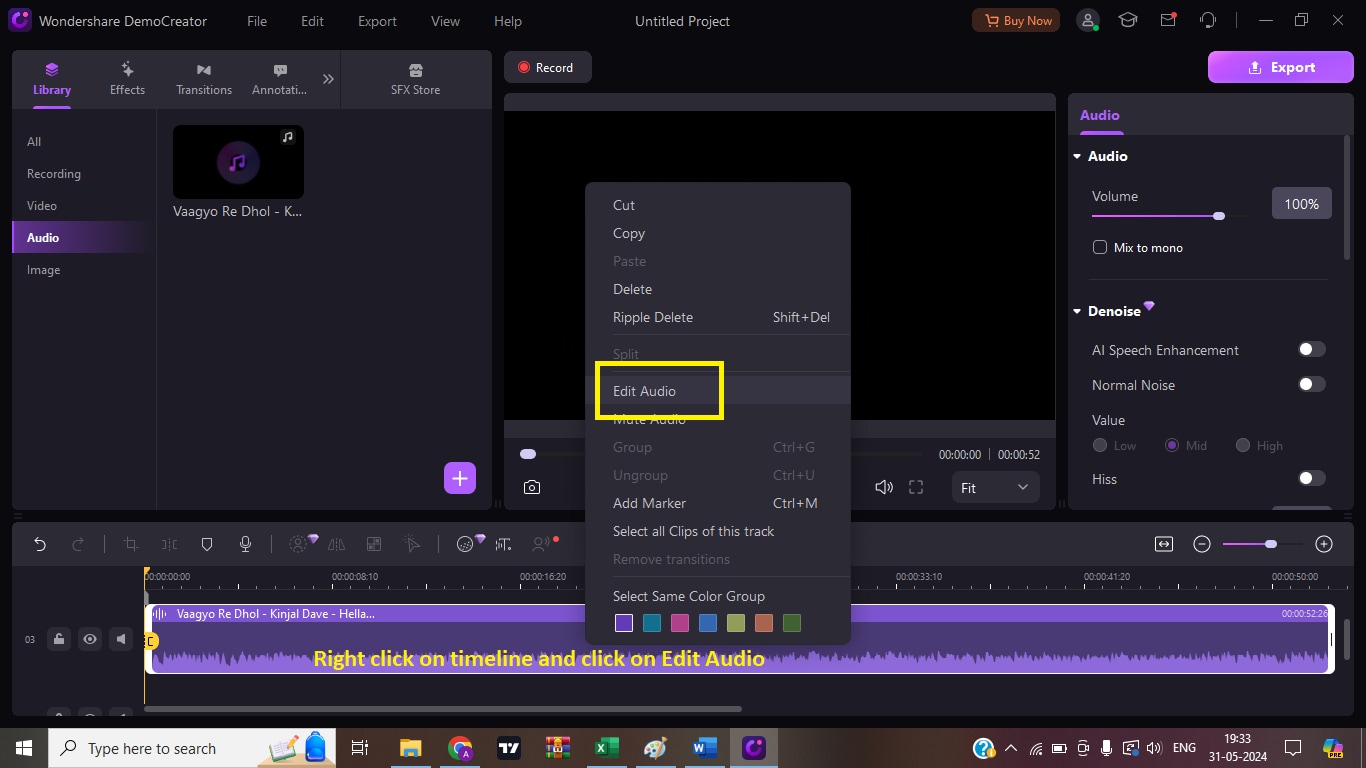
Step 4: Drag the file to the timeline. Right-click on the timeline and click on edit audio. You will now see two green dots at each end of the timeline. These are the fading handles.
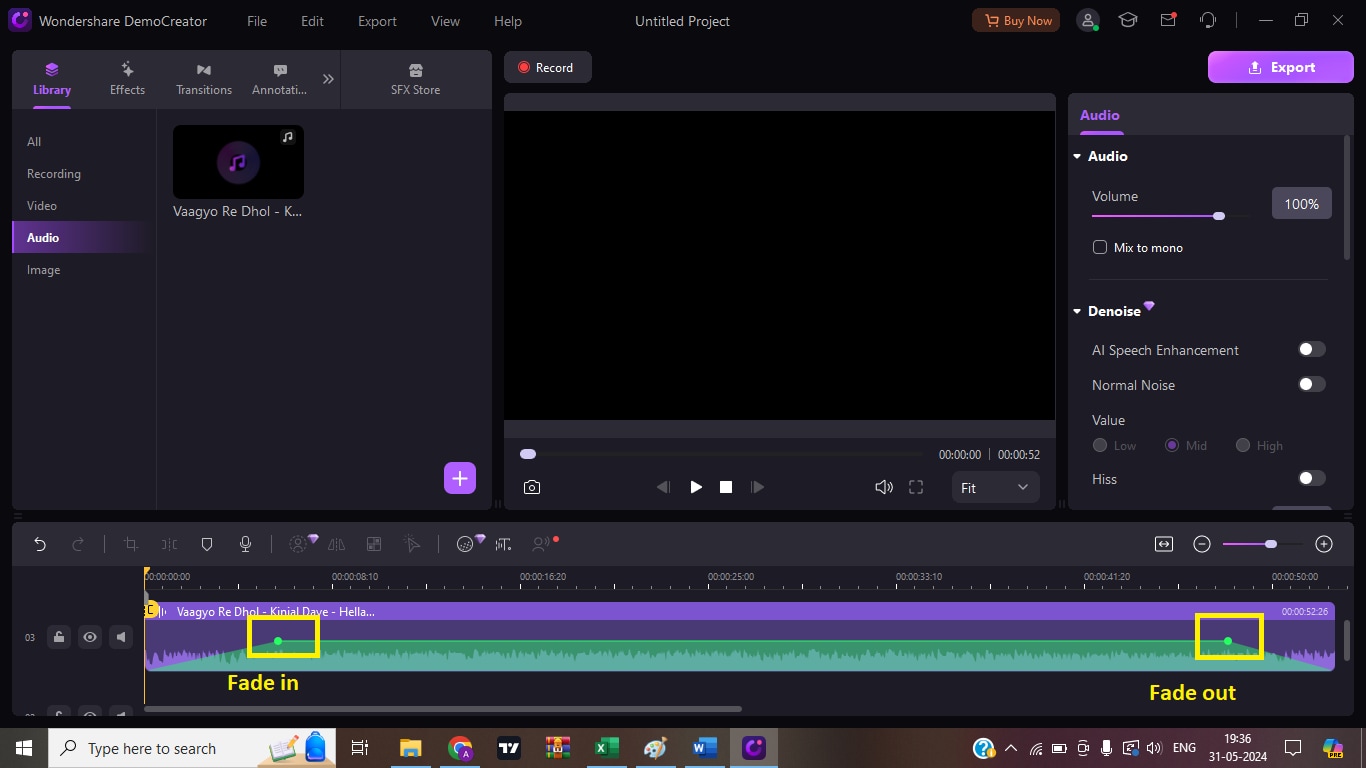
Step 5: Drag the green dots to the level you wish to fade in or out of the audio. The green dot at the beginning of the timeline is for fade-in, and the green dot at the end of the timeline is for fade-out. Once you fade in and fade out the audio, the timeline will look something like the picture below.
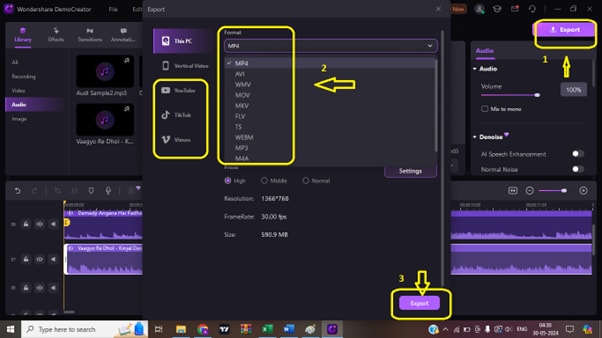
Step 6. Once you are satisfied with the editing, click on Export. You can also directly upload the file to your social media handle from here.
Conclusion
Premiere Pro is a professional video and audio editing tool, which may not be user-friendly for newbies, if it is becoming difficult for you to understand and use, I recommend trying a super easy way to fade audio - Wondershare DemoCreator. Download it now and fade the audio in seconds!
FAQ
-
Q1: How to fade out audio in Premiere Pro?
A1: There are two ways to fade out audio in Premiere Pro: The Volume Keyframe method and the Exponential Fade method. The detailed steps of both methods are explained in the guide above. -
Q2: How do you change the volume of audio in Premier Pro?
A2: One way to edit the volume of Audio in Premier Pro is to long-hold on the timeline where you want to lower or increase the audio, then drag it up to increase the volume and pull it down to lower the volume.


