
Subtitles have proven to be a significant factor in better video comprehension and increased audience reach. Adding captions for videos can make your content more accessible and inclusive, especially for viewers who rely on subtitles for understanding. Thus, we suggest you add auto captions or create custom captions for videos to all your videos before posting them. These captions not only improve comprehension but also help increase engagement across different platforms.
We'll show you how to add subtitles to videos on a Mac. Whether you’re using tools to generate subtitles from video automatically or prefer manual methods, there are efficient solutions available for Mac users.
We'll cover five methods with step-by-step instructions to help you quickly add subtitles to MP4 on a Mac. From using automatic captions to tools that allow you to fine-tune your subtitles, we’ll provide insights into the most effective techniques. Moreover, we'll explain what option is the best and why. With our detailed guide, you'll effortlessly add captions for videos on a Mac, ensuring you'll effortlessly add captions to videos on a Mac.
Table of Content
Different Methods to Add Subtitles to a Video on Mac
We've prepared five methods for adding captions to your videos on a Mac. Mac users can use several programs and tools to add subtitles to their videos and boost their SEO. Follow our guides to add subtitles to your Mac videos easily.
Method 1. Add Subtitles/Captions to Video on Mac Using an Auto Subtitle Generator
Our top choice for adding video subtitles on a Mac is a dedicated subtitle generator, Wondershare DemoCreator. It's one of the best subtitle creator for Mac users. It lets you quickly add subtitles and create high-quality videos you can instantly share on social media.
- Add captions to video manually or generate subtitles automatically in 90+ languages.
- Customize every aspect of the captions and subtitles, including the font, color, position, styling, and effects.
- Access over 12,000 trendy caption templates, allowing your imagination to run wild when customizing your captions.

Wondershare DemoCreator stands out from the competition due to its incredible Auto Caption feature. With this subtitle editor software, you can generate subtitles automatically in just a few steps. Moreover, you can edit and customize the subtitles using subtitle templates and editing tools. Its AI algorithms allow Wondershare DemoCreator to add or generate the most accurate subtitles for your videos on Mac.
With its AI-powered video and audio editing tools, Wondershare DemoCreator offers advanced features like auto-generated subtitles, AI dubbing, voice changer, various video effects, stickers, annotations, transitions, virtual avatar presentation, green-screen effects, and others. Moreover, the download is free, and you can access premium features at minimal prices.
Follow these steps to add subtitles to your videos on a Mac using Wondershare DemoCreator:
- Download and install Wondershare DemoCreator on your Mac computer.
- Go to Video Editor and select Import to add your video file. Drag the file to timeline.
- Navigate to the Captions tab at the top of the screen. Click on Local Caption in the left sidebar and upload your local subtitle file. Alternatively, you can select a caption template to manually add captions to your video.

- Double-click the uploaded subtitle file to add it to the timeline.
- Edit, customize, and adjust the subtitle if necessary.

- When done, click Export to save your final result or directly share it on social media.
On the other hand, Wondershare DemoCreator offers an easier way to add subtitles to your videos. You can use the Auto-Caption feature if you don't have a subtitle file or want to speed up the process. Auto-Caption uses advanced AI technologies to transform speech to text for your videos on Mac automatically.
Therefore, if you want a hassle-free process of adding subtitles to your videos on Mac using Wondershare DemoCreator, follow these steps:
- Download and launch Wondershare DemoCreator on your Mac. Select Video Editor from the main menu.
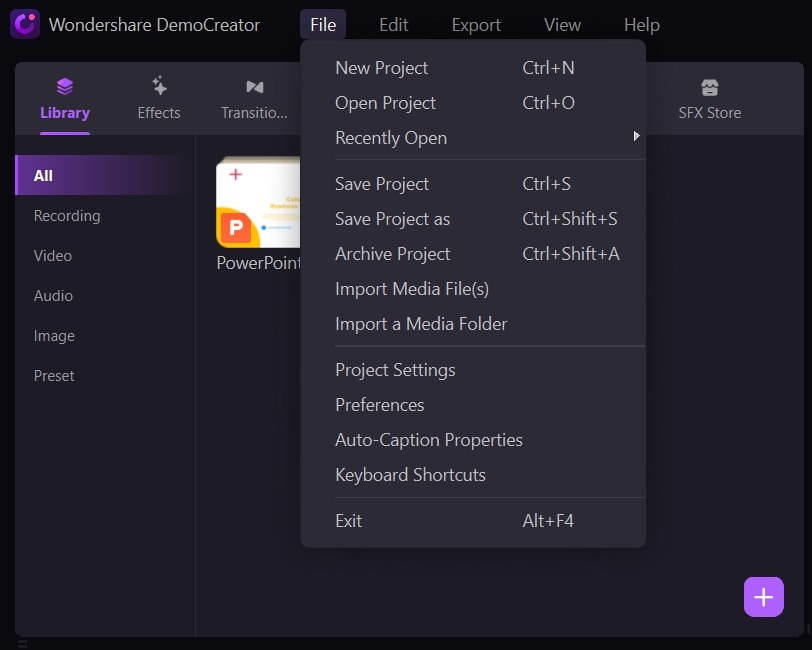
- Upload your video to the Library by clicking File > Import Media File(s).

- Click the video file and drag it to the timeline.
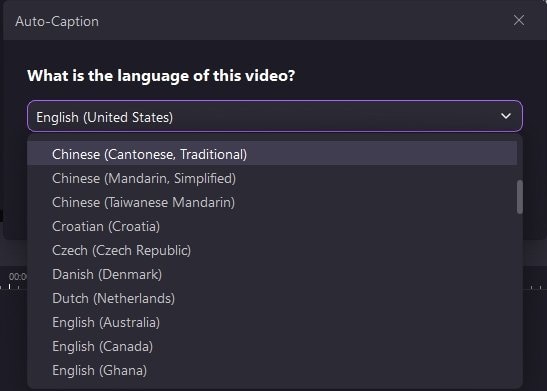
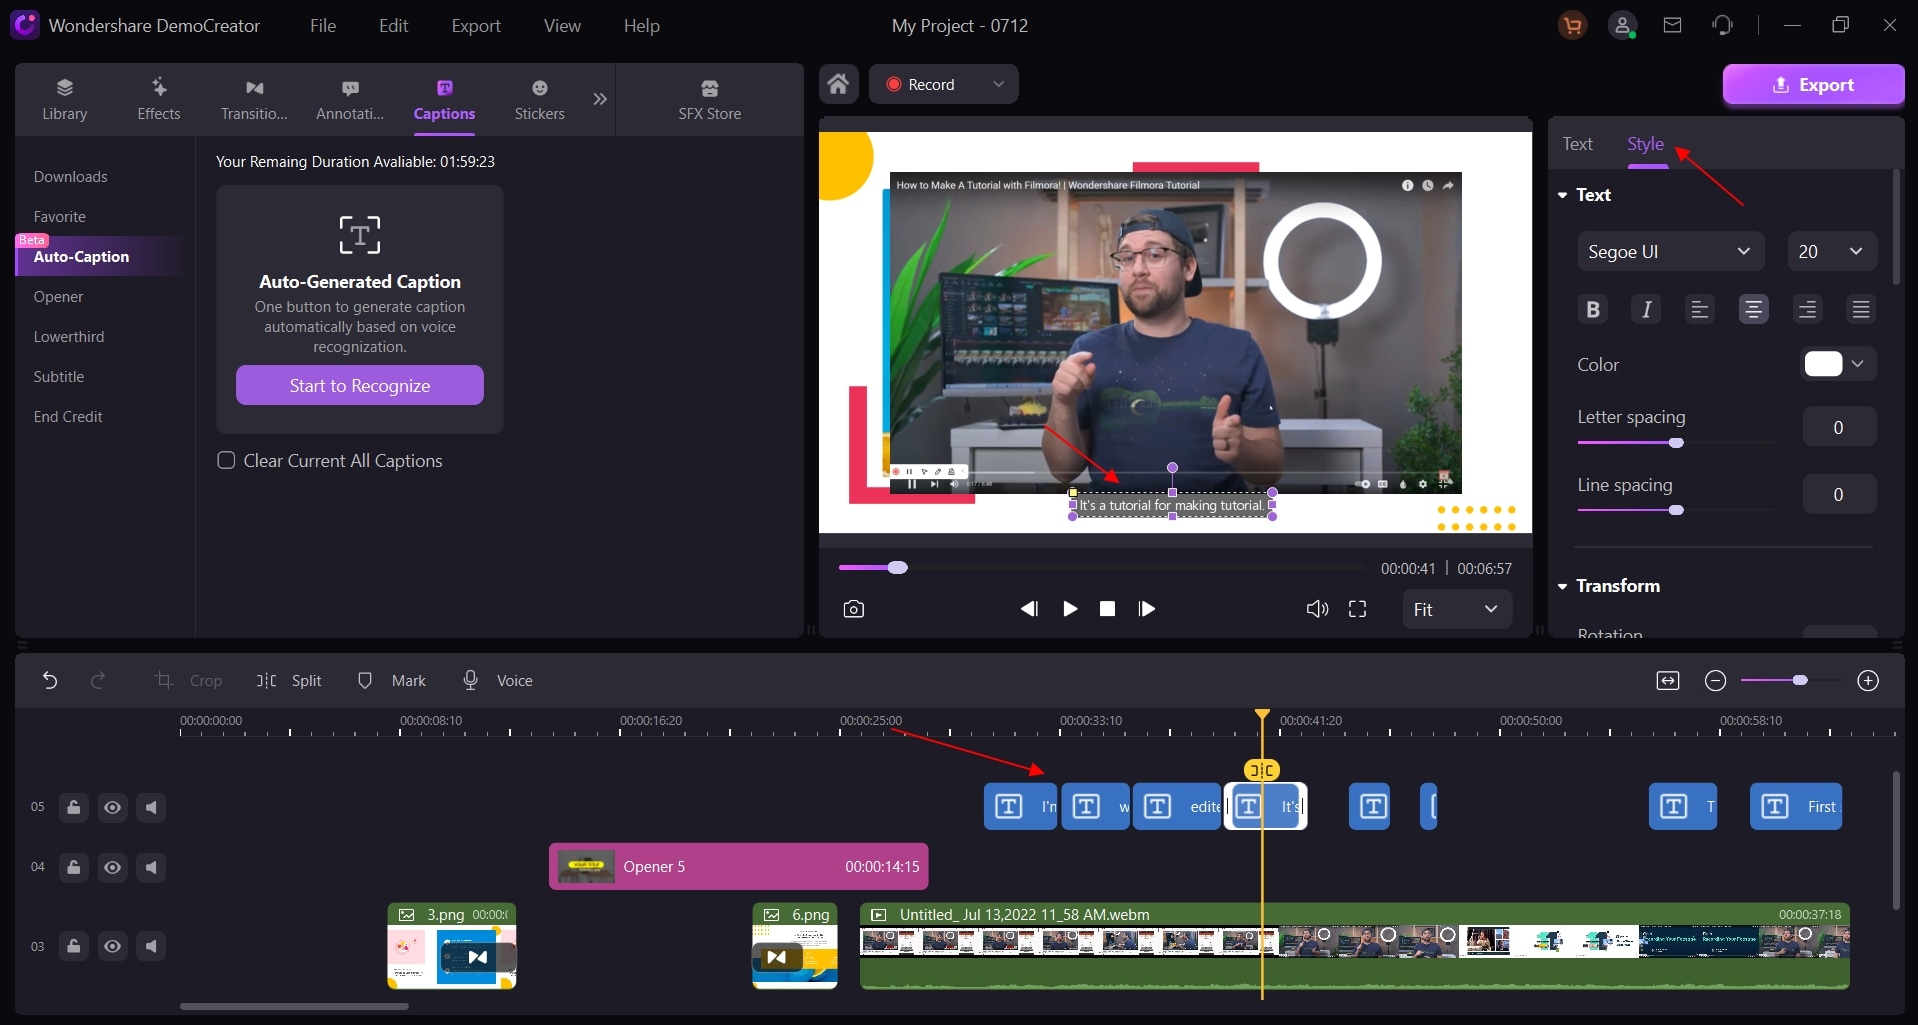
- Go to the Captions tab and click Auto-Caption in the left sidebar. Click Start to Recognize to generate auto-subtitles.

- Choose the language used in your video. Over 90 languages are supported by DemoCreator.
- The process can take some time, depending on the length of your video. Once the software generates subtitles, you can edit and customize your subtitles according to your needs.
- Finally, click Export in the upper-right corner. Set the format, name, and destination, and click Export again.

Method 2. Add Captions to Video on Mac Using iMovie
iMovie is a video editing tool for Apple products. It's a free app that lets users edit videos with different video effects and features. iMovie can help users with color correction, stabilization, and other tools with no complex steps.
Unfortunately, iMovie currently doesn't have a feature for generating subtitles for video. However, there is a manual way to add subtitles to your videos using iMovie. Once you manually type your subtitles or captions, you can set the duration and timestamps for each line to synchronize the subtitles with the audio.
Follow these steps to add subtitles to your videos on Mac using iMovie:
- Open iMovie from the Applications folder.
- Click the Plus icon to start a new project and import your video file.

- Once you upload your video, drag it to the filmstrip area.

- Click Titles and double-click the Lower style. That will add it to your video.

- Select the timestamp on the video in the timeline to add subtitles. Then, click the Text box icon above the viewer and enter your subtitles.

- Adjust the duration of that line in the timeline to match your audio. Then, add more titles and repeat the process until you add all the subtitles for your video.
- Click File > Share. Choose File again and save your video.
Method 3. Add Subtitles to Video on Mac Using an Online Subtitle Editor
Kapwing is an online subtitle generator that can be accessed from Windows, Mac, and mobile devices. It's an excellent subtitle editor tool that supports several subtitle methods, including manual, automatic, and SRT file uploads.
Since the auto-subtitle generation feature requires payment, we'll show you how to upload a subtitle file for free. If you want to add subtitles to your video on a Mac using Kapwing, follow these steps:
- Visit the official Kapwing website and go to the Subtitles tool.
- Click Choose a video to start.

- A new window will open, so click Upload at the top of the screen and import your video.
- Once you add your video, click Subtitles > Upload SRT/VTT.

- Let the subtitle file sync with your video. Then, customize it on the right by changing the placement, color, size, and font.

- Click Export Project and save your file.

Method 4. Add Subtitles to Movie on Mac Using VLC Media Player
VLC is primarily a media player. It's one of the most widely used media players in the world. Besides playing videos, VLC offers several other features for basic video editing, fixing errors, and adding subtitles. What makes VLC so popular is that it's entirely free to use and available for Windows and macOS.
If you have a subtitle file ready, you can quickly add the subtitle to your video using VLC:
- Open VLC Media Player on your Mac.
- Go to Media > Convert/Save.

- Click Add in the File section and upload your video file.
- Tick the checkbox next to Use a subtitle file and import your SRT file.
- Once you upload both files, click Convert/Save to start the process.

- Click the wrench icon next to Profile and navigate to the Subtitles section.

- Tick the Subtitles checkbox to enable them and the one below to overlay them on the video, and click Save.

Method 5. Add Subtitles to Video on Mac Using a Video Converter
HandBrake is open-source software that helps convert videos to MP4 and MKV formats. It's entirely free and easy to use. People mostly use it as a post-production tool to convert videos to the desired file format.
However, this video transcoder offers several other features, including adding subtitles, restoring low-quality videos, and removing artifacts. Moreover, HandBrake can help you compress videos to take up less storage space.
If you want to add subtitles to your Mac video using HandBrake, follow these steps:
- Upload your video file to HandBrake.
- Go to the Subtitles section and click Import SRT.

- Tick the Burn in checkbox if you want open captions, or skip it if you wish closed captions.
- Hit the green play icon that says Start Encode.

- Play your video in your preferred media player to check if the subtitles fit.
Which Is the Best Method for Adding Subtitles to Videos on a Mac?
While each method is sufficient and will result in embedded captions on your video, some are quicker and more straightforward than others.
Adding subtitles in videos on a Mac using iMovie will get you the desired results, but it's tedious and unnecessarily long. Having to type the captions manually can take hours.
If you have a subtitle file, you can upload it to your video using Kapwing, VLC, or HandBrake. However, they also have some downsides. Users have reported Kapwing lowering their video quality after adding subtitles. Moreover, VLC and HandBrake don't have advanced subtitle-generating tools and have an extended processing time.
Therefore, leverage auto-generated subtitles to add subtitles quickly and smoothly, with little to no effort. Wondershare DemoCreator offers an advanced auto-subtitle generator that will get you the best and quickest results. Moreover, your final product will be of the highest quality and ready for direct social media sharing.
Summing Up
Subtitles are essential for video visibility and accessibility, helping you reach more viewers. Fortunately, you can add subtitles to your videos on a Mac with several methods. You can use a video player, a video converter, an online subtitle editor, a video editing tool, or a dedicated subtitle editor software. While they all provide subtitles for your video, a dedicated subtitle editor is the best, most reliable option.
Wondershare DemoCreator is one of the best subtitle generator tools that allows you to add captions to your videos on a Mac quickly. It uses advanced AI technologies to provide the most accurate subtitles for your videos.
FAQs
-
Can I add subtitles to an MP4 file on a Mac?
Yes, you can add subtitles to an MP4 file on a Mac. There are several methods to add subtitles to MP4 files on Mac, such as using HandBrake, VLC Media Player, Kapwing, iMovie, and Wondershare DemoCreator. The easiest way to do it is to use a dedicated subtitle editor software, like Wondershare DemoCreator. -
How do I add subtitles to a video on a Mac for free?
You can use Wondershare DemoCreator to add subtitles to a video on Mac:- Download, install, and launch DemoCreator for Mac.
- Choose Video Editor in the main menu and upload your video file.
- Navigate to Captions > Local Caption and upload the SRT file.
- Alternatively, navigate to Captions > Auto-Caption feature to generate subtitles automatically.
- Edit and customize the subtitles according to your needs.
- Export your video file with subtitles.
-
Do Mac devices support SRT?
Mac supports SRT and other subtitle file formats like WebVTT, SSA, TXT, and TTML. -
How do I add subtitles to QuickTime Player on a Mac?
You can add subtitles to QuickTime Player by following the steps below:- Open your video file and then the subtitle file in QuickTime Player.
- Click Edit > Select All, copy and paste the subtitles.
- Reopen your video, click Edit > Add to Movie, and hit Save.
-
How do I permanently add subtitles in VLC on a Mac?
You can permanently add subtitles to your videos using VLC. To do that, you need to hardcore your subtitles. The process of hardcoring is simple; just follow these steps:- Upload your video and subtitle file to VLC.
- Set the desired output format and convert it.
- Save your video with permanent subtitles.


