Watermarks in videos usually distract people from the visual appeal or the content that creators want to convey. It may result in an unprofessional and unhappy watching experience. It is vital to have a watermark-free video in the content creation journey. Many content creators are aware of this and concerned about how to remove the CapCut watermark from a video. It would be a good idea to go for something with an almost flattened learning curve.
Considering this, the following sections suggest some of the best solutions to remove CapCut watermarks on any device you have access to.
In this article
How to Remove CapCut Watermarks?
In this section, you will learn some of the most effective ways to remove CapCut watermarks online and offline without getting into too many technicalities or going through a steep learning curve.
Method 1: Use of Video Editing Software with AI
After ChatGPT took the world by storm, almost everyone is talking about AI now. However, even today, not many vendors have integrated AI features into their apps, and therefore, they are kind of left behind in the race.
Luckily, one of the most influential companies in the world, Wondershare, took a step ahead and added artificial intelligence into almost all its products to make things easier for its existing and new customers. In this context, a tool that helps you remove the CapCut watermark and has gained a decent reputation amongst its customers is Wondershare DemoCreator.
Wondershare DemoCreator is a video production and post-production application for computers that comprises several AI features to reduce manual tasks and complete the given assignments almost instantaneously.
Some key features that Wondershare DemoCreator comprises include:
- Built-in screen recorder
- Advanced video editor.
- Access to several stock audio effects
- Integrated filters and video effects
- A plethora of caption and subtitle presets
Learning how to remove the CapCut watermark with Wondershare DemoCreator is pretty simple, and the instructions are explained below:
Step 1Add the Watermarked Video to DemoCreator's Timeline
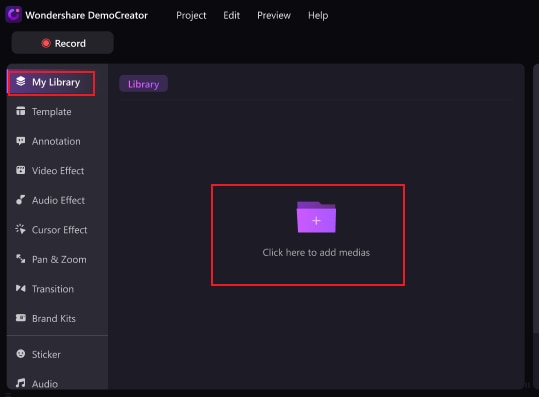
Open Wondershare DemoCreator, click Video Editor and click the (Add) button from the left sidebar My Library.
Next, locate and import the video with the CapCut watermark to DemoCreator, and then drag it from My Library to the Timeline at the bottom while choosing your preferred project resolution when the app prompts for it.
Step 2Remove CapCut Watermarks Using DemoCreator
Click the Video Effects button from the left sidebar, click and drag the Video Object Remover effect from the effects box, and drop it on a new track in the Timeline.
Drag the left and right handles of the effect to cover the entire duration of the video. In the Preview window, drag the video object remover effect over the CapCut watermark and use the scaling handles to adjust its size.
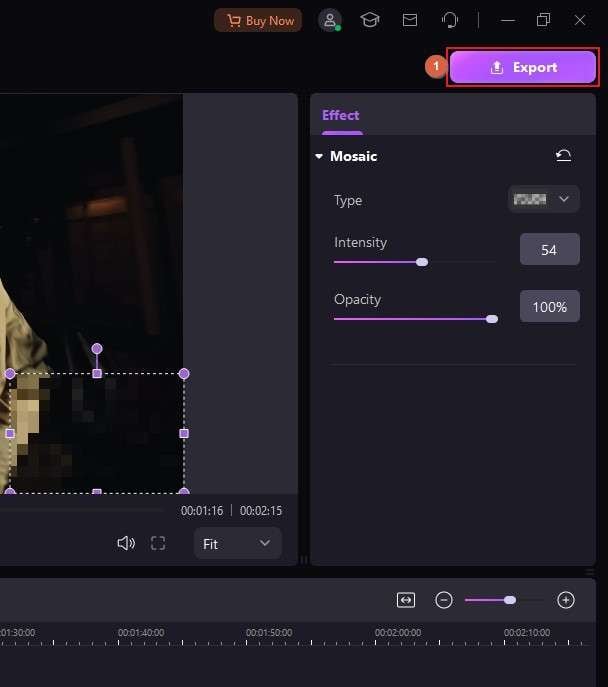
You can also manage the intensity and capacity of the effect by dragging their corresponding sliders in the right pane.

Step 3Export the Video with the Neutralized Watermark
Click Export from the top-right, choose your preferred target platform from the left pane of the Export box, define output preferences from the right, and click Export from the lower-right to export the clean video from Wondershare DemoCreator and save it to your computer.This method also effectively removes the watermark from Rednote videos.
Method 2: Use CapCut Watermark Remover Online
Online portals offer a convenient way to remove CapCut watermarks without installing any application on your computer or worrying about hardware compatibility. However, because this approach requires uploading your videos to a third-party website, they are prone to unwanted exposure unless the company is trusted and has a high reputation in the market.
Therefore, rather than taking chances with any random portal, it is always a good idea to choose Wondershare because of its strict privacy policies. Wondershare has an Internet app called Media.io for users who don't wish to install dedicated programs on their PCs.
When it comes to learning how to remove CapCut watermarks online, you can use Media.io AniEraser, which offers an easy three-step process to get the job done. The procedure is given below:
Step 1Upload the Video to Media.io
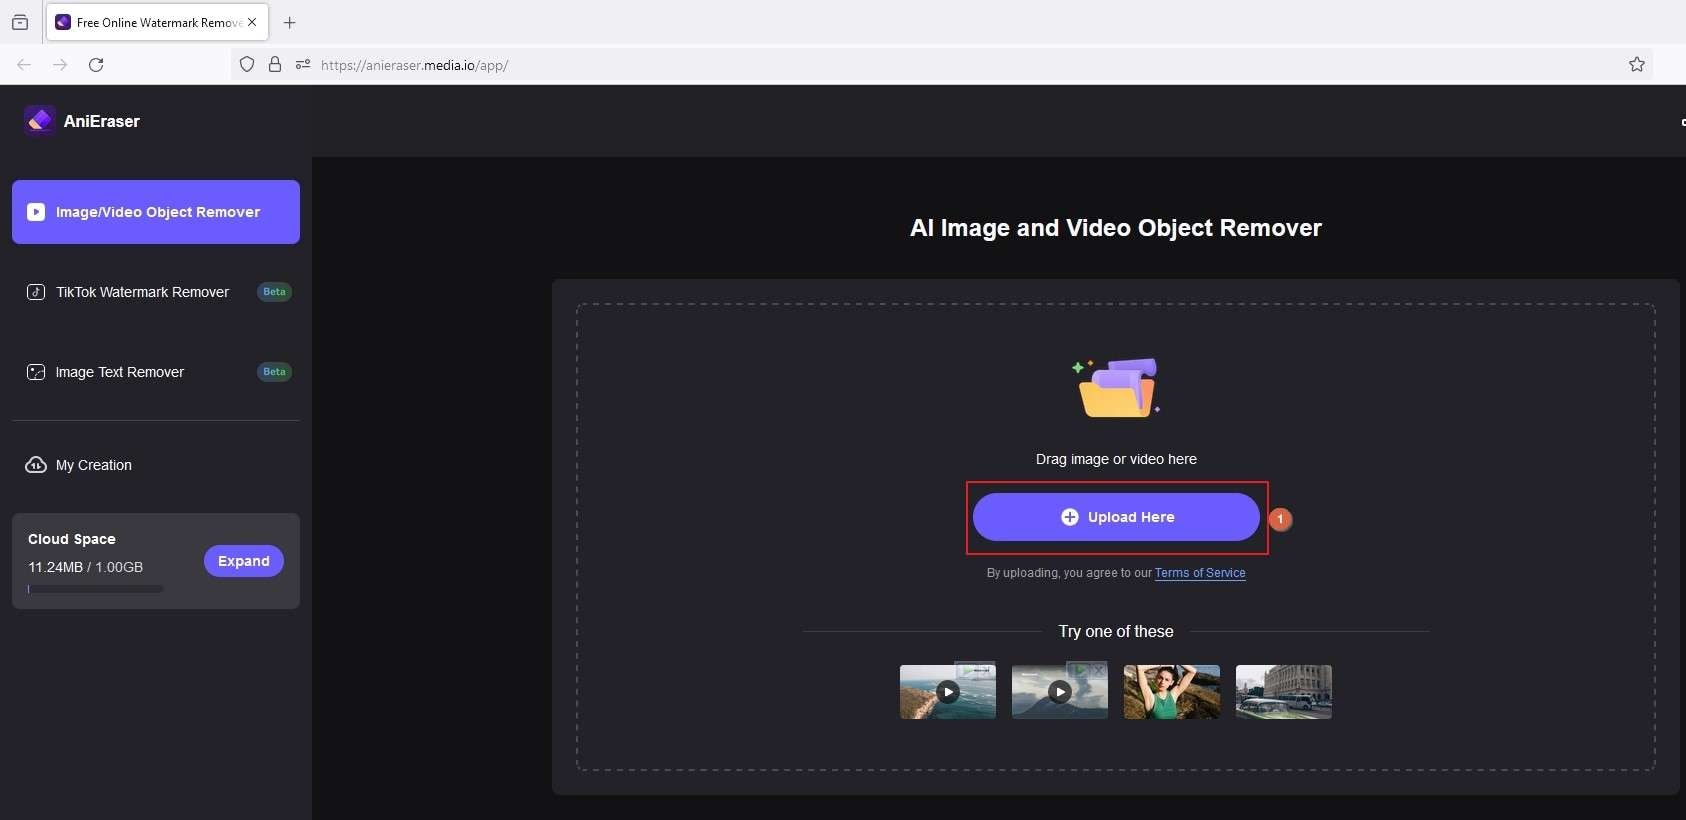
Go to the Media.io watermark remover online site using your favorite web browser, click Upload Here, and upload the watermarked video to AniEraser.
Step 2Remove CapCut Watermarks
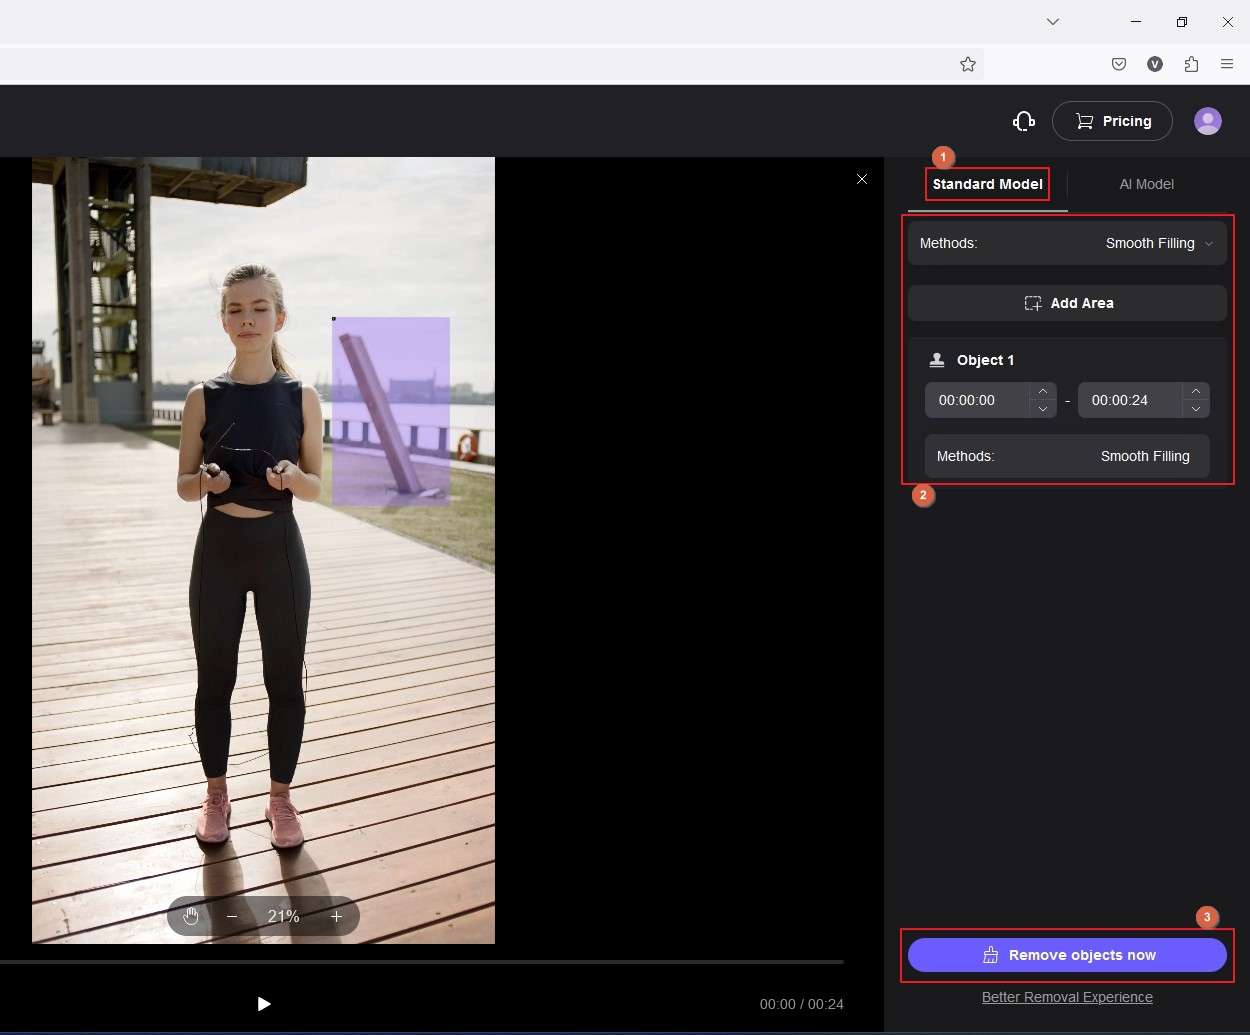
On the next page, click to select the Standard Model tab from the top of the right pane, ensure that Smooth Filling is selected in the Methods list, click Add Area, and drag the area frame in the Preview window over the watermark.
If necessary, use the scaling handles to resize the frame to cover only the unwanted image in the video. Optionally, repeat this process to cover all unwanted elements you want to remove. Once done, click Remove Objects now from the bottom of the right pane and wait while Wondershare AniEraser does its magic.
Step 3Download the Clean Video
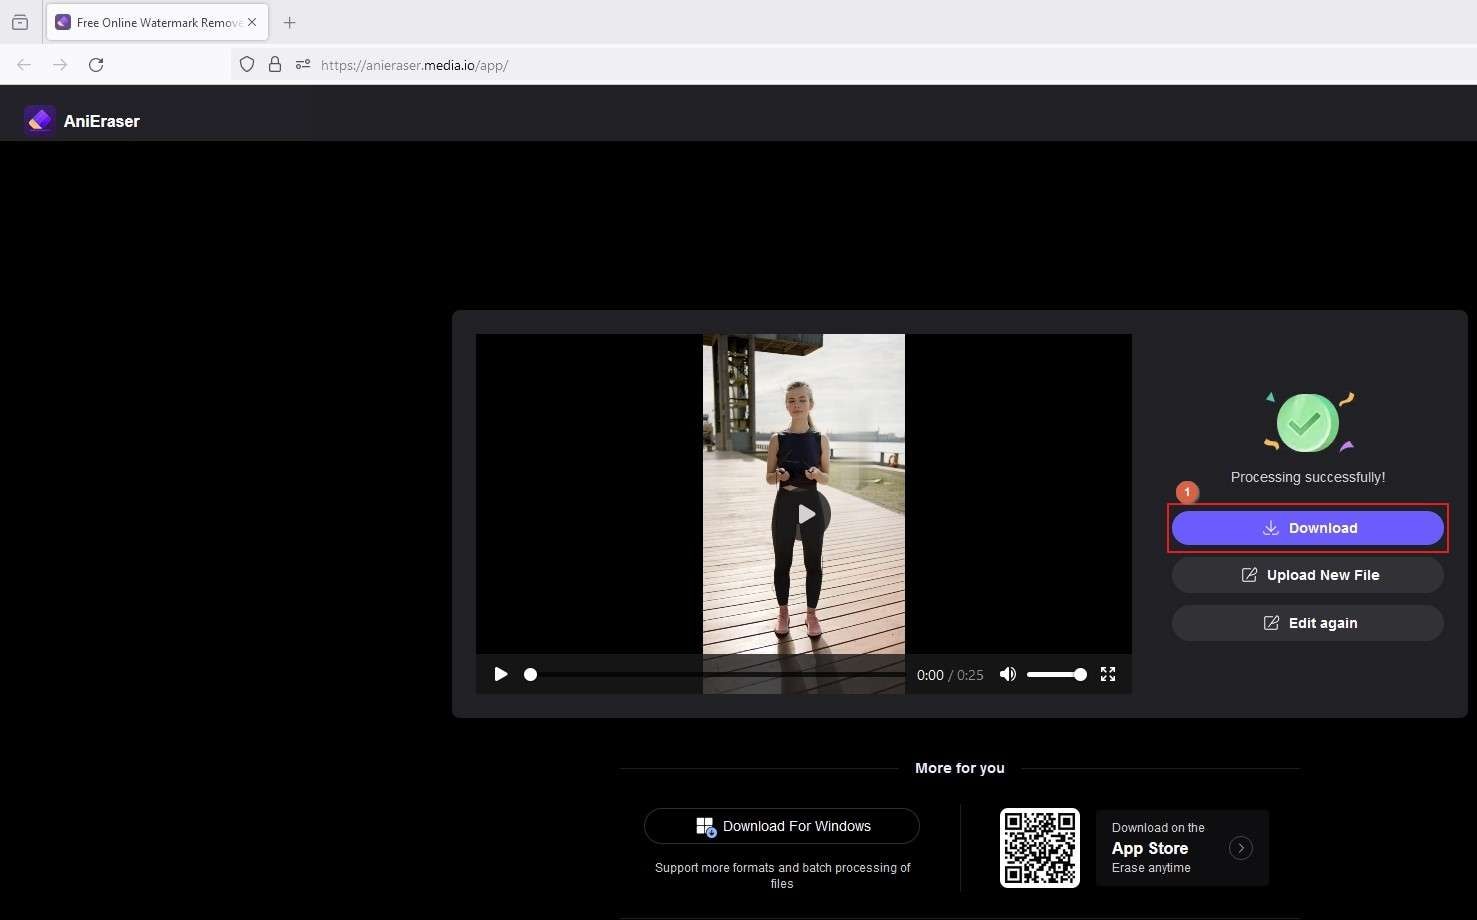
On the next page, click Download and save the video without the watermark on your computer.
How to Create Videos Without CapCut Watermarks Completely?
As Wondershare, even CapCut has its online sibling that allows you to edit videos using your favorite web browser. While the portal is free to try and doesn't add watermarks when exporting, you must purchase a subscription plan to download videos in 1080p or above resolution. Nevertheless, the step-by-step instructions are given below:
- Open your preferred web browser and visit CapCut online video editor.
- Click Try for free

- Upload and edit your video.
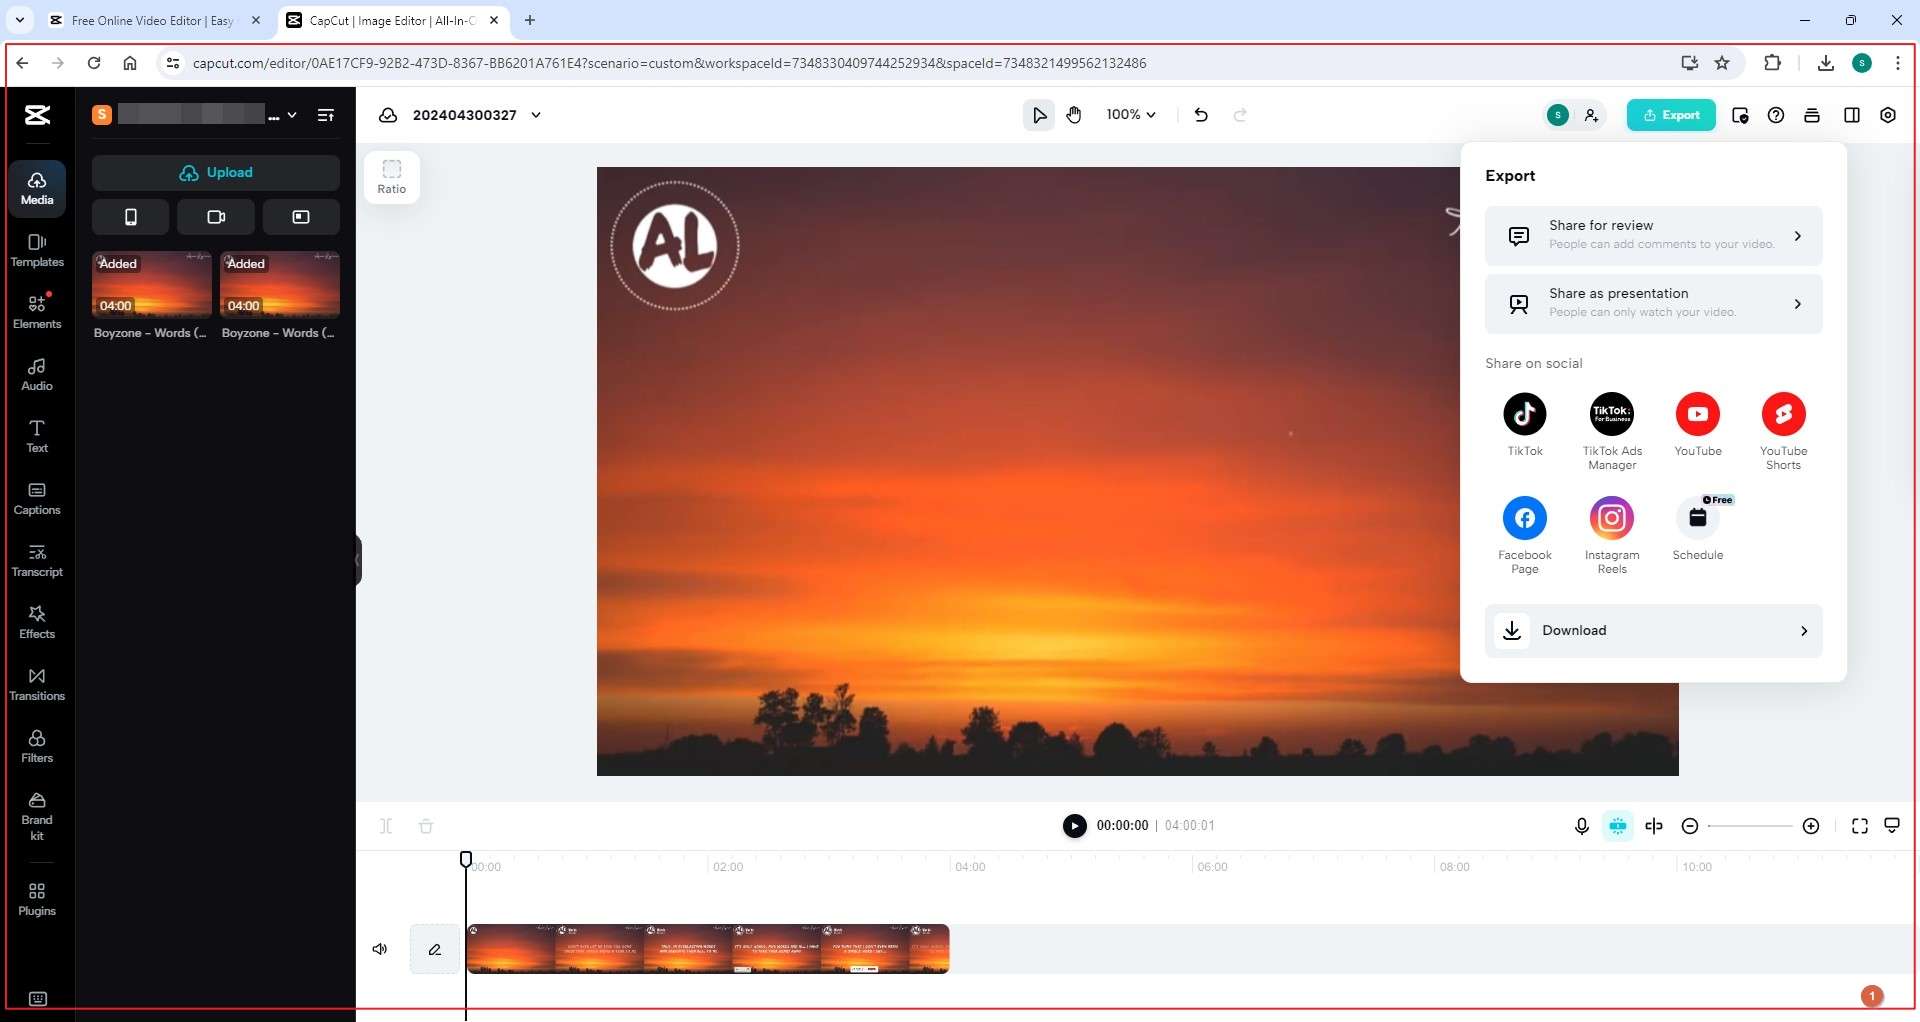
- Once done, click Export from the top-right of the online CapCut editor's page.
- Define export preferences.
- Click Download from the bottom of the menu to download the edited video without a watermark.
Bonus Tips to Remove CapCut Watermarks on Mobile Devices
The good news is that CapCut is available for Android and iOS devices, and you can use the app itself to easily remove CapCut watermarks that it automatically adds to the end of the video.
Technically speaking, branding photos or videos that appear at the end of any footage aren't watermarks but are called outros. Here are the steps:
Step 1Import the Video
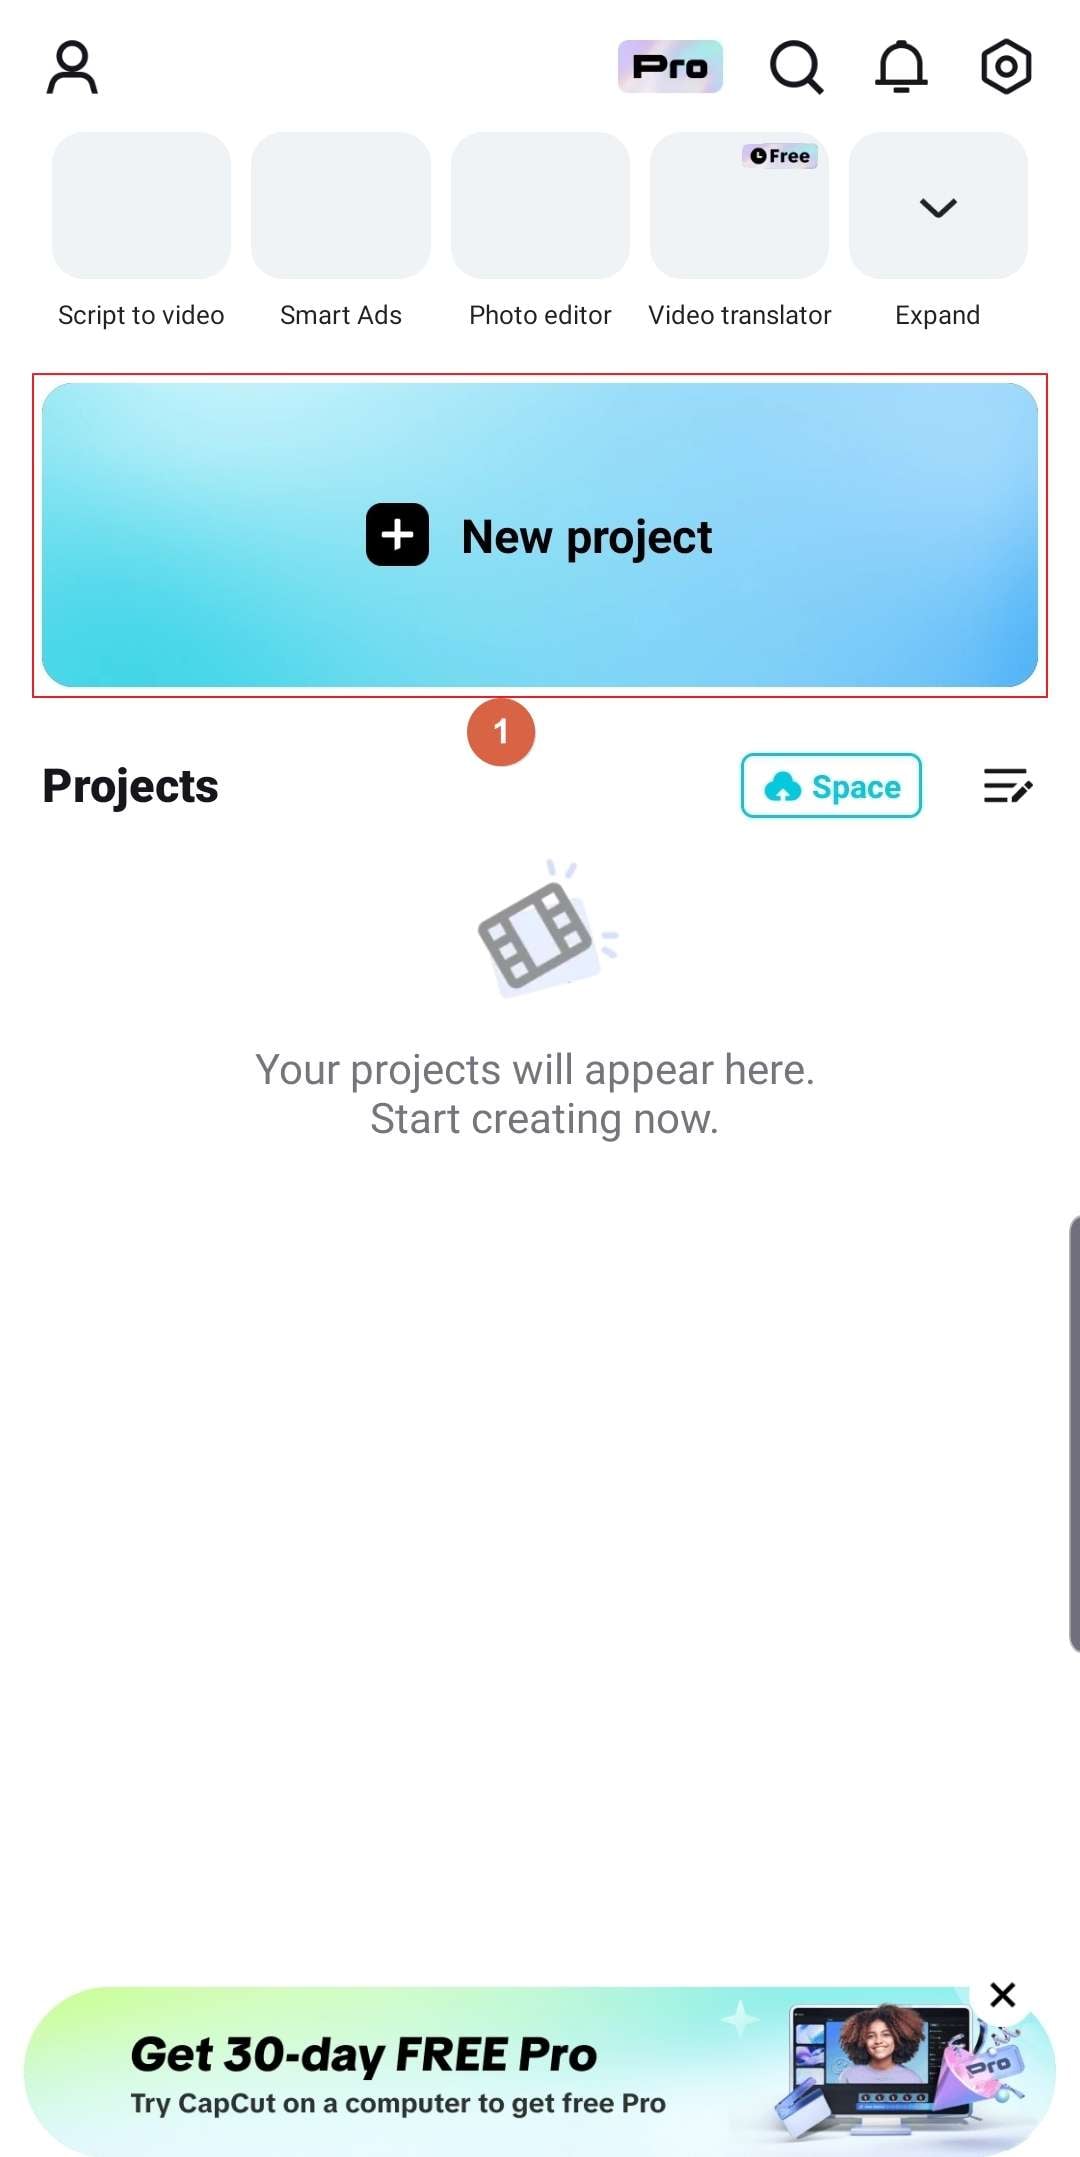
Launch CapCut on your smartphone, tap New Project, choose the video you want to edit, and click Add from the bottom right to import the video to the app.
Step 2Remove the CapCut Watermark
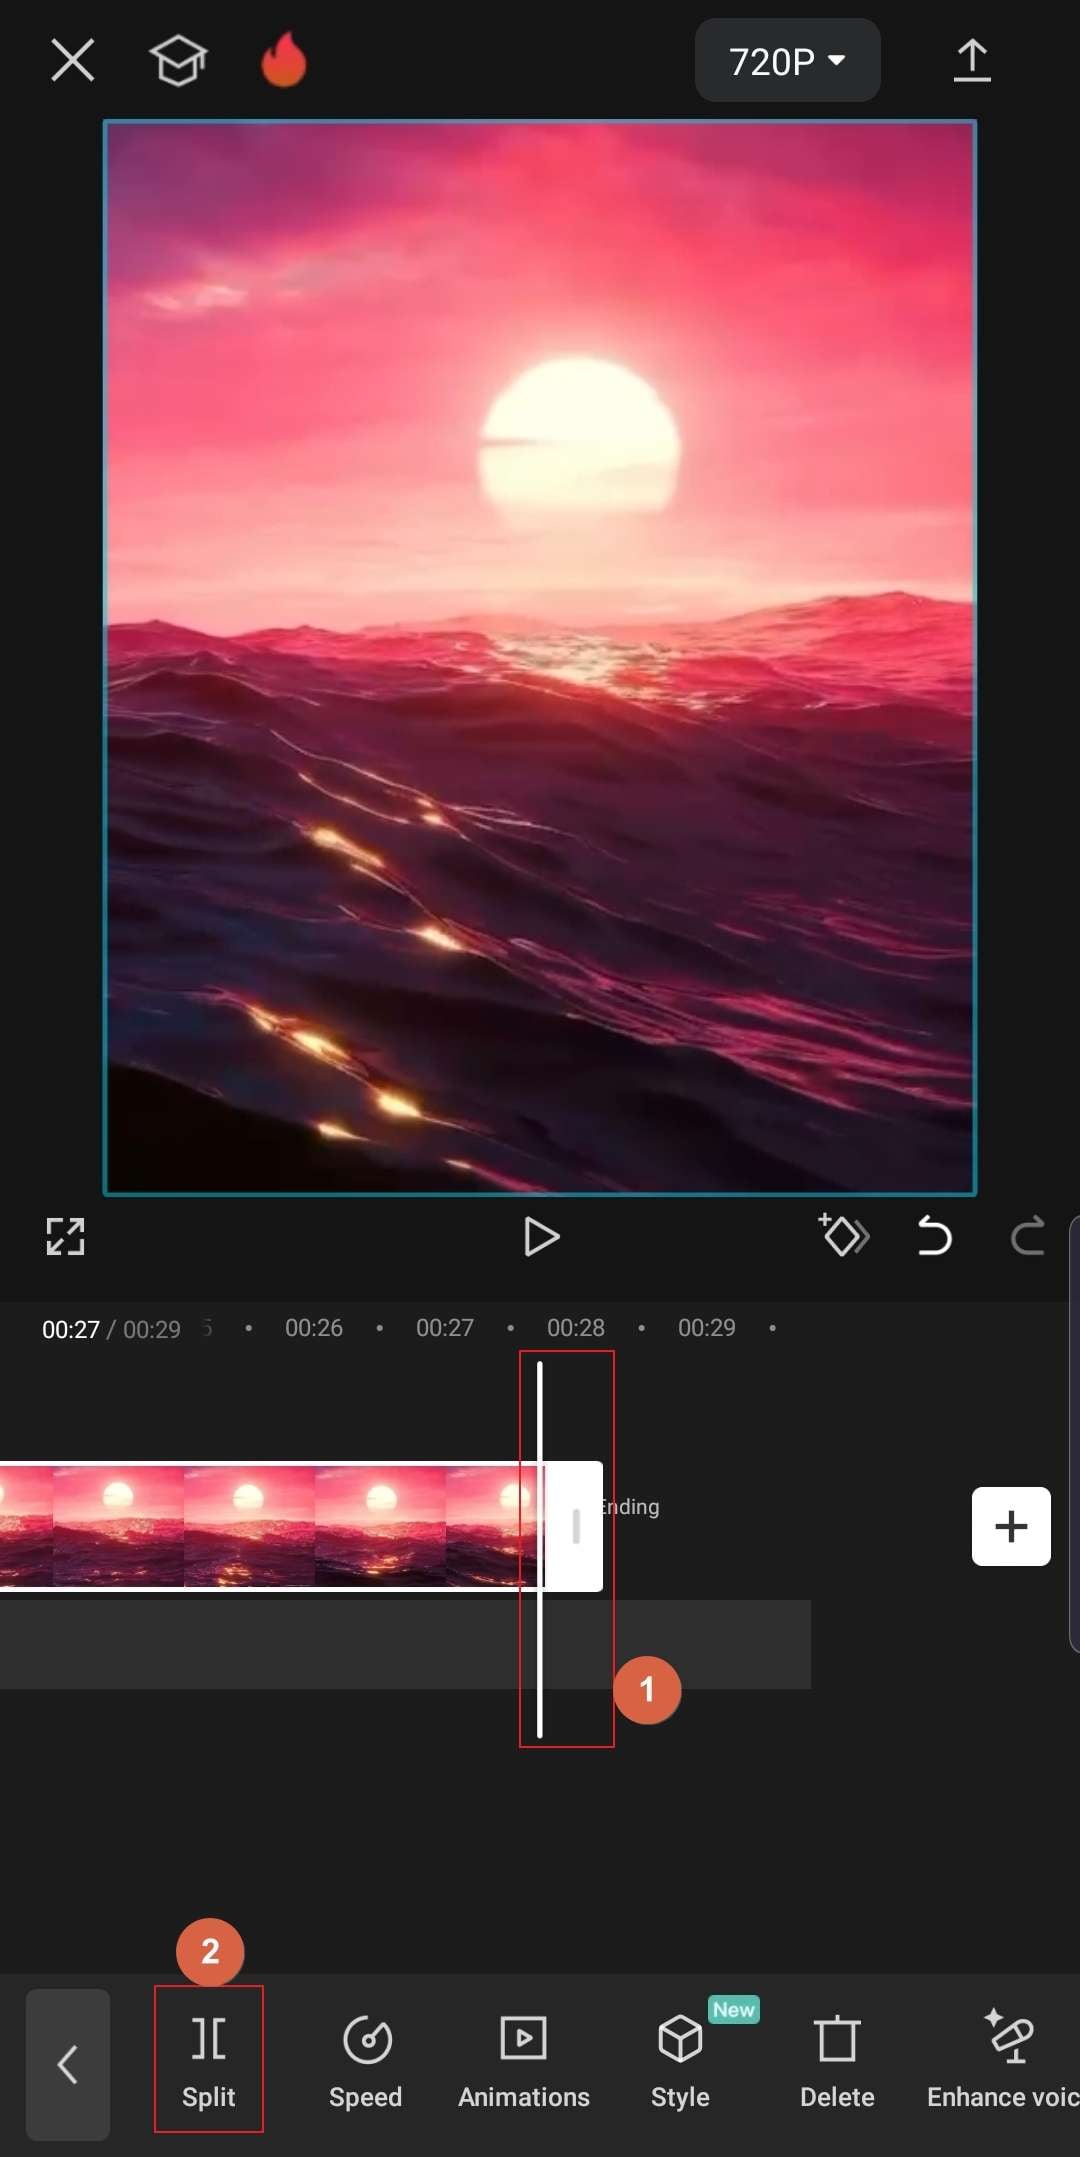
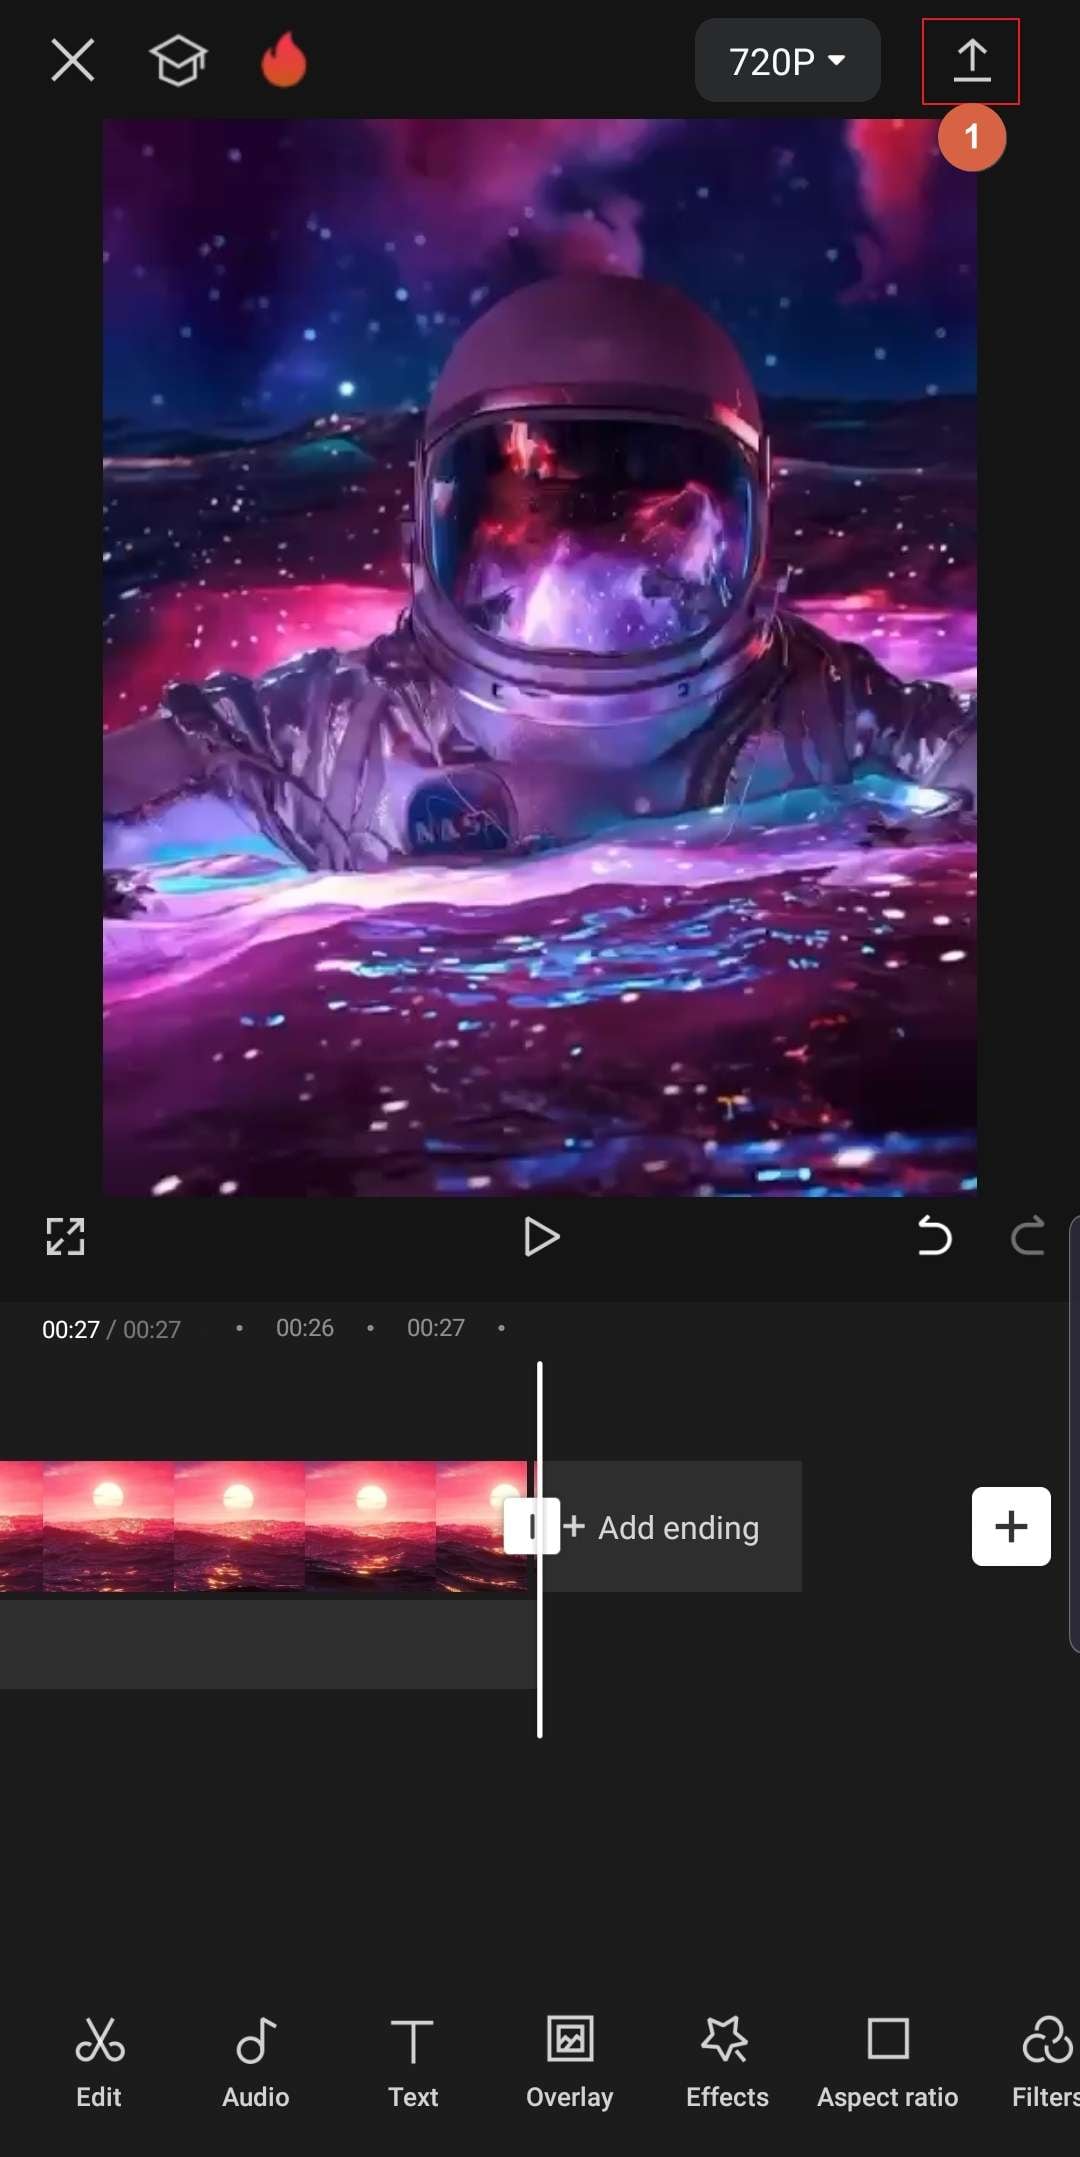
Tap and horizontally scroll the media to position the Playhead at the last frame of the video (the point from where the CapCut logo begins to appear), tap Split from the bottom, tap to select the media segment with the CapCut logo, and tap Delete from the bottom.
Step 3Export the Video
Tap the Export icon from the top-right, and tap Done from the top-right of the next screen to export the video without the CapCut watermark. Access the file from the default output folder on your smart device.
Keep reading if you are also curious about how to remove background noise on CapCut.
Conclusion
You can use a CapCut watermark remover app or remove CapCut watermarks online easily when you have the correct tool and know the process to get the job done. However, things are not always this simple. Therefore, to save all the legwork and make tasks easier, this guide highly recommends using Wondershare DemoCreator or Media.io AniEraser as your default app to remove CapCut watermarks.


