Sometimes, your posted video does not convey the required message properly. To address this, you use video annotations to highlight your ideas for viewers. People focus on video only if they understand its main theme. So, the video annotation can easily deliver the context of your digital content. Annotation is the video editing process that helps to mark important things.
It helps you add information and comments to the video to make it more engaging. Furthermore, it makes communication with other people easier and more effective. This article discusses the guide to annotate a video and the best tools for this process.
In this article
Part 1. How Does Annotating Video Help Users in the Field of Video Editing?
Annotating video helps users in the field of video editing by providing flexibility. You can annotate a video by adding comments and marking important points to convey your idea more precisely. It can make several processes engaging and collaborating with clients. Additionally, it can help you find the video's errors and inconsistencies:
- Marking Key Points: The annotation can highlight the specific point in the video that needs attention. It serves as a marker that gives information in editing tasks to assist editors. The annotation marks scenes that need to be emphasized in your content.
- Collaboration and Communication: The editor can leave notes for team members to suggest changes in the video. It is also a way to convey ideas without communicating with external tools. Annotation allows the user to collaborate and communicate with colleagues easily.
- Quality Control: In video editing and annotation, video helps the users to control the quality process. The editor's annotation can mark the part of the video that needs approval or final editing. So, it helps fulfill the required video standards before delivery.
- Improve Efficiency: Annotation is the way to streamline the workflow and enhance the efficiency of the video. It helps to add the notes in the video to quickly approach the specific information. In this way, it saves time rather than searching for the required information.
- Script and Storyboard Reference: You can reference your script through the video annotation. Editors can use annotation to deliver a planned narrative of the video easily. Moreover, it aligns the video according to the required script.
Part 2. Annotating Videos with Wondershare DemoCreator: Composite Guide
If you are looking for a flexible video annotation tool, use Wondershare DemoCreator. This platform is a video recorder and editor with advanced tools to make your content outstanding. It’s an all-in-all software that captures every detail to craft pro-level digital content. You can share projects with co-workers using its cloud-storage service, making collaboration easier.
The AI integration in DemoCreator can transform your text into speech with diverse voices. Video recording allows you to record with virtual cameras, screens, and AI avatars. If we talk about annotation in videos, this tool offers more than 10 annotation features to uplift creativity. Besides, it holds over 10,000 video packs with many transitions, effects, audio, and stickers.
What Are the Key Functionalities of DemoCreator?
Unlike other platforms, DemoCreator is not just an editing or recording software. It can change your voice and reduce background noises for flawless audio in your content. If it seems interesting, delve into the detailed features of DemoCreator given below.
1. Video Annotation
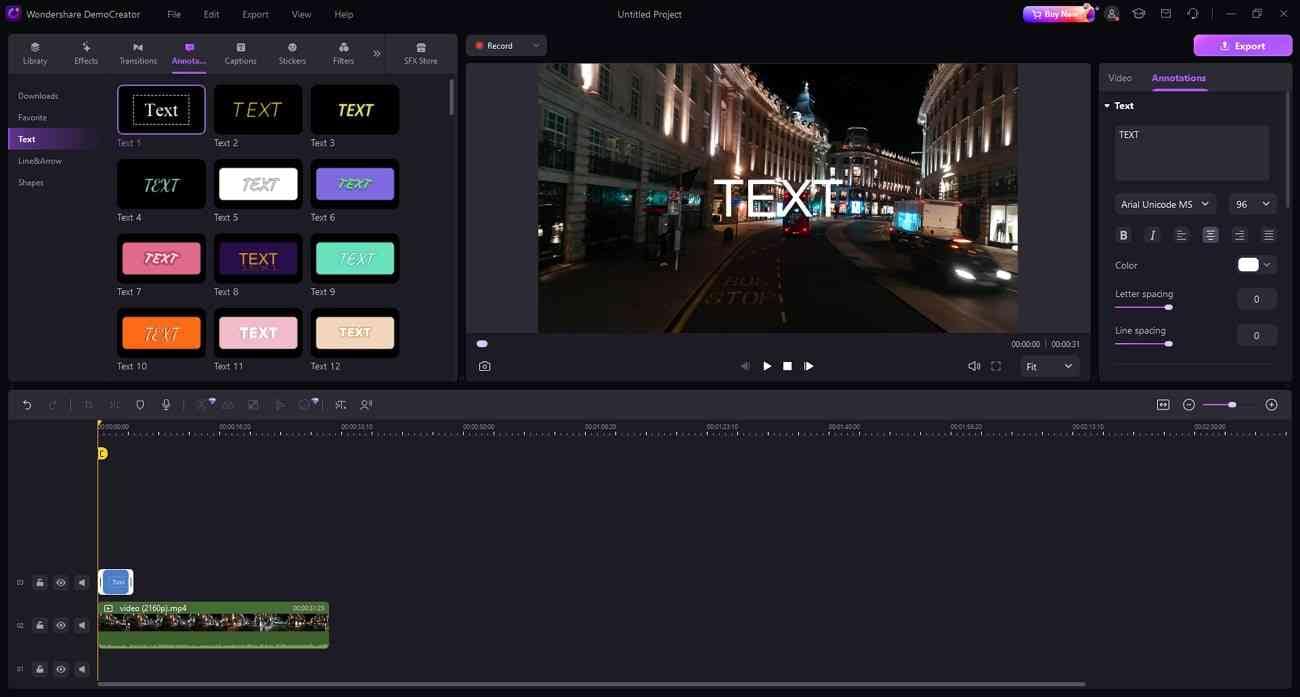
Complex information becomes easier to comprehend with annotations in the video. Thus, DemoCreator allows you to add video annotations from its rich library. You can use shapes, text, and line & arrow options to extend the annotation library. When you use one annotation template, it gets saved in the download folder for later use. Also, users can add annotations in the “Favorite” folder to easily access later for other videos.
2. AI Dubbing
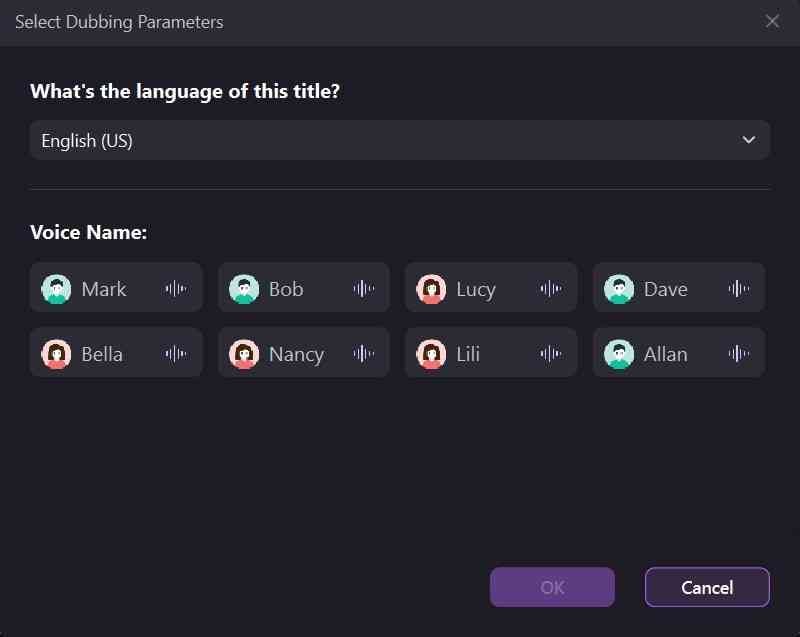
Voiceovers are essential for content creators to make their content globally reachable. This tool offers an AI dubbing feature with effective operations. Using it, you just need to add text in the respective section and pick one AI voice. Afterward, you should choose one language to make the content accessible for that region. Apart from content reach, you can save time for recording and budget for voice artists.
3. AI Sound to Text
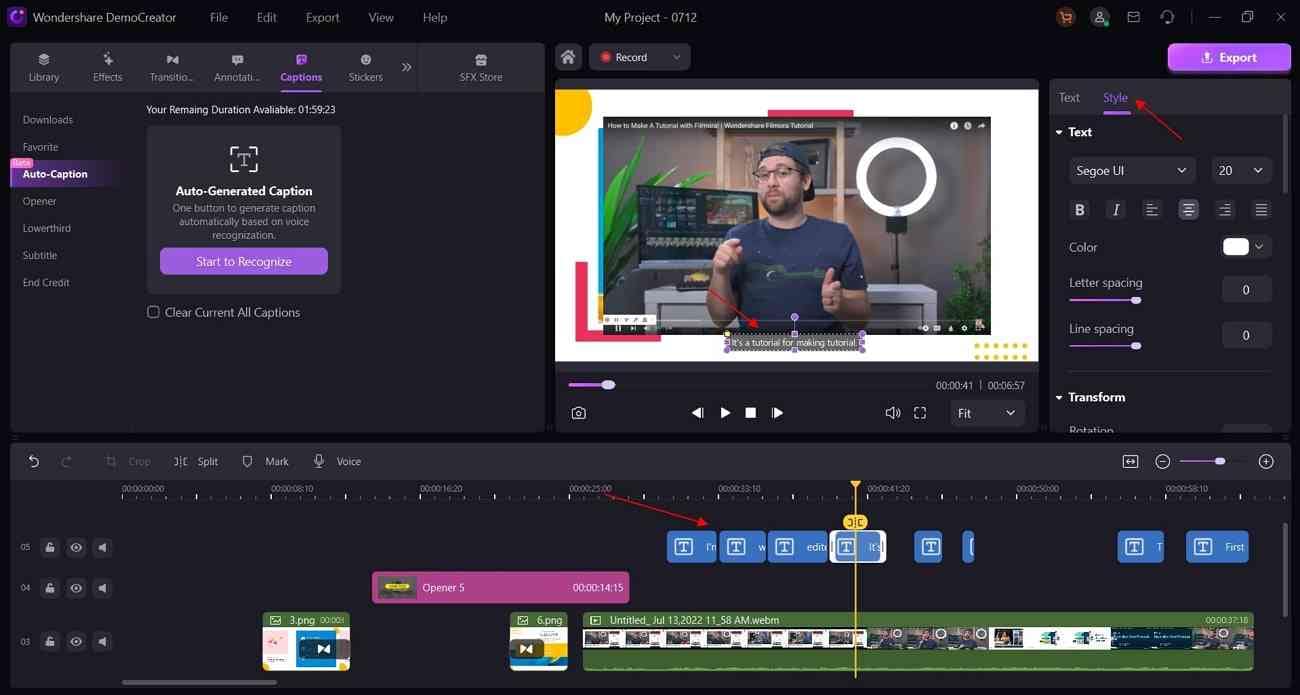
Everyone must be familiar with text-to-speech, but have you heard of Sound-to-text? If not, then let us tell you that DemoCreator introduced an Auto caption or sound-to-text feature. AI integration accurately recognizes speech to transform it into text. It appropriately locates the text in the video, considering the frame in which it was spoken.
4. AI Noise Reducer
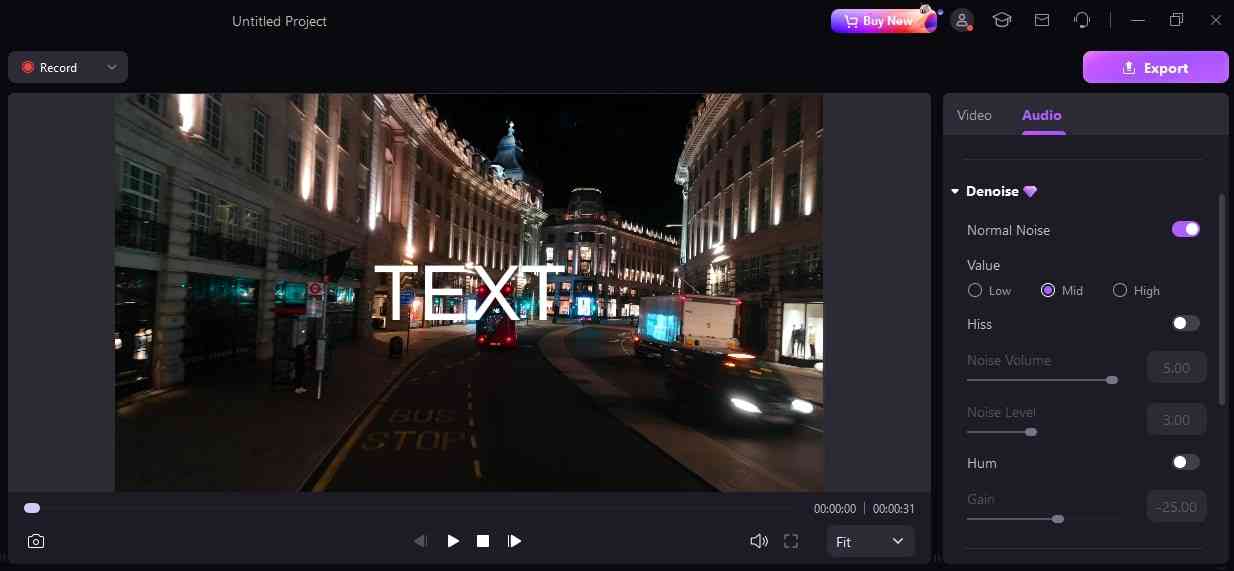
Creating flawless videos is the task everyone wants to achieve for perfection. With DemoCreator, it’s not a big deal. You can make your recorded lectures and social media content noise-free with the Denoiser of this platform. It detects the Hiss, Hum, and other background noises automatically with AI. Later, it allows you to make adjustments in noise while retaining the high quality of your video.
How to Annotate Video With Ease in DemoCreator
After an overview of the key features of this tool, it’s necessary to unlock the methods of achieving it. Thus, you can follow the below step-by-step guide to annotate a video. Although using DemoCreator is not difficult, you should try these steps for quicker results:
Step 1: Install DemoCreator and Import Video in Timeline
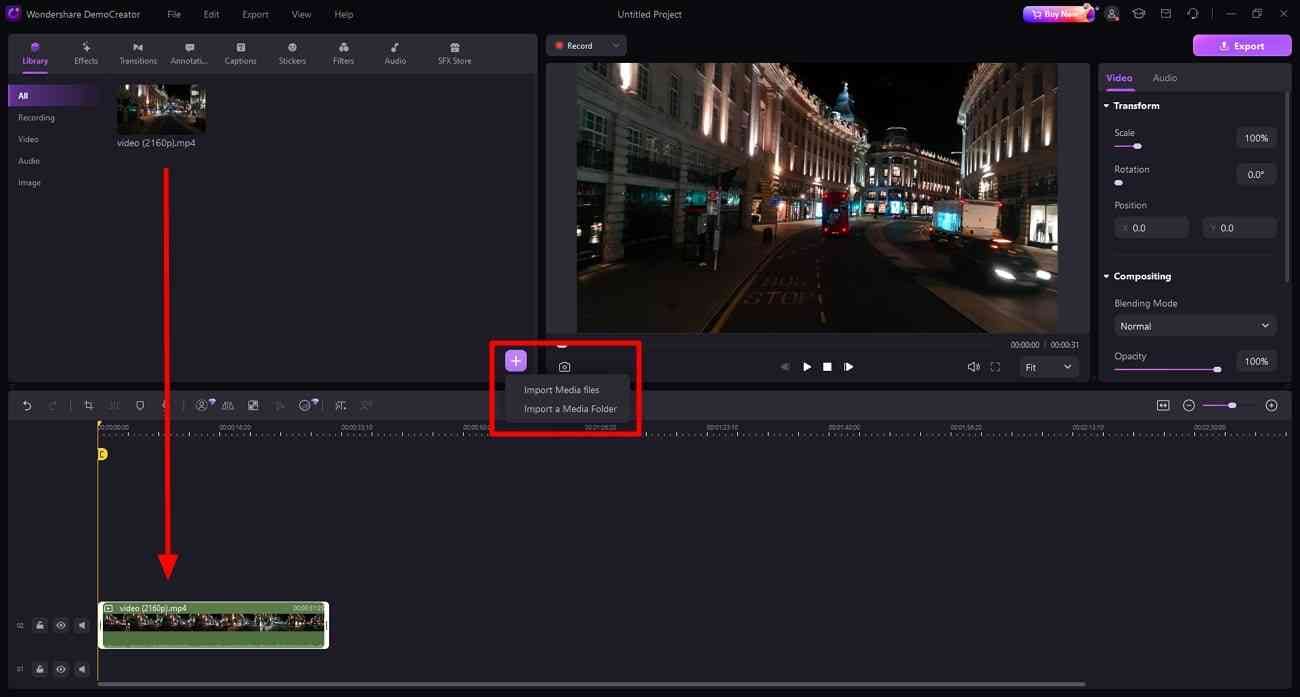
To start your creativity, download Wondershare DemoCreator from its site. Launch it in your system and enter its main screen. There, hit the “Video Editor” and get access to the editing panel. Notice the “+” button and tap it to import your video. After getting the video into the media panel, hold it and drop it into the timeline section for further processing.
Step 2: Annotate Video with Text
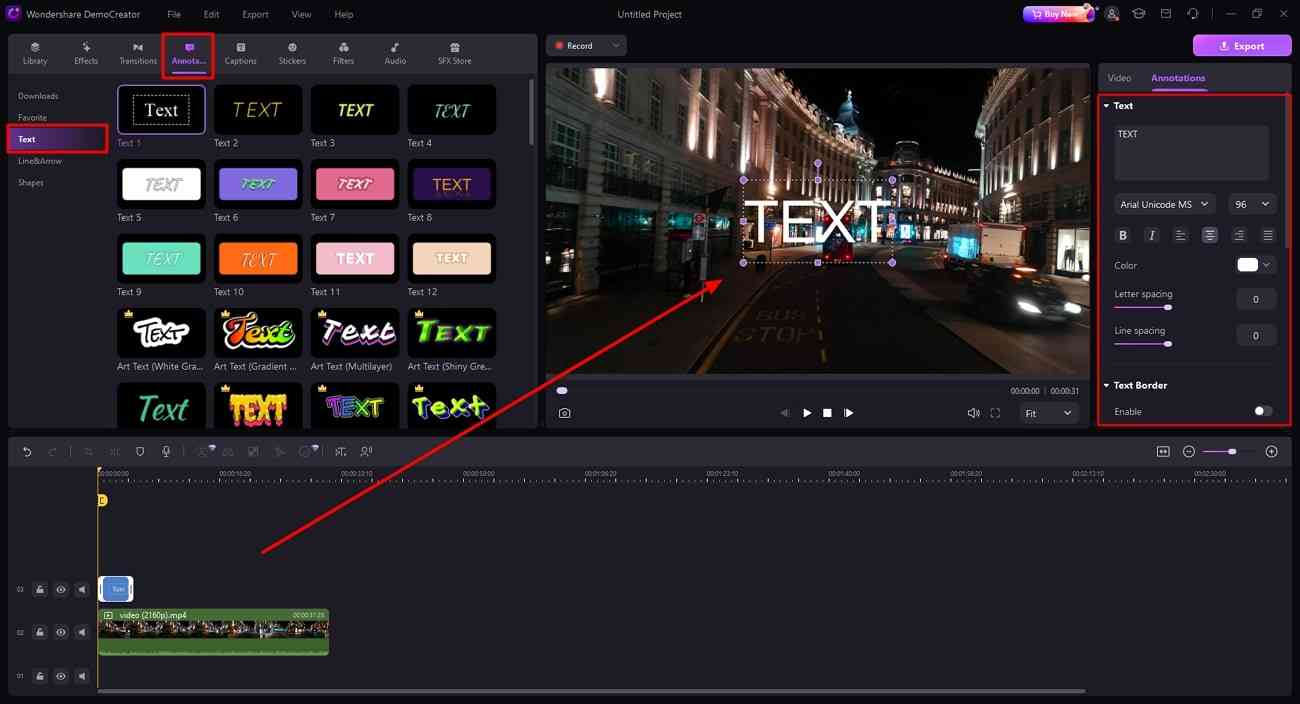
Go to the media panel toolbar and pick “Annotation” next to the “Transitions.” Go through the "Text" templates to select one and drag it to the timeline. Adjust its appearance in the video and move to the right-hand side section. Paste your text into the given section and head down to customize it. You can change the “Font,” “Alignment,” “Color,” “Letter Spacing,” and “Line Spacing” as required.
Step 3: Using Lines & Arrow to Annotate Video
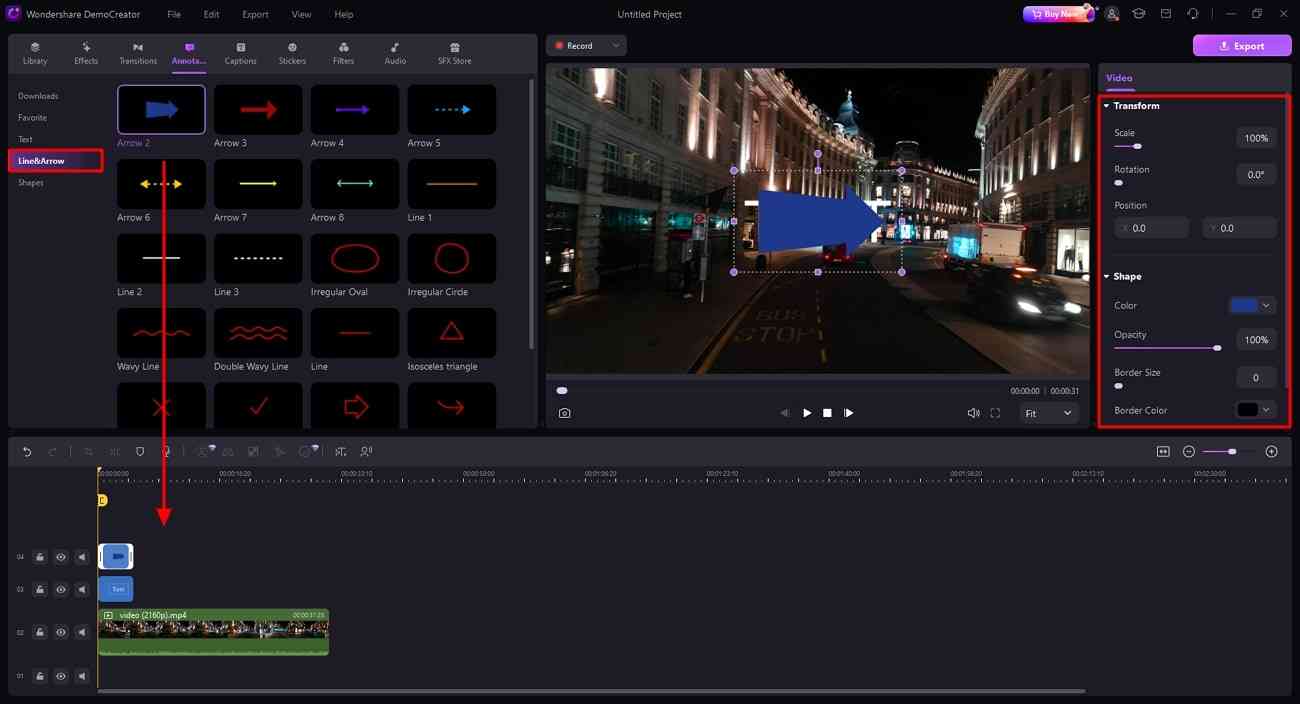
Return to the media panel and tap on “Line&Arrow” from the left side. Choose any annotation object and locate it in the timeline to align with video segments. Direct towards the right side and adjust its “Scale” with a slider. You can change “Rotation” and “Position” as desired. From the “Shape” section, users can even pick any “Color,” “Opacity,” or “Border Size.”
Step 4: Continue to Annotate with Shape or Export the Video
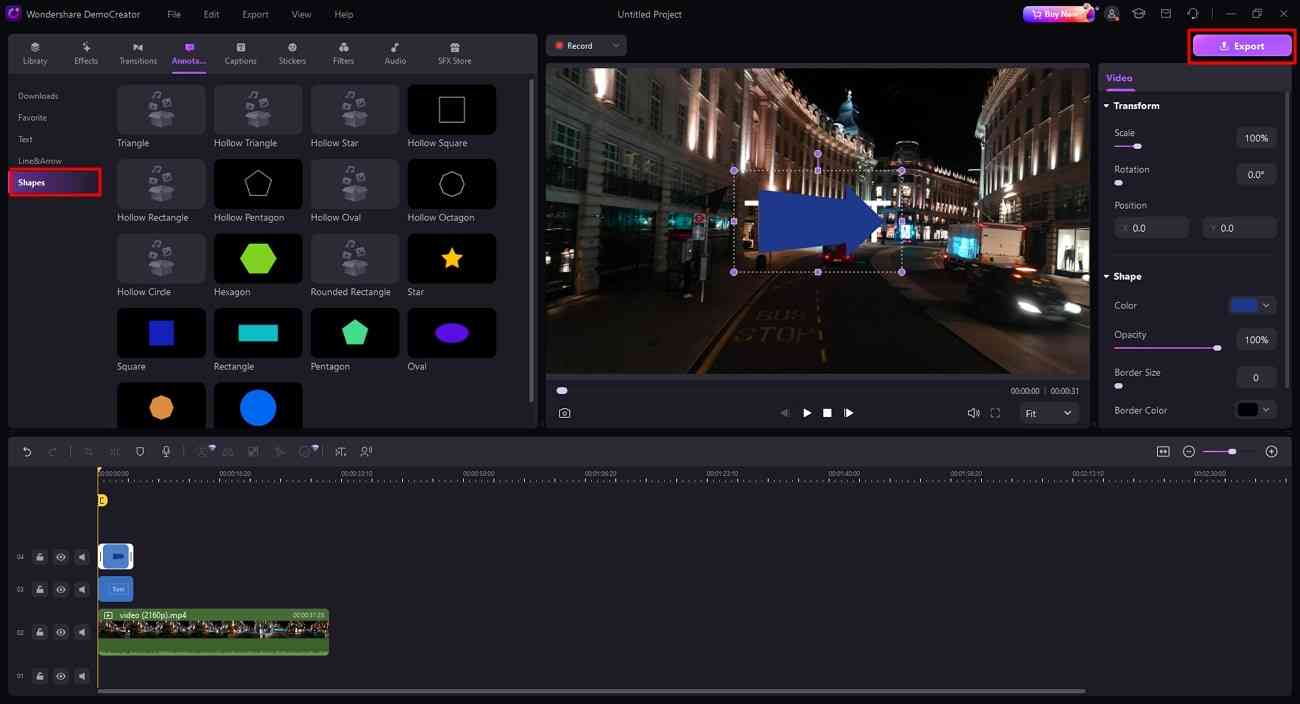
If you want to annotate the video with shapes, go to “Shapes” in the media panel. Otherwise, look for the “Export” button if you are satisfied with the results.
Part 3. Proper Alternatives to Annotate Video with Ease
No doubt, Wondershare DemoCreator is an exceptional platform for annotating video free. If you want to explore other options, find a few alternatives below. After reading them, you will be satisfied with your selection of DemoCreator:
1. Encord
Encord is an AI-powered tool to annotate videos easily. It works 6 times faster without any errors with AI-assisted labeling. Create high-quality data video with accuracy with this advanced tool. Also, it outlines the random number of sides in the video through the polyline annotation. The complex information in the video is easily conveyed with this annotation app feature.
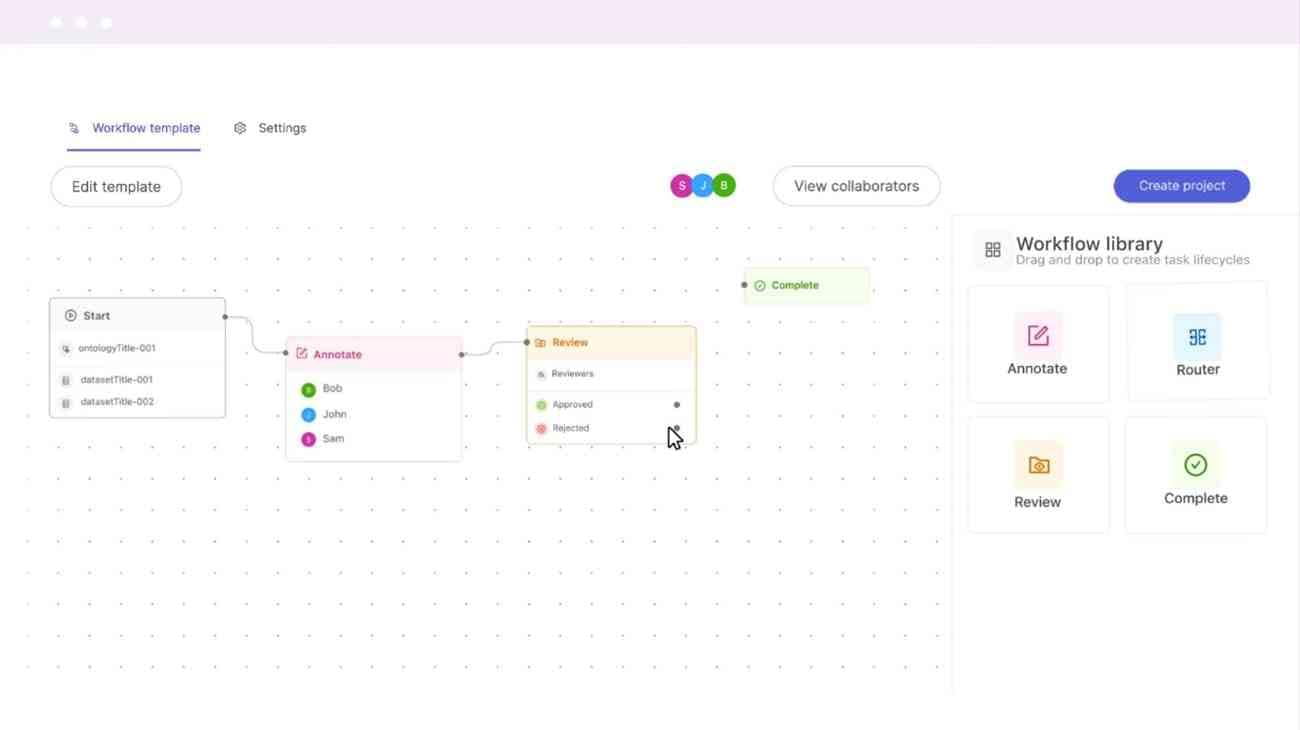
- This video annotation app makes team collaboration more effective. Team members can communicate regarding changes and reviews that need to be brought in for video editing.
- Users can achieve consistent annotation by object tracking from frame to frame. In addition to that, you can make background changes and shifts framed in a synchronizing way.
- The app has a “Hanging Protocol” feature to highlight the specific portion of the picture and video. The picture of internal body parts X-ray can be labeled separately by this feature.
2. V7
Lengthy video can take time for annotation and make the user's video editing process tiring. For this, videos of any length can be labeled properly by the auto-annotate feature in this app. You can annotate the video 10 times faster with the V7 video annotation tool. Moreover, this annotation has been widely proven to be efficient and human error-free.
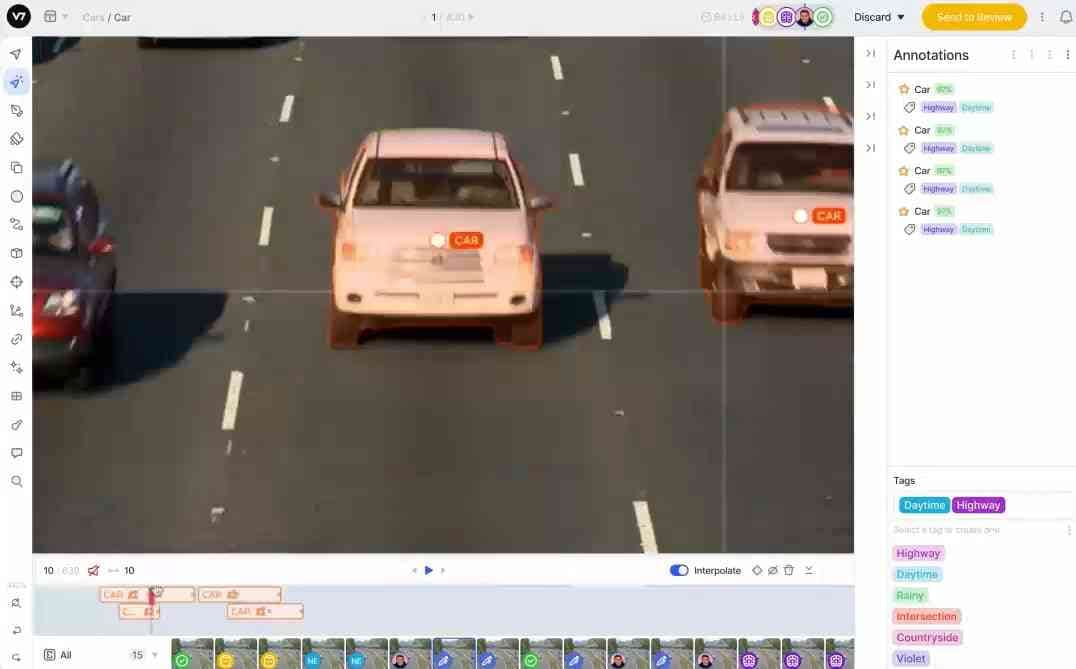
- It is the platform that annotates the video at its native frame rate. The resolution originality is maintained while labeling the video.
- You can add thousands of annotations in the video more precisely. Furthermore, this annotation can render simultaneously even with complex shapes.
- Footage from the multiple cameras can be labeled through custom layouts and grids. Custom multi-slot views option can easily compare different video frames of the same clips.
3. Super Annotate
Users can create accurate and high-quality annotations from the Super Annotate app. This video annotation app supports all the most commonly used video types and file formats. You can use its advanced feature to annotate a video super-fast. Videos can be categorized through annotation based on content and characterization.
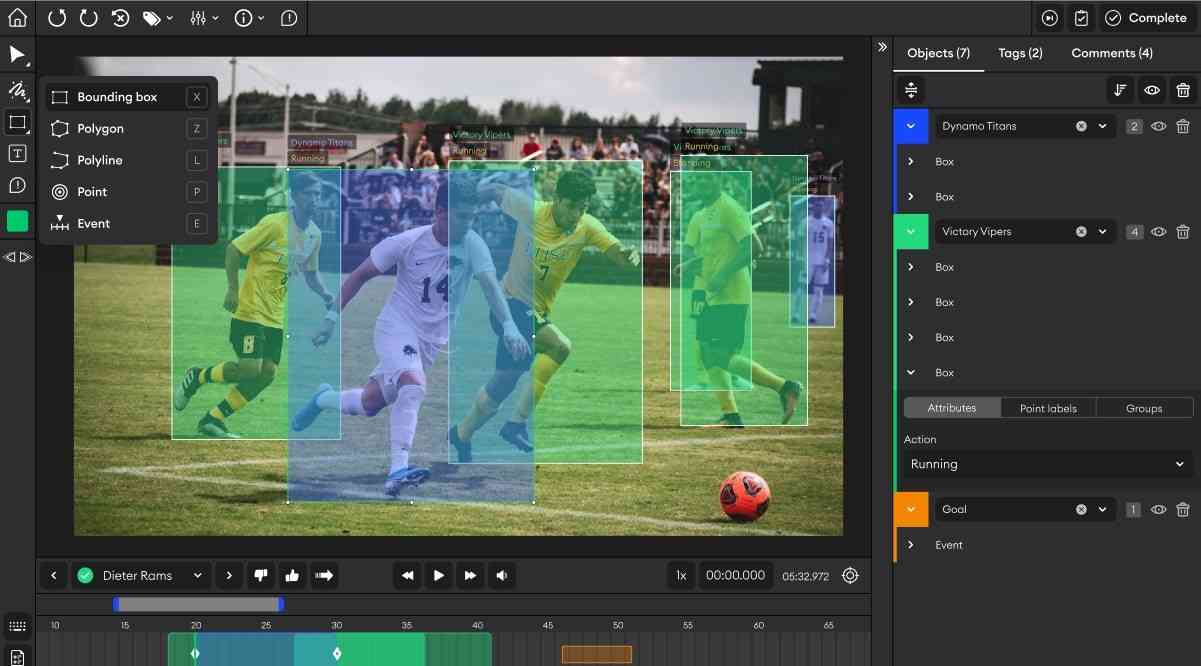
- It has a feature to track and localize the movement of objects. This localization and tracking happen by consecutive framing.
- The app has a “Pose Estimation” feature to determine the position of joints and body parts. It is helpful for the sports analyst to review the movement of a sportsperson.
- The traffic rule analyst uses the “Lane Detection” feature of the app for safety purposes. The annotation easily identifies the lane or road in the video.
Conclusion
In short, video annotation has many benefits and use cases in different settings. Annotation gives the video a professional look and delivers the message well. There are many tools to annotate the video during the video editing process. Among them, DemoCreator is a top-notch tool for video annotation with advanced features.


