Background noise in videos may annoy viewers, distracting them from the content. It can also prevent the creators from getting their message across. Your AC unit, fan, phone calls or messages, keyboard taps, and mouse clicks can ruin your audio quality. The same goes for wind, traffic noise, and other sounds in outdoor settings.
Fortunately, you can remove background noise from a video with a few clicks. It will help you create clean, crisp, studio-quality audio. Learn when and how to do it.
In this article
Part 1: When Should I Remove Background Noise From a Video?
Here are the most prominent occasions when you should remove ambient noise from videos:
- Recording online courses: Noise-free audio can help learners better understand your educational content. Nothing will distract them from your instructions, and they'll remember information more easily.
- Professional interviews: Crystal clear audio in interviews is crucial for credibility and professionalism. Anything less irritates viewers. It also prevents your interviewees from hearing you loud and clear.
- Conferences or seminars: High-quality audio without background noise helps convey intended messages and engage participants. It also eliminates misunderstandings and makes events more productive.
- Film or video production: Studio-level audio quality is vital for storytelling in film and video production. It can immerse and engage viewers, evoke emotions, and deliver a lasting impact.
Video noise cancellation is paramount while recording. However, you can also remove background noise in post-production. Wondershare DemoCreator is an excellent solution to try. Here's why and how to use it.
Part 2: How Can I Remove Background Noise From Videos?
Removing background noise from videos is a walk in the park with Wondershare DemoCreator. You don't have to jump through hoops to navigate the software and spend hours improving audio quality. You can get crystal-clear audio within seconds.
Check out who this software is perfect for and the top reasons to use it.
Why Use Wondershare DemoCreator
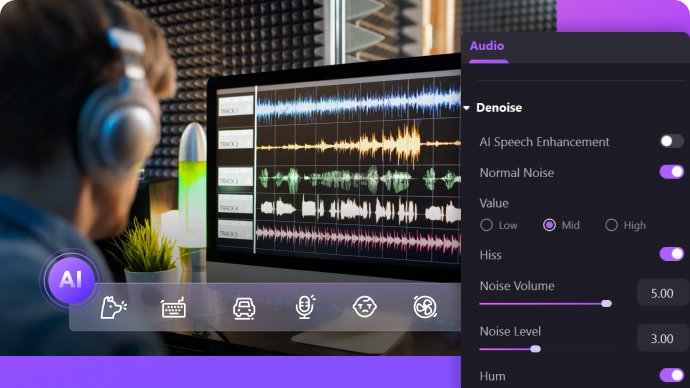
Wondershare DemoCreator is an all-in-one video recorder and editor. It features AI-powered tools for the utmost convenience. One includes AI Denoise, which lets you remove ambient noise from video and audio files in a few clicks.
Here's why it's your go-to solution for background noise reduction:
- Denoise a video in seconds: You only need to fine-tune noise filters for videos to remove background noise and get clear audio.
- Enjoy a user-friendly interface: Wondershare DemoCreator is intuitive software with a shallow learning curve. It makes the user experience frictionless.
- Leverage support for 14 formats: You don't need to convert your video and audio files. AI Denoise supports MP4, MP3, M4A, MOV, MKV, AVI, WebM, WMV, MTS, FLV, AU, VOB, OGG, and GIF.
Wondershare DemoCreator is best for newbies, seasoned video producers, educators, business professionals, journalists, podcasters, social media influencers, and other content creators and editors.
How to Use Wondershare DemoCreator
Wondershare DemoCreator offers a free trial. However, most AI-powered tools, including AI Denoise, aren't part of it. Therefore, get a paid subscription to remove background noise from video files.
Once you choose the desired pricing plan, follow these steps to denoise videos:
- Download Wondershare DemoCreator from the official website and install it on your computer.
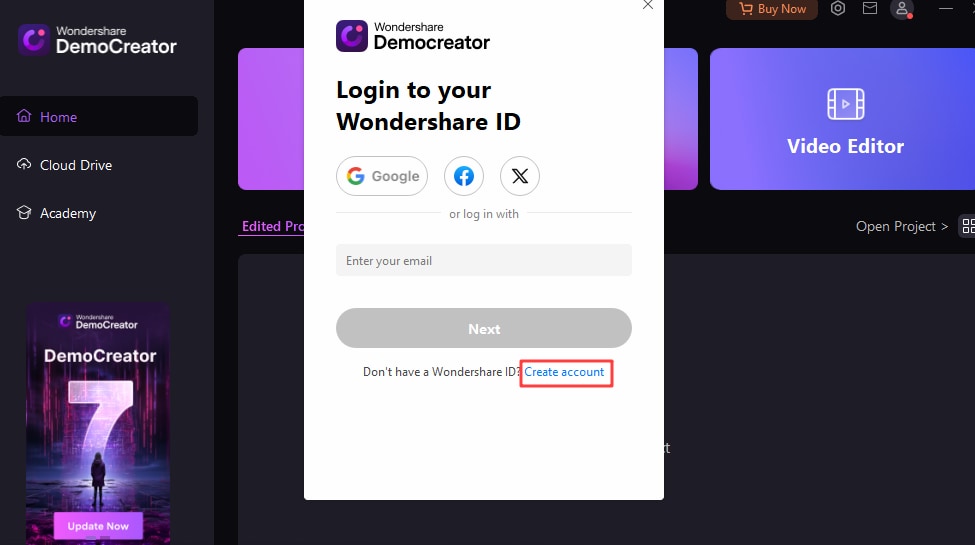
- Launch the software, click the Profile icon in the top right corner, log in with Gmail or Wondershare ID, or create a new account.
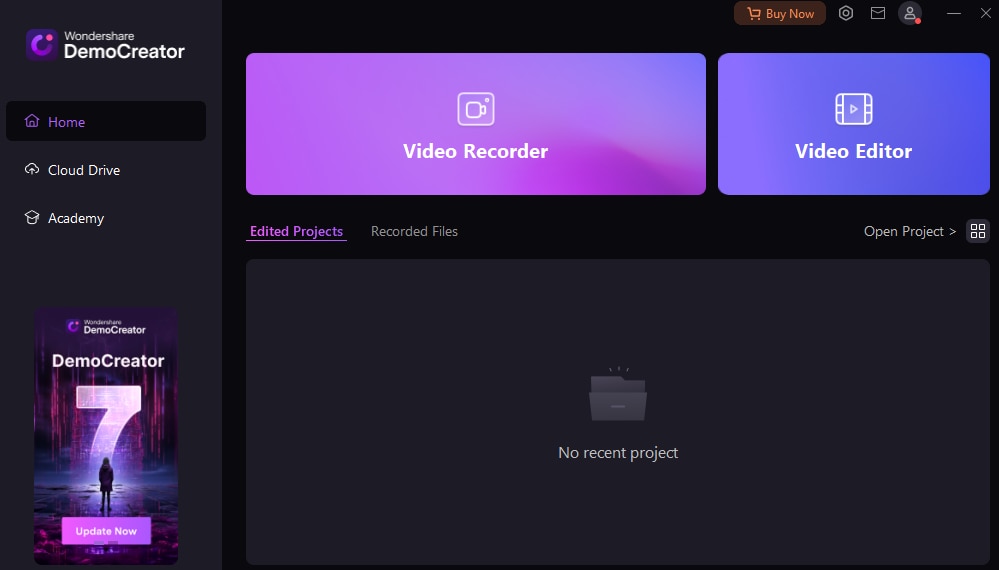
- Go to the Video Editor in the startup panel.
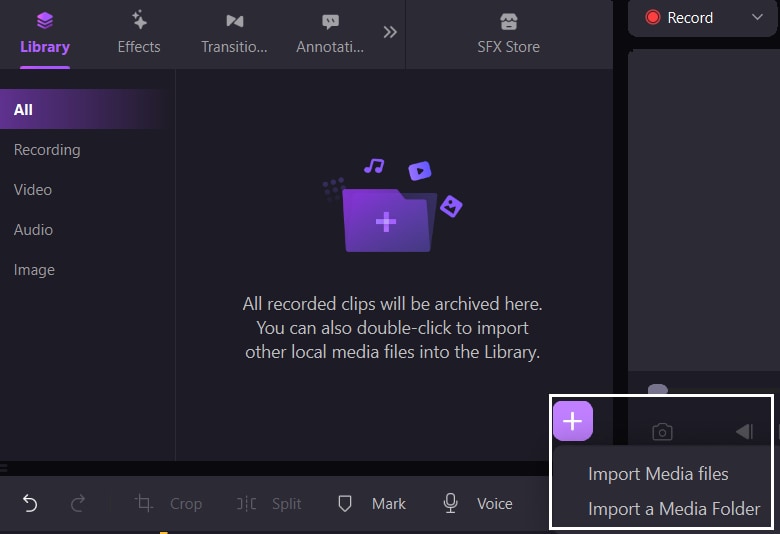
- Click the Plus icon and select Import Media Files to upload your video. Alternatively, double-click the Media Library board or go to File > Import Media Files. Once you do, drag and drop the video to the timeline in the lower section of the screen.
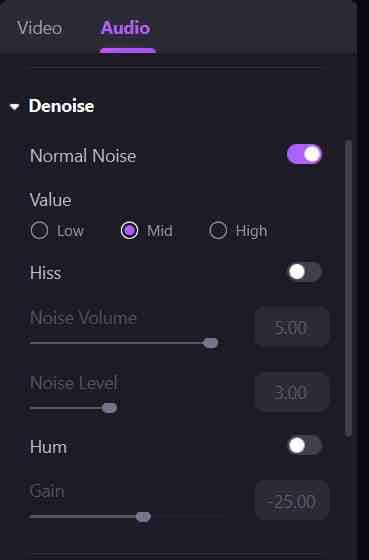
- Switch to the Audio tab in the Properties panel on the right-hand side and scroll to Denoise. Toggle the Normal Noise switch, set the Value to Low, Mid, or High, and fine-tune each applicable noise filter for the video (e.g., hisses and hums).
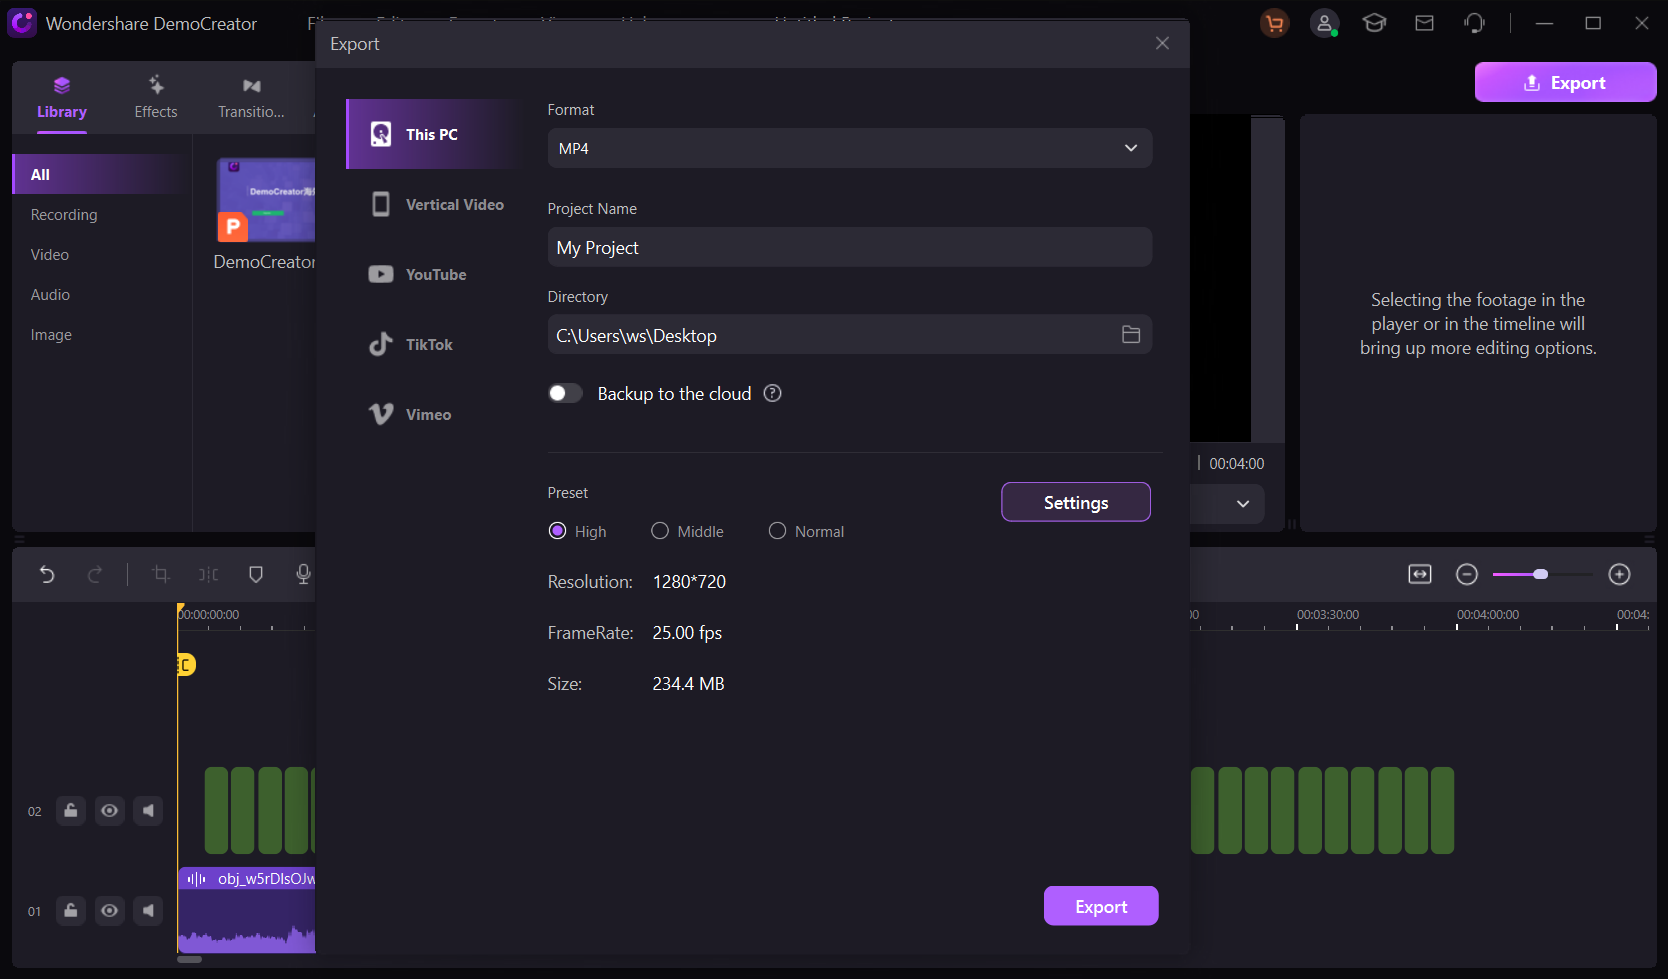
- Once you have clean audio, click Export to save the video to your device. You can also share it on YouTube, TikTok, or Vimeo from the software. Set the desired format and resolution, and hit Export or Upload.
Wondershare DemoCreator has many more features for polishing videos. Some include the green screen, sound effects, transitions, and tools for editing your camera, screen, and microphone separately. You can also use AI tools like a teleprompter, text-to-speech, auto-captions, and speech enhancement.
Part 3: Tips and Tricks to Clean Noise When Shooting Videos
AI-powered solutions like Wondershare DemoCreator let you remove ambient noise from videos in post-production with a few clicks. However, you can clean the noise from videos while recording to save time. Here are the essential steps to do the trick.
Tips and Tricks
Tip 1: Find a Quality Acoustic Environment
A controlled acoustic environment while recording is crucial for better sound quality. It lets you record natural, accurate sounds.
When recording in a room, use proper acoustic treatment to reduce unwanted reverberations and echoes. Carpets, curtains, and soft furnishings are excellent because they absorb sound. You can also dampen noise with acoustic foam barriers, soundproofing panels, and similar materials.
Don't forget to remove fans and other unnecessary acoustic noise sources. Turn off your AC unit and close the windows to block traffic noise and other sounds from the environment. Create a noise-free space for clean, consistent audio.
Are you recording outdoors? Reduce noise with a noise gate, equalization, frequency cutoffs, and acoustic foam barriers.
Tip 2: Use an External Directional Microphone
It focuses on one direction, reducing ambient noise and helping you get clean audio.
Many noise-canceling microphones have multiple polar patterns and filter settings for various environments. Whichever microphone you choose, get a sturdy mic stand and a pop filter to eliminate popping sounds, primarily plosives.
Tip 3: Put the Microphone Close to the Subject
Your mic placement is another factor that can make or break your audio. Therefore, place the microphone close to the subject (near the speaker's mouth).
It will help you achieve a high speech-to-noise or signal-to-noise ratio (SNR). The higher the SNR, the better the sound quality. Anything greater than 0 dB means that the speech is louder than the noise. An SNR of 30 dB or higher indicates clean speech, although it's intelligible even at 0 dB.
Conclusion
Video background noise reduction is vital for achieving clean audio and attracting more viewers. You can reduce ambient noise while shooting videos with a directional microphone, proper mic placement, and acoustic treatment. You can also remove it when editing with advanced software like Wondershare DemoCreator.
FAQs
-
Why do my videos have background noise?
Your microphone picks up sounds from your recording environment. It records everything, even sounds you don’t notice, such as wind and AC. If you set the volume too high, the background noise will be louder. A poor-quality mic can also affect audio quality, increasing ambient noise. -
Can I remove background noise from videos online?
You can remove ambient noise from videos online with Media.io. You only need to upload a video, choose the noise type to remove, and download the denoised file. The best part? You can download your first file for free. -
Can I remove background noise from videos on my phone?
Certainly! You can remove background noise from videos on your phone, although doing it on a computer may be more straightforward. iMovie and Denoise are among the best iOS apps for that. We recommend Noise Reduction and Noise Eraser if you’re an Android user.


