"How do I remove the background noise in Audacity?" We found many inquiries like this in Quora.
With almost 25 years of experience in the industry, Audacity is one of the most popular free audio editing and recording tools. Its noise-reduction feature is a powerful solution for sound engineers and editors trying to reduce the amount of background noise, regardless of their skill level.
The Audacity app also includes a wide variety of tools that can optimize the sound quality of your recordings. Its noise reduction feature is imperfect but does the job in countless situations.
Keep reading to learn about noise reduction with Audacity. We'll teach you how to use it, give you a few tips for reducing background noise in the future, and show you an excellent alternative app.
In this article
How to Reduce Background Noise in Audacity
One of the main advantages of Audacity's background noise reduction tool is its ease of use. You only need to follow these simple steps:
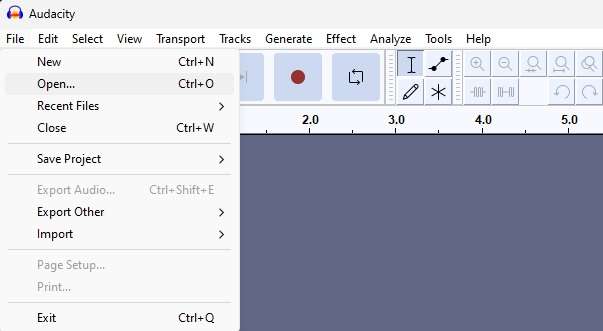
- Open Audacity on your computer and import your audio file by navigating to File > Open.
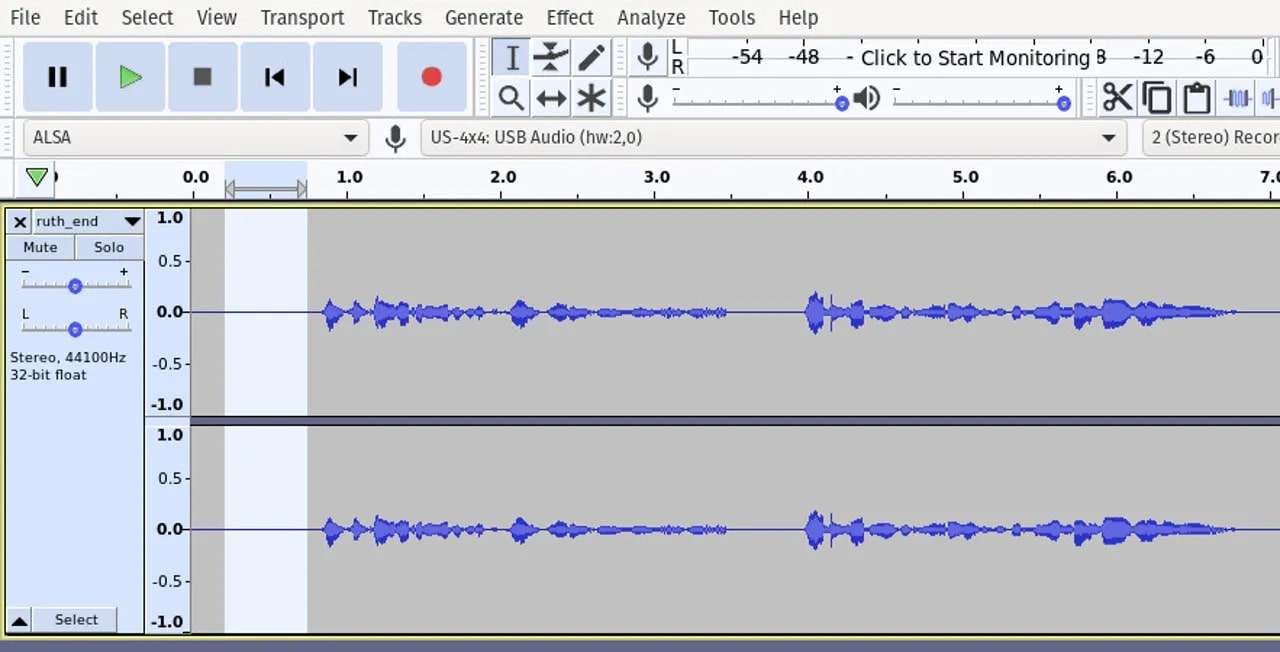
- Select the first few seconds of your audio file to help the Audacity app identify background noise from recorded voices. You can do this by clicking on a part of the recording and dragging the mouse to a part before the voice.
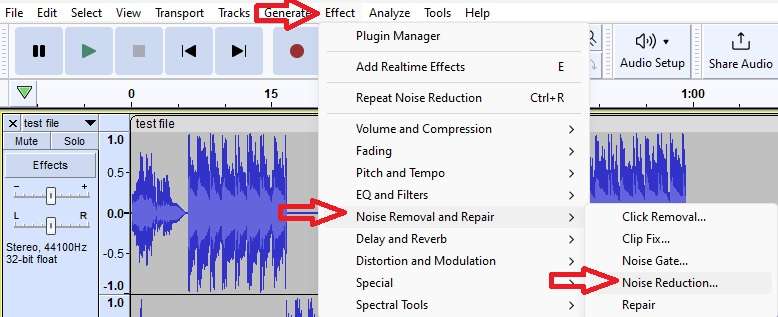
- Navigate to Effect > Noise Removal and Repair > Noise Reduction.
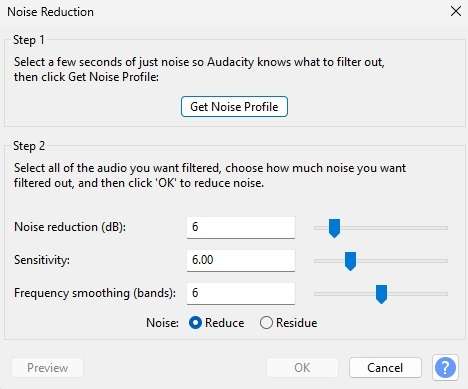
- Tap the Get Noise Profile button at the top and click OK.
- Then, select the entire audio track. You can do this by pressing CTRL + A on your keyboard or dragging the mouse from the beginning of the track to its end.
- Once again, navigate to Effect > Noise Removal and Repair > Noise Reduction. Tap OK, and the app will remove the background noise based on the noise profile of the selected few seconds of your track.
That's all there is to it. In most cases, Audacity's background noise reduction will serve its purpose and remove unwanted hums and hisses from your recording.
Whether Audacity's background noise reduction didn't work or you didn't achieve the desired effect, there's no need to panic, as you can still try a few tricks to achieve a better effect.
Things You Can Do to Make Audacity Noise Reduction More Effective
- Apply the Noise Reduction effect a few times;
- Use the Noise Reduction tool with different sound selections;
- Use the app's Residue setting to check which background noises are getting removed;
- Utilize Audacity's Noise Gate effect to adjust your track's settings further;
- Investigate the app's Volume and Compression effects and try its Filters.
While it's a free and open-source app, Audacity provides a wide variety of high-quality effects that can help achieve pristine sound quality. However, Audacity's noise reduction feature needs to pay more attention to sensitivity. It isn't realistically possible with a single click and will require patience. In that case, if you are looking for a simple one-click solution, let's try Wondershare DemoCreator.
A More Effective Alternative: DemoCreator
Unlike Audacity, Wondershare DemoCreator doesn't require selecting background noise or creating a noise profile. Instead, it relies on advanced AI algorithms to do everything for you and can remove nearly any unwanted noise.
Using Wondershare DemoCreator is an even more straightforward process. Here's everything you'll need to do:
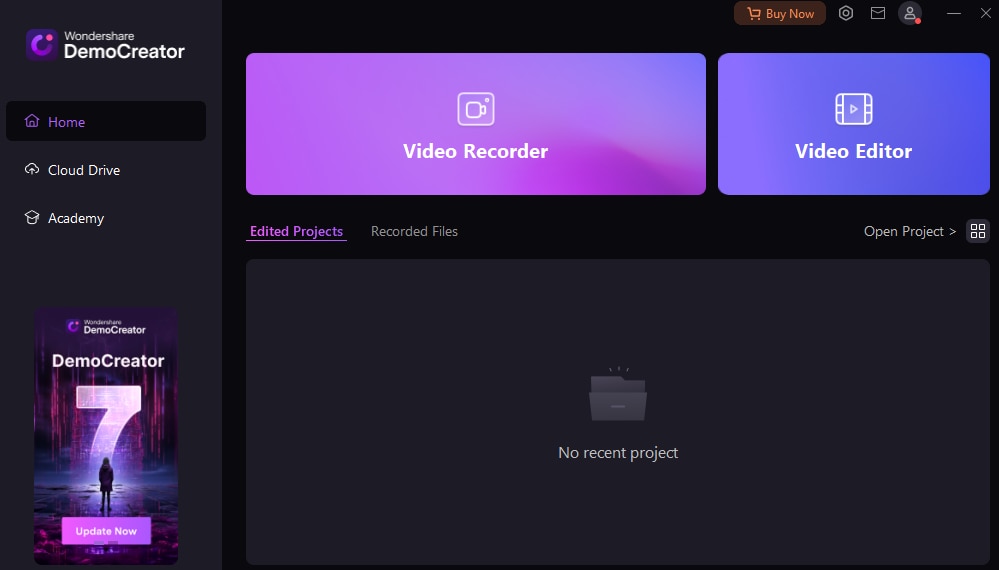
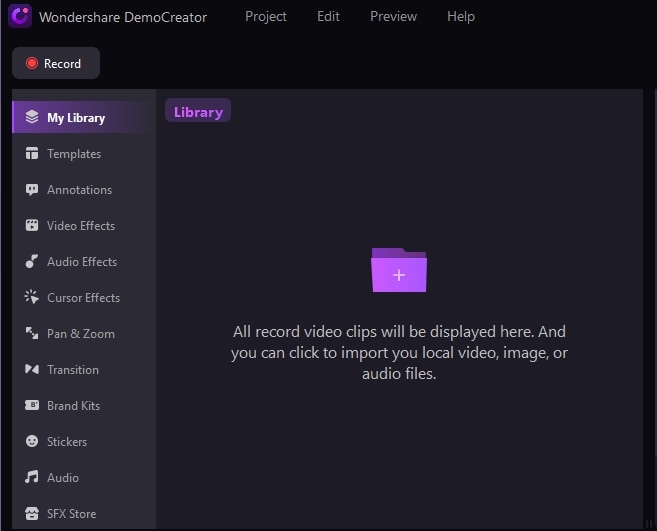
- Launch the app and select Video Editor. (Don't worry, DemoCreator works with audio, too).
- Add your track to the editor and drag it into the timeline.
- Select the audio track in the timeline and navigate to the Audio tab in the right sidebar.
- Scroll until you see the Denoise tab and apply the Normal Noise effect.
- Play and review the audio track to check the feature's quality or apply additional Audio editing settings.
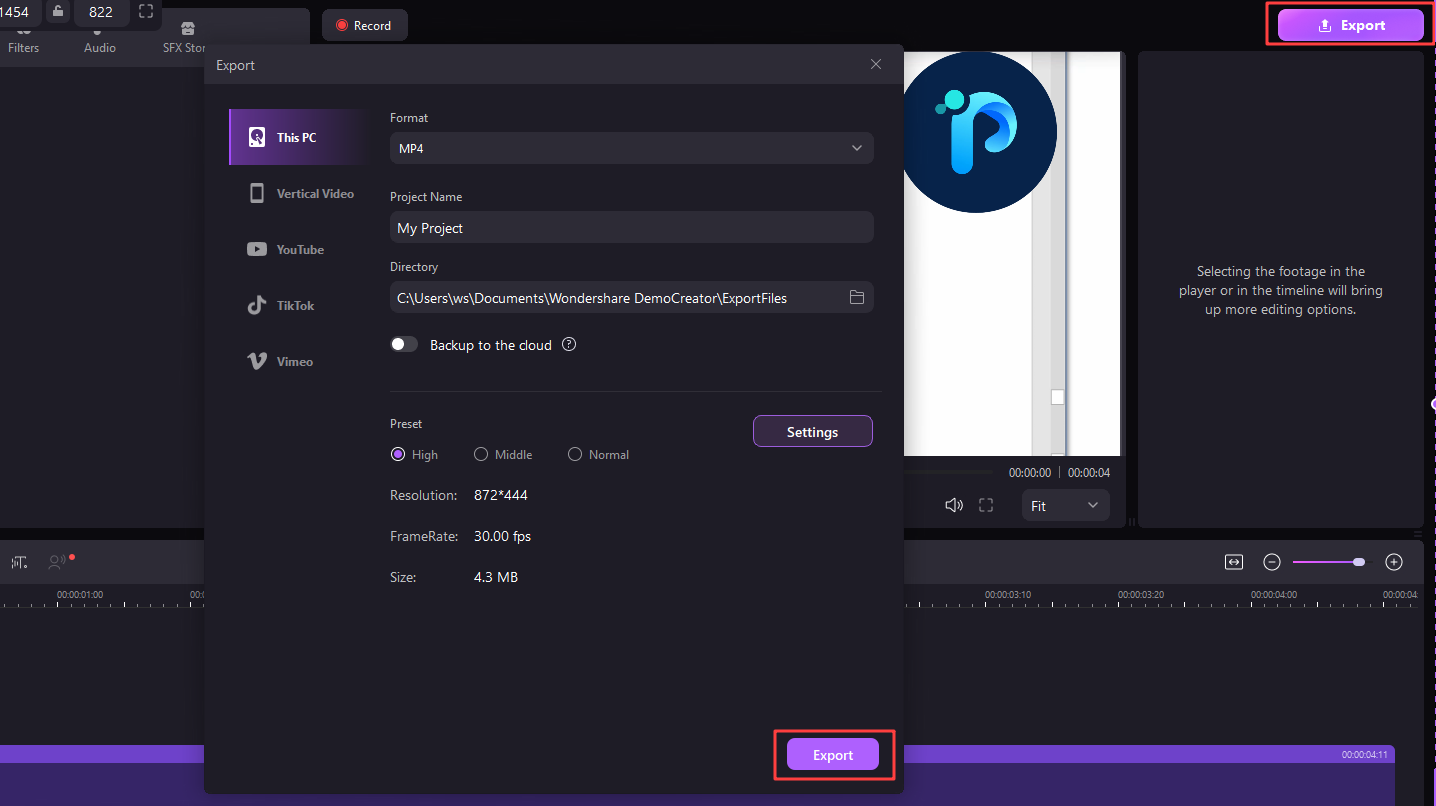
- When ready, click the Export button at the top right, adjust your settings, and save the file to your device.
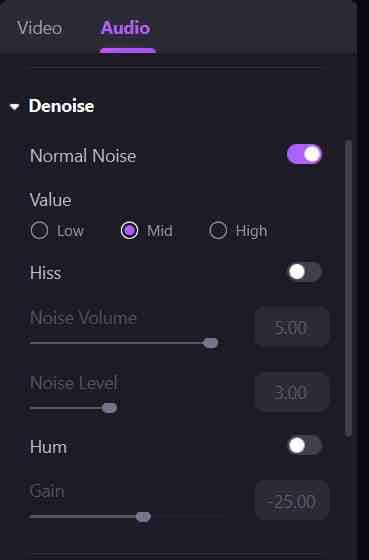
Wondershare DemoCreator can automatically recognize the background noises and denoise them in seconds. It also offers many more customization options in the Audio tab. That way, it provides more creative freedom and allows you to adjust and add sound effects to your liking.
Tips for Preventing Background Noise in the Future
While recording crystal-clear audio tracks isn't always possible, there are a few things you should consider when creating a new recording:
- Avoid recording in empty rooms or buildings, as there's no sound-absorbing furniture;
- Take your pets outside or keep them behind doors during recording sessions;
- Place your mic far from electrical appliances to avoid hums you're used to but your mic isn't;
- Sit or stand closer to your microphone and invest in a microphone windscreen;
- Hang a heavier blanket over your windows to dampen outside sound sources;
- Invest in sound-dampening material if you're constantly recording.
Although your next recording may not be perfect, with these in mind, you'll have a significantly smaller amount of background noise.
Conclusion
Whether you're an amateur singer or a professional sound engineer, recording audio doesn't always go as expected. It's often followed by unwanted background noises.
Fortunately, you can remove these sounds when editing. The great thing about an app like Audacity is that it offers a robust solution for such tasks. Its Noise Reduction plugin is excellent at removing unwanted sounds like hisses, hums, etc.
However, Audacity is not the only solution to this problem, as an alternative like Wondershare DemoCreator represents an even more robust tool. The latter's AI-powered noise reduction tool is far easier to use. That's why it's a better option for amateur and professional audio engineers alike.


