

Grain and noise are unavoidable regardless of the quality of your equipment or video creator skills. Many video content creators are trying to find a viable solution for these issues during their post-production processes. Luckily, one of Adobe's apps sits comfortably at the top of the software pile – Adobe After Effects. Its noise reduction and grain removal features make it one of the best solutions to these issues.
Stay with us, and we'll teach you the steps to grain removal in After Effects. We'll also explain why noise and grain happen to videos.
In this article
Causes of Noise/Grain and Benefits of Noise Reduction
Before we get into the After Effects noise reduction or grain removal process, we must first investigate why noise and grain happen to avoid these issues afterward and the benefits of removing them from the video.
| Causes of Noise/Grain | Benefits of Noise/Grain Reduction |
|---|---|
| Low Light Conditions | Clear Image/Video |
| Unadjusted Camera Settings | Enjoyable Content |
| Lower-Quality Equipment | Higher Viewer Retention |
Although there might be other reasons for noisy and grainy videos, these are the most common. Whether you're an amateur YouTuber, a TikToker, or a professional videographer, achieving high-quality shots is one of the most vital goals of video content creation. Therefore, grain removal and video denoising are pivotal, helping you create significantly better final results.
2 Solutions to Remove Noise/Grain from Video In [Adobe] After Effects
Fortunately for video content creators, software solutions can easily remove noise or grain from your clips. Let's explore the two most popular solutions to denoise in After Effects.
Solution 1: Remove Noise/Grain from Video in Adobe After Effects
As a company, Adobe has been in the image/video editing industry for over three decades. Its After Effects software is among the leading tools most post-production specialists use for editing tasks. The app also includes noise and grain removal features. Here's how you can use these effects:
- Launch the Adobe After Effects app on your computer, import your video, and drop it into the timeline.
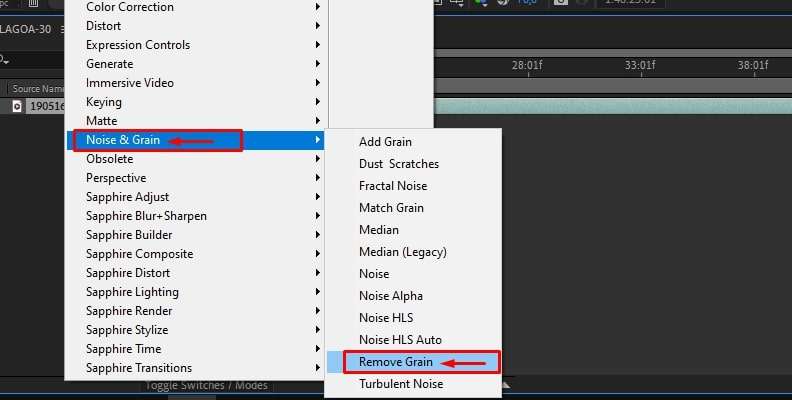
- Select the clip in the timeline and navigate to Effect> Noise and Grain> Remove Grain. (Using the Noise effect requires similar steps.)
- The effect will automatically apply noise reduction and grain removal techniques, and you'll see a preview of how the clip will look if you leave it as is.
- You can also manually adjust the effect's settings. First, navigate to Effect Controls. Then, change the Viewing Mode to Noise Sample, select the Sampling tab, and shift Sample Selection to Manual.
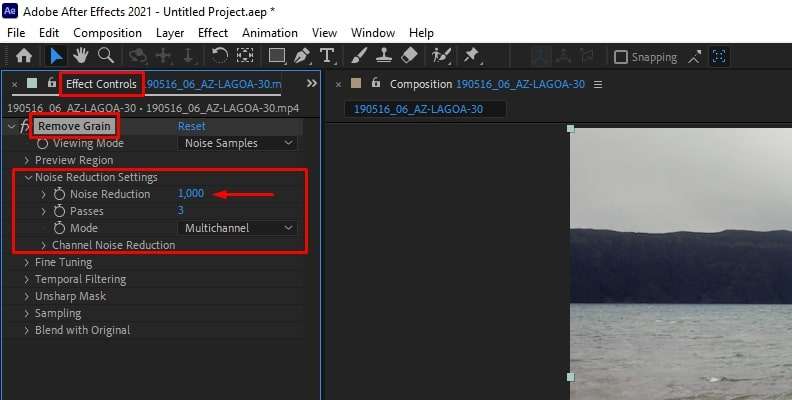
- Select the Noise Reduction Settings tab, adjust the Noise Reduction setting, and check the preview to see how it affects your image. Passes and Mode settings can also be adjusted.
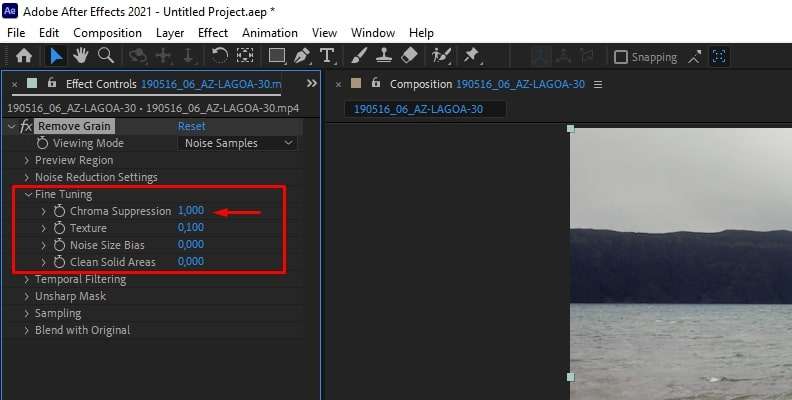
- Navigate to the Fine Tuning tab. Then, alter the Chroma Suppression, Texture, Noise Size Bias, and Clean Solid Areas settings until you're happy with the results.
- Finally, you can also experiment with the Temporal Filtering tab. When satisfied with the results, navigate to File> Export> Add to Media Encoder Queue to adjust your settings and export the denoised video.

Note: You don't have to bother with steps four to seven if you're happy with the Remove Grain effect's automatic settings and results.
Solution 2: Remove Noise/Grain from Video in Adobe After Effects with Plug-in
The built-in Remove Grain effect can reduce noise and remove grain in After Effects. However, it's not the only way to eliminate these pesky elements from your videos. Adobe's app also supports plug-ins. Here, Neat Video emerges as an excellent alternative to the built-in tool. Here are the steps to using it:
- Open the Adobe After Effects app at least once, go through the tutorial, then close the app.
- Download the Neat Video plug-in from the official website and follow the installation instructions.
- Once you've installed Neat Video's plug-in, relaunch the Adobe After Effects app, import your grainy or noisy clip, and add it to the timeline.
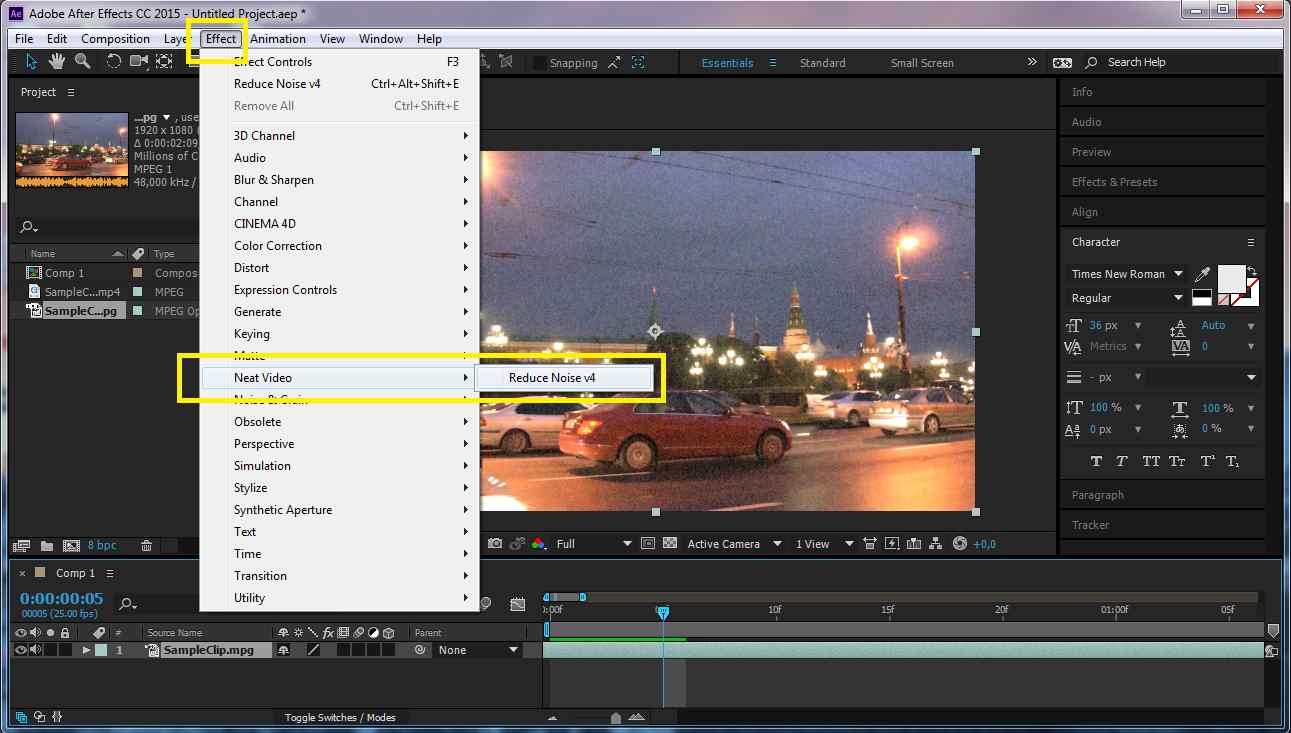
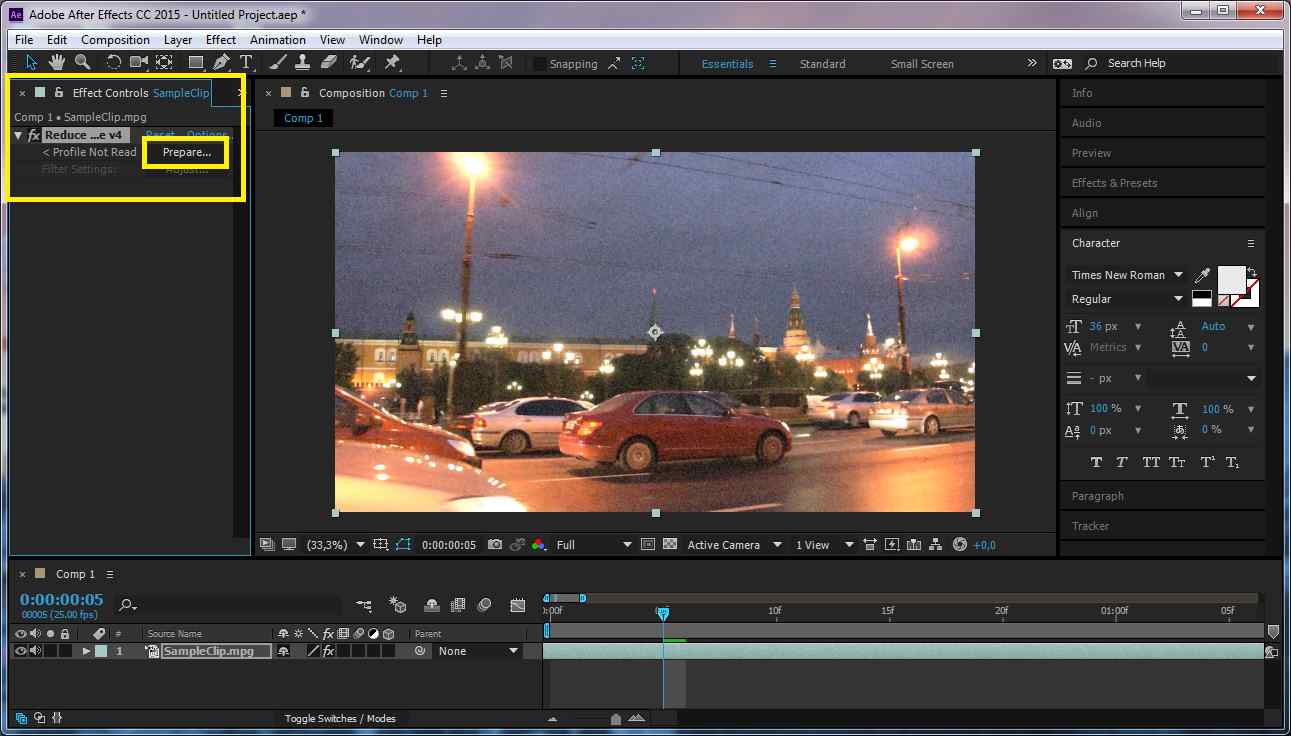
- Select the layer from the timeline, and navigate to Effect> Neat Video> Reduce Noise v4.
- Return to the timeline and select a frame with noise or grain, which will be used for analysis.
- In the Effect Controls panel, tap the Prepare button to let the plug-in analyze the video.
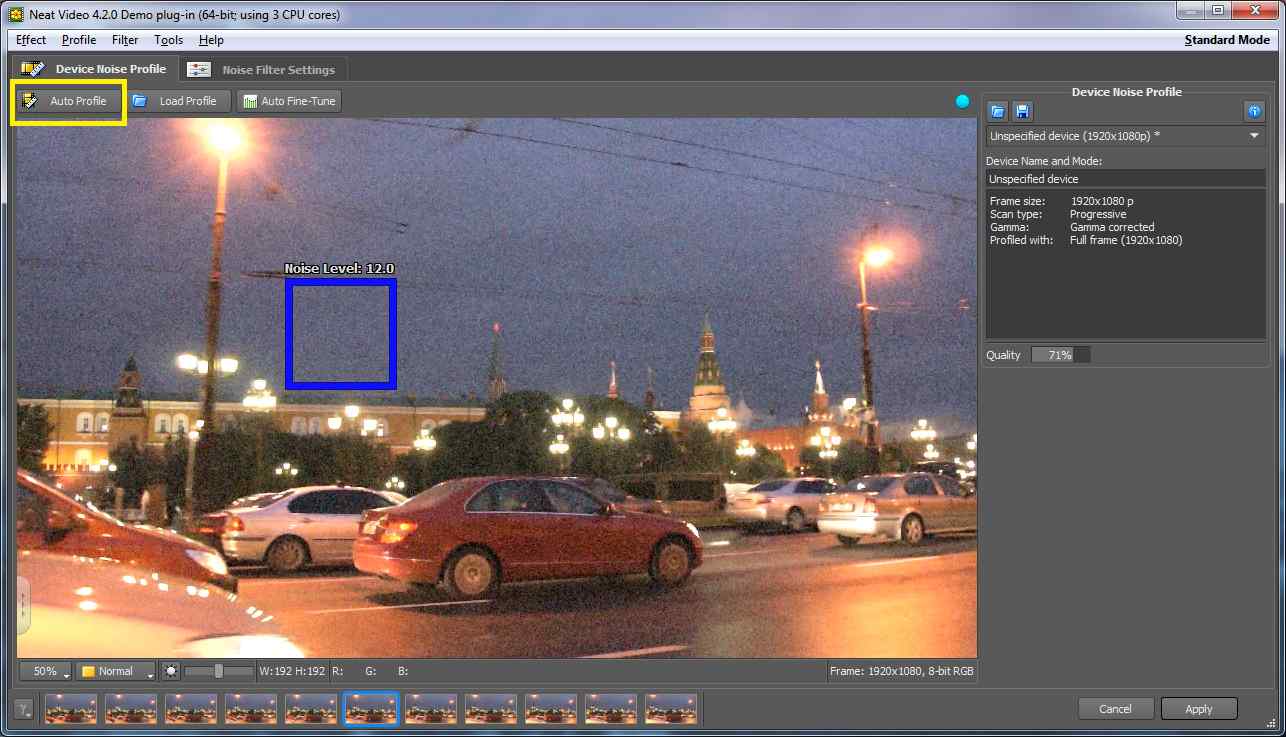
- A new window will open with Neat Video's plug-in. Tap the Auto Profile button to let the plug-in automatically build a noise profile and ensure the select area contains only noise.
- Click the Noise Filter Settings tab and adjust the settings to your liking. When ready, tap the Apply button to save the final results.
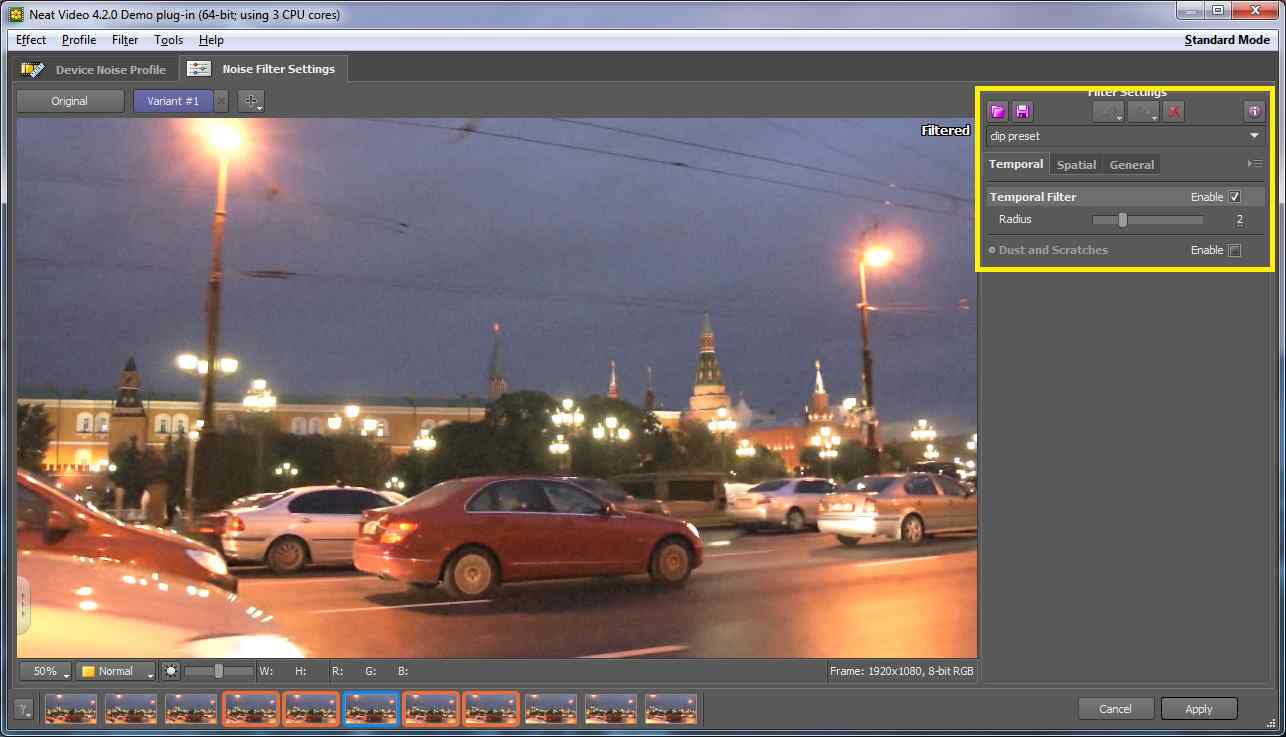
Once the Neat Video window closes, preview the clip by navigating to Composition> Preview> Play Current Preview. If you're satisfied with the results, render the denoised clip and save it to your PC.
Conclusion
Noise and grain are unavoidable video elements, regardless of your skills and equipment. Wrong camera settings and low-light conditions often cause these issues, which are even more significant when recording with low-quality cameras and lenses.
However, clear imaging can also remove these elements and produce high-quality videos. It helps you create more enjoyable content and keep your viewer retention high. Most users love Adobe After Effects, using its built-in Noise and Reduce Grain effects or adding a Neat Video plug-in.
It's worth noting there are also fantastic solutions for audio noise removal, such as Wondershare DemoCreator. This tool uses AI to power its Denoiser feature, making it excellent at handling audio noise. The app is also available for a far smaller subscription price.
FAQs
-
Is there DeNoise in After Effects?
Yes, Adobe After Effects denoiser is a built-in tool that lets users remove background noise from their clips. You can find the denoiser tool by navigating to Effects > Noise and Grain > Noise. -
How do I fix grainy footage in After Effects?
There are two ways to handle grain removal in After Effects. You can use the app’s built-in Remove Grain effect. Alternatively, get a specialized plug-in from Neat Video called Reduce Noise v4. This plug-in allows more post-production control and supports per-channel degraining. -
How do you remove background noise in After Effects?
Applying the Noise Reduction effect in After Effects requires using the app’s Effects and Presets. Here’s how you can do that:- Load the app and import the footage.
- Head to the Effects and Presets sidebar on the right and search for Levels.
- In the Effect Controls menu on the left, find the Input White setting and check for background noise.
- Search for Remove Grain in the Effects and Presets sidebar.
- Move the white square and select the noisiest part of the footage.
- Go to Noise Reduction Settings and Fine Tuning menus in Effect Controls and adjust them until the noise is removed from your footage.


