

Adobe Premiere Pro is an excellent video editor with dozens of tools for polishing videos. Some of the most prominent features focus on removing background noise from audio tracks and grain from recorded footage.
The software isn't free, but you're in for a treat if you have a Premiere Pro subscription or a Creative Cloud membership. Forget about grainy videos and ambient noise that ruins your audio. Discover the best methods for noise reduction for Premiere Pro videos and master timeline-based editing.
In this article
Part 1: What Is Noise Reduction?
Noise reduction in video editing involves removing grain and other unwanted digital noise from recorded footage. For instance, high ISO settings and low-light conditions can cause discoloration and create a pixelated look. Specialized tools like Premiere Pro can denoise videos, improving their quality.
Noise reduction in audio editing includes reducing or eliminating background noise like hums, hisses, white noise, mouse clicks, keyboard taps, static noise, and other sounds that distract listeners. The goal is to clean up the audio to make speech intelligible while keeping other sounds natural and not compromising quality.
Part 2: 3 Ways to Remove Noise From Videos in Premiere Pro
The following Premiere Pro noise removal methods include your go-to tools for enhancing video quality and require no advanced skills.
Method 1: Using the Median Effect
The Median effect in Premiere Pro blurs the grainy bits in your video instead of removing them. That way, it creates a smooth look. However, it doesn't automatically provide the desired result. It requires adjusting the radius and adding masks for all blurry areas throughout the video.
Here's how to remove noise from a video with Premiere Pro's Median effect:
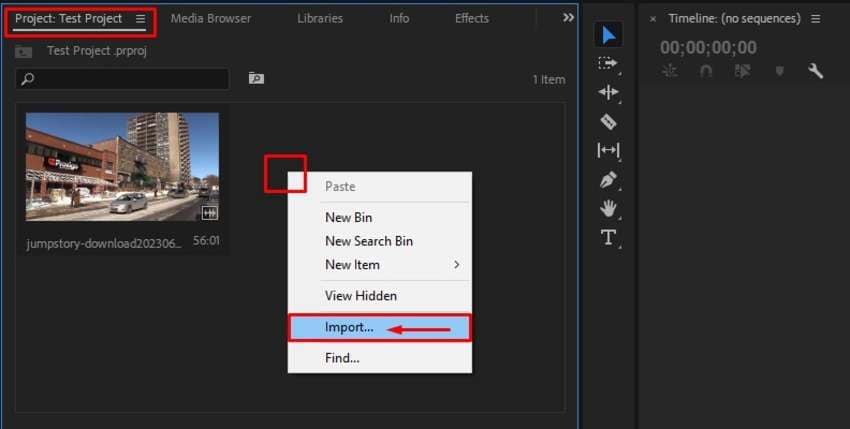
- Launch Premiere Pro. Click New Project, select a folder containing your video, right-click the Project panel, and click Import to add your video.
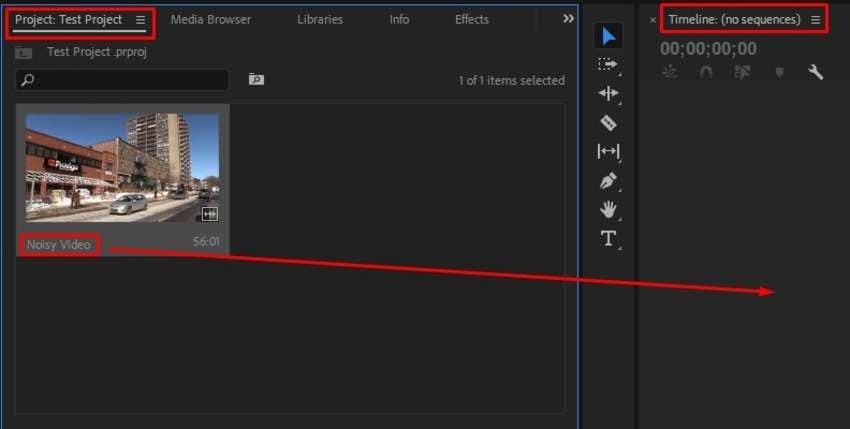
- Drag the video to the timeline to create a sequence.
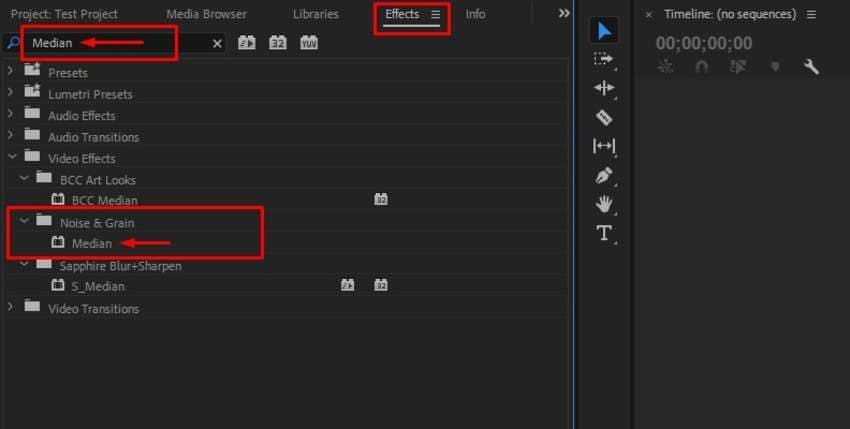
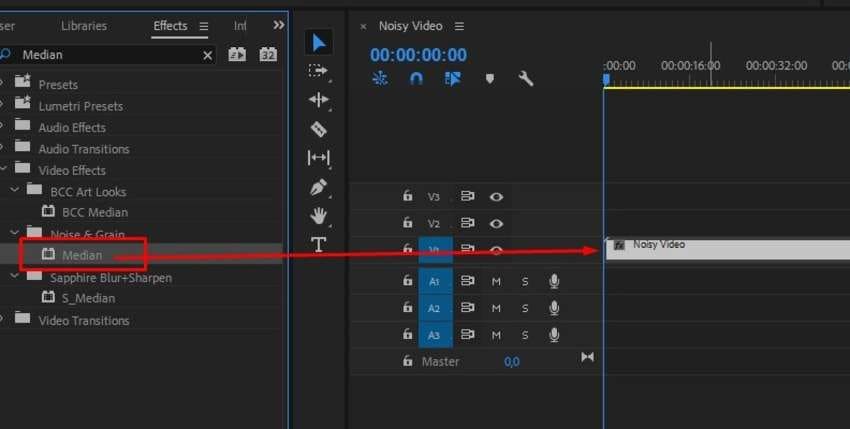
- Click the video, go to the Effects panel, and type Median into the search box. You'll find it under Noise & Grain in Video Effects.
- Apply the Median effect by dragging it to your video on the timeline.
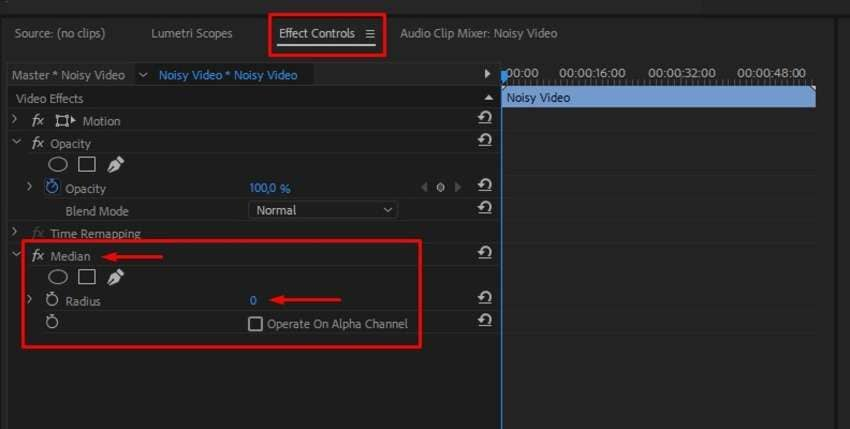
- Expand the Median in the Effect Controls panel and change the Radius value. It's zero by default, so increase it gradually until you achieve the desired result.
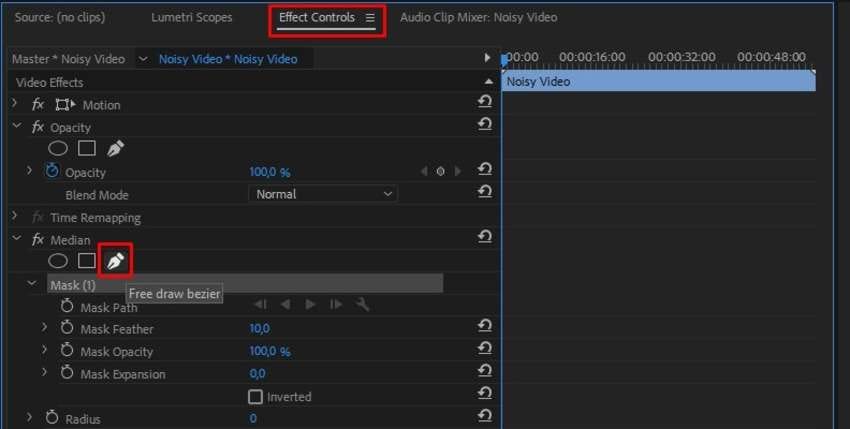
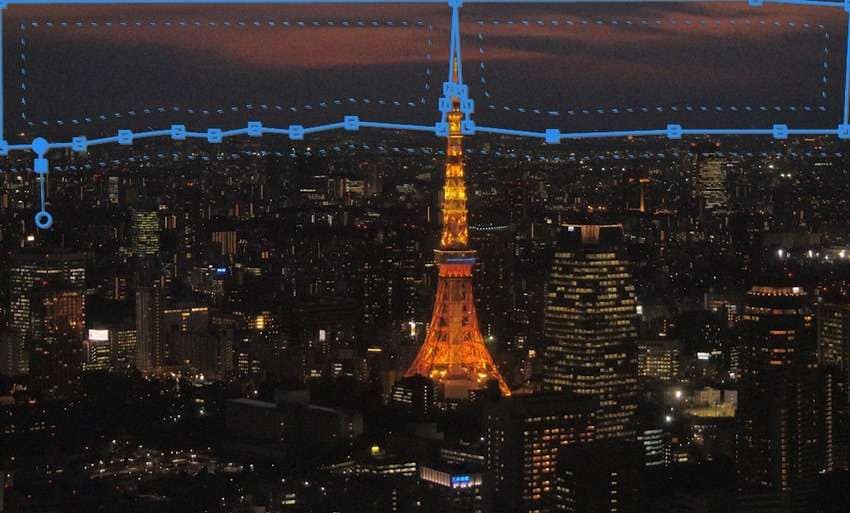
- Find the Mask effects under Median in the Effect Controls panel and add a mask for every grainy part in the video, but remember that they stay in place.
- The Pen tool can help you free-draw the masks before changing the Feather value (preferably to +100) to smoothen the edges. Once you create mask paths, readjust the Radius to find the sweet spot.
Method 2: Using Adobe After Effects
The Median effect for grain removal in Premiere Pro doesn't always provide the best results. It blurs your entire video, and although masks help, they're better for still images.
Therefore, you can try Adobe After Effects, which is ideal for motion graphics and video compositions. However, you don't need to close your project and leave Premiere Pro after applying the Median effect (if at all). You can do it directly from Premiere Pro.
Here's how to create a dynamically linked clip to use After Effects alongside Premiere Pro:
- Import your video to Premiere Pro (go to New Project > File > Import) and drag it to the timeline (if you haven't followed Method 1 in this guide).
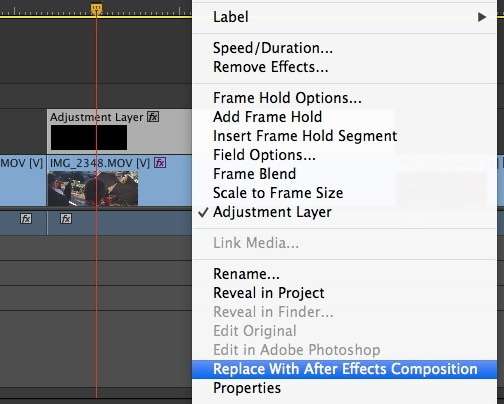
- Right-click the video on the timeline and click Replace With After Effects Composition.
- Once Adobe After Effects launches, go to the Effect Controls panel, find Remove Grain, and drag it to the video on the timeline. You can then adjust multiple settings, including Noise Reduction (higher values will make the video more blurry) and Temporal Filtering (ideal for decreasing unwanted noise between frames).


Method 3: Using Premiere Pro Noise Reduction Plugin: Boris FX Continuum
Boris FX Continuum is an excellent plugin collection for Premiere Pro, After Effects, and other video editing software. It has 5,000+ presets, 300+ effects, 40 transitions, and many AI-powered tools for content creators, including a denoiser.
Here's how to use the Boris FX Continuum's Premiere Pro noise reduction plugin:
- Download and install the Boris FX Continuum plugin package for Adobe Premiere Pro on your computer.
- Launch Premiere Pro. If you've already edited your noisy video with the methods above, click Open Project, select the video, add it to the Project panel, and drag it to the timeline. Otherwise, click New Project, select the relevant folder, right-click the Project panel, hit Import, choose the grainy video, and drag it to the timeline.
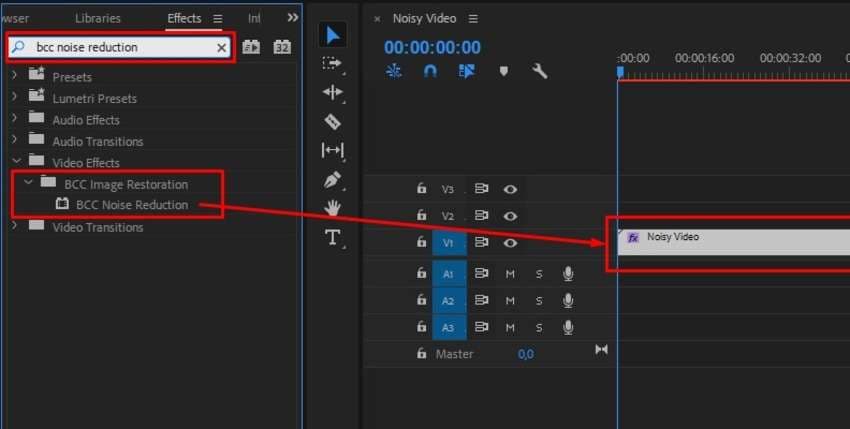
- Click the video, go to the Effects panel, and search for BCC Noise Reduction. You'll find it under BCC Image Restoration in Video Effects. Apply it by dragging it to your video on the timeline.
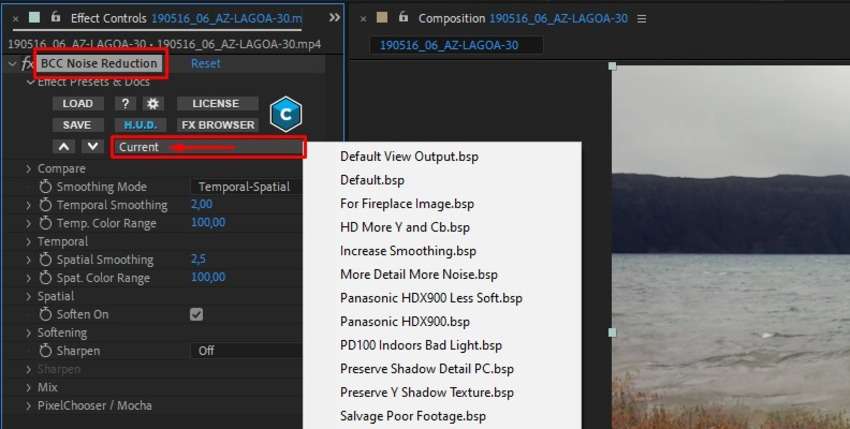
- Expand BCC Noise Reduction in the Effect Controls panel and choose the desired preset. You can then tweak other settings like Temporal and Spatial Smoothing for multiple video frames and still shots (respectively) before softening or sharpening various areas to prevent losing detail.

Part 3: Bonus Tip: Can I Also Remove Background Noise from Videos?
Yes. You can remove background noise from videos with a click using AI-powered software like Wondershare DemoCreator. This video and audio editing solution has multiple tools, including AI Denoise, which eliminates ambient noise like hums, hisses, and wind. Here's how to use it:
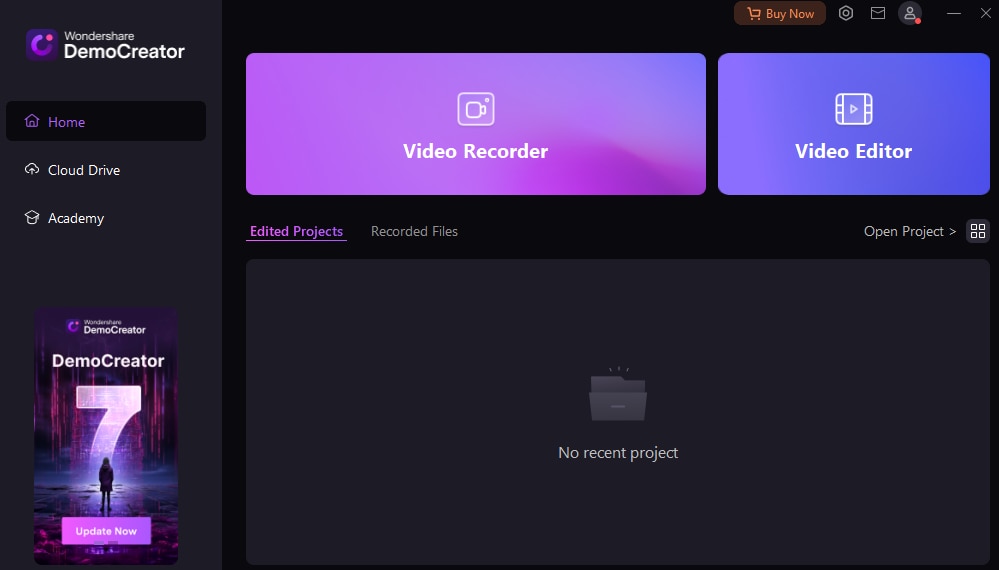
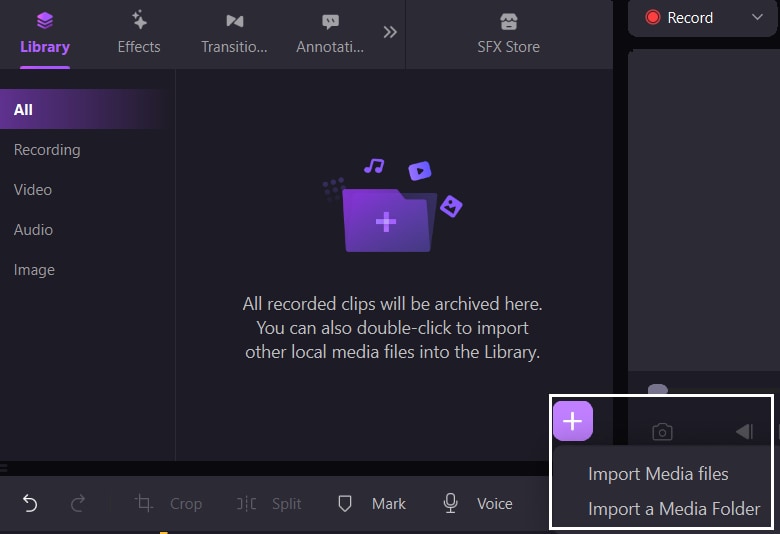
- Download and install DemoCreator on your computer and click Video Editor in the startup panel.
- Click the Plus icon, select Import Media Files, choose your noisy video, and drag it to the timeline below.
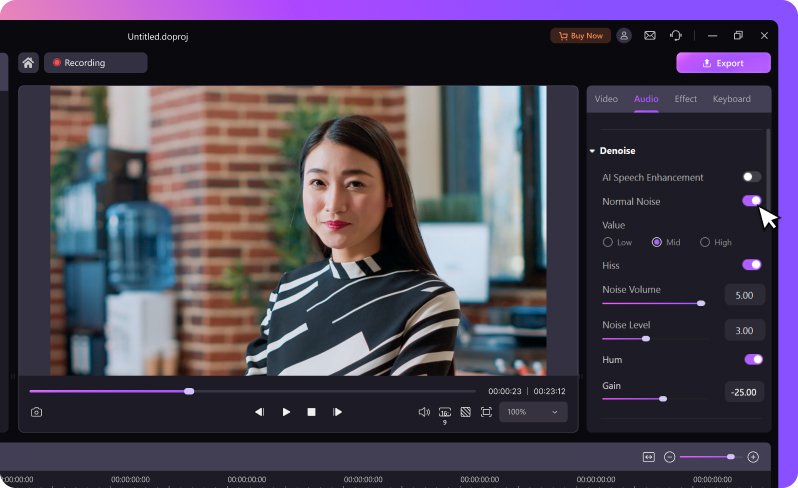
- Switch to the Audio tab in the Properties panel, enable Normal Noise under Denoise, and set the Value to Low, Mid, or High. Adjust the noise volume and level, fine-tune the audio gain, and remove hums, hisses, and other noise (if necessary) before clicking Export to save the denoised video to your device.
Part 4: Conclusion
Video denoise in Premiere Pro may seem daunting initially due to the feature-packed interface. However, it's a piece of cake if you follow the steps above because you only have several tools for reducing noise and grain. We recommend combining all of them for the most professional results.
Start with the Median effect in Premiere Pro, add After Effects to the mix to smoothen the frames, and complete the process with Boris FX Continuum's noise reduction plugin. But if you also want to remove background noise from your video and audio, you can try Wondershare DemoCreator's AI denoiser.
FAQs
-
What should I do to remove background noise in Premiere Pro?
You can remove background noise in Premiere Pro using the Essential Sound panel or the DeNoise effect. Here are the two ways:- Method 1: Using the Essential Sound Panel
- Method 2: Using the DeNoise Effect
-
How do I fix grainy videos for free?
You can use Media.io Video Enhancer. It's a free, cross-platform online tool that supports MP4, MOV, and AVI formats. Open it via your browser, upload your grainy video, select the upscaling factor, and download the file to your device in high resolution (up to 4K). You can also denoise and smooth the video and correct color.


