
This article presents a comprehensive guide on audio normalization and lists some actionable tips for optimal results.
In this article
Uneven audio volume in music and videos is a very common issue that affects both listeners and content creators worldwide. You must have played a playlist or an album where loudness varies, making you adjust the volume frequently. Right?
Similarly, you must have noticed that older music files are quieter than modern music tracks. Inconsistent volume levels are also observed in live recordings where the sound goes up and down depending on the crowd noise or mic position.
Audio normalization plays a crucial role in all these conditions. It adjusts the volume levels precisely, making them more balanced and stable to provide you with a smooth listening experience. To know more about the audio normalization technique, don’t miss the discussion below.
What Is Audio Normalization?
The process of achieving a consistent level of loudness across your audio file is called audio normalization. This technique adjusts the overall volume of a music track or file to keep it consistent throughout. It does not compress or alter the dynamic range of your audio file; instead, it makes sure that the audio peaks at a specific level.
Why does audio normalization matter? Is this what you have in mind? Well, it offers a comfortable listening experience by making sure that the volume does not change constantly. Without normalization, you may have to continually adjust an audio playlist's volume. Whether you are a live streamer, video creator, or podcaster, audio normalisation helps you make the production volume more professional.
Types of Normalization
Normalization is categorized into three types: peak normalization, loudness normalization, and RMS normalization. Let’s look at what each type has to offer.
-
Peak Normalization: It adjusts the volume in a way that the loudest peak in your audio file reaches a specific target level.
-
Loudness Normalization: It uses LUFS to average loudness over time. This audio normalization type is best for streaming and broadcast consistency.
-
RMS Normalization: As the name suggests, it is based on the Root Mean Square (RMS) level of your audio file. It is suitable for perceived loudness.
Why Should You Normalize Your Audio?
It does not matter what is inside your audio file. If it is not audible properly to listeners, it is worth nothing. This is where normalization of audio lends you a helping hand by adjusting volume levels to provide listeners with a good listening experience. Below is a list of four prominent benefits audio normalization offers.
1. Consistency Across Files
Whether it is a music album, a vlog on YouTube, a learning tutorial, or a podcast, audio normalization makes sure that all segments of the audio or video file play back at a uniform loudness. This is how it ensures a seamless experience for all listeners.
2. Platform Compliance
Different streaming services (such as Apple Music, YouTube, and Spotify) have different loudness standards, e.g., -14 LUFS. Audio normalization helps you avoid penalties (such as automatic volume reduction) and enables you to meet the industry standards.
3. Enhanced Accessibility
As stated earlier, audio normalisation makes the volume levels of your audio consistent. When your content has stable volume or loudness, it will be accessible to more listeners, especially those listening to audio in noisy environments or those with hearing problems.
4. Professionalism
Audio files with inconsistent loudness levels seem amateur. In contrast, you achieve balanced, broadcast-ready, and clean sound with normalization of audio. It is a sign of respect for your audience, as it makes your content more competitive and helps it stand out among other competitors.
How Does Automatic Audio Normalization Work?
As the name suggests, automatic audio normalization normalizes your audio files automatically. It analyzes the loudness of an audio file first and then adjusts the overall sound to a specific target level, without manual tweaking. The steps included in the process of automatic audio normalization are as follows.
1. Analyze Loudness
First, an audio file is scanned to measure the average loudness (not the peak volume levels only) or volume fluctuations. It uses modern standards, like Loudness Units Full Scale (LUFS), to measure how loud it is for human ears.
2. Compare to the Target Level
The measured loudness is then compared to a specific preset target, such as -23 LUFS (for broadcast TV) and -14 LUFS (for Spotify and YouTube).
3. Adjust the Gain
In this step, the entire audio volume is increased or decreased so that the average loudness matches the desired target. The volume of louder parts is slightly reduced, whereas quiet sections get louder.
4. Protect Against Clipping
If increasing the volume causes clipping, the automatic audio normalization technique may compress or limit the peaks to keep the loudness level consistent. Since no manual tweaking is needed, it saves you effort and time.
This technique produces balanced and even audio with no sudden dips or spikes, which is perfect for all listeners or viewers. Everything happens without the user's input; therefore, it is preferred to use it in smartphones, streaming platforms, and editing software.
How to Normalize Audio Easily with DemoCreator?
Wondershare DemoCreator offers an incredible one-click audio stabilization feature that automatically detects the loudness of audio files and removes uneven fluctuations to meet the modern industry standards. This feature is also known as volume normalization or audio normalization.
Whether you want to record a podcast, a tutorial for learning purposes, or a YouTube video, DemoCreator will help you get professional audio with balanced and consistent sound levels, ensuring the best possible listening experience for your target audience or viewers. What else do you need?
Steps to Normalize Audio Using DemoCreator
Normalizing your audio files with this tool is super easy and fun. Let’s look at the steps you need to follow.
Step 1: Download and install this audio normalization tool on your computer.
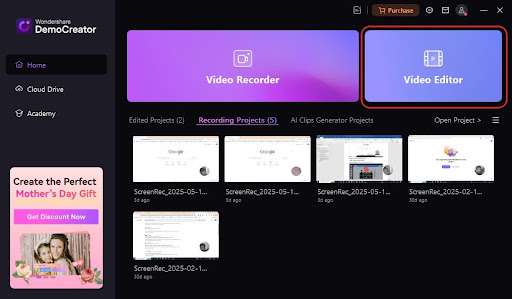
Step 2: Open the tool and enter the Video Editor option.
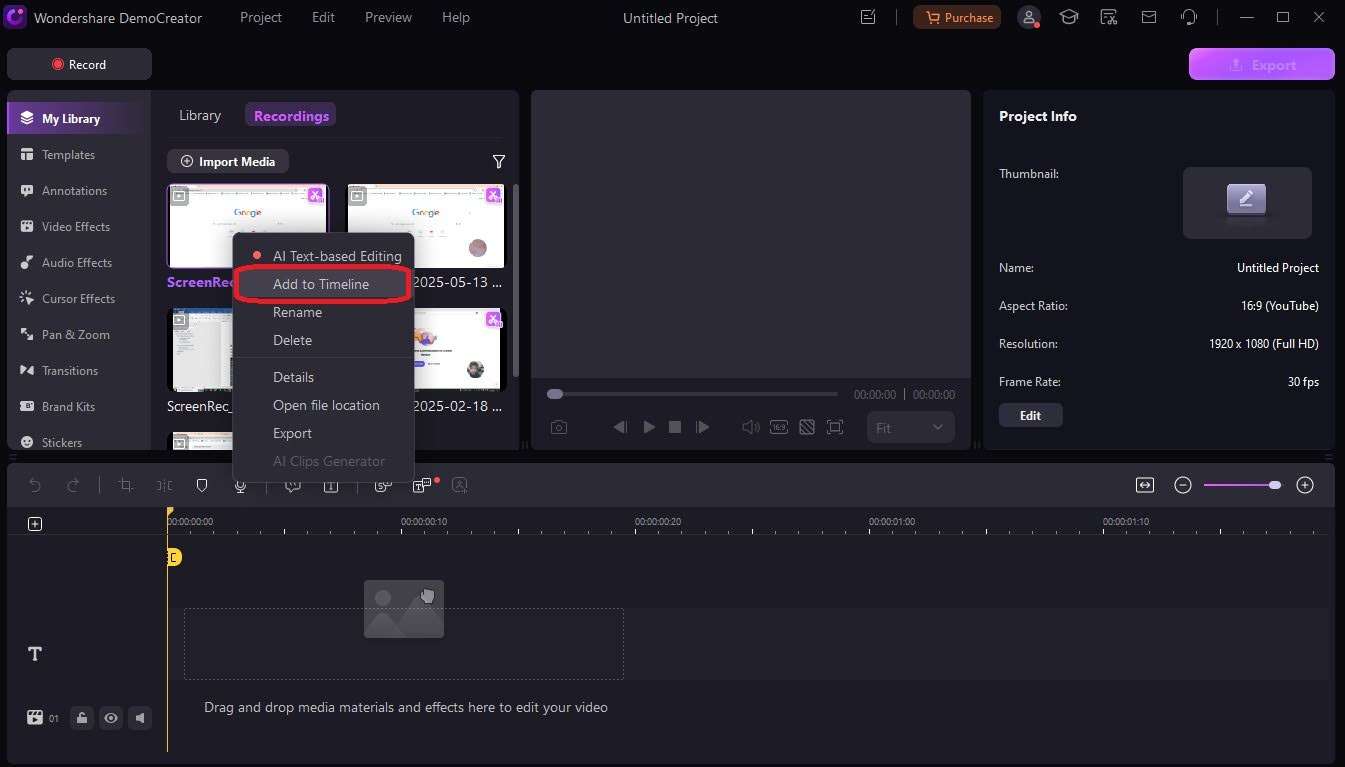
Step 3: Then, import your audio or video with embedded audio that you want to normalize.
Step 4: Add the imported audio/video file to the timeline. All you need to do is right-click the file and choose Add to Timeline, as shown below.
Step 5: Click the audio clip and go to the Audio panel. You will find it on the right side of the screen.
Step 6: It is time to enable the Audio Normalization feature by moving the slider to the right, as shown below.
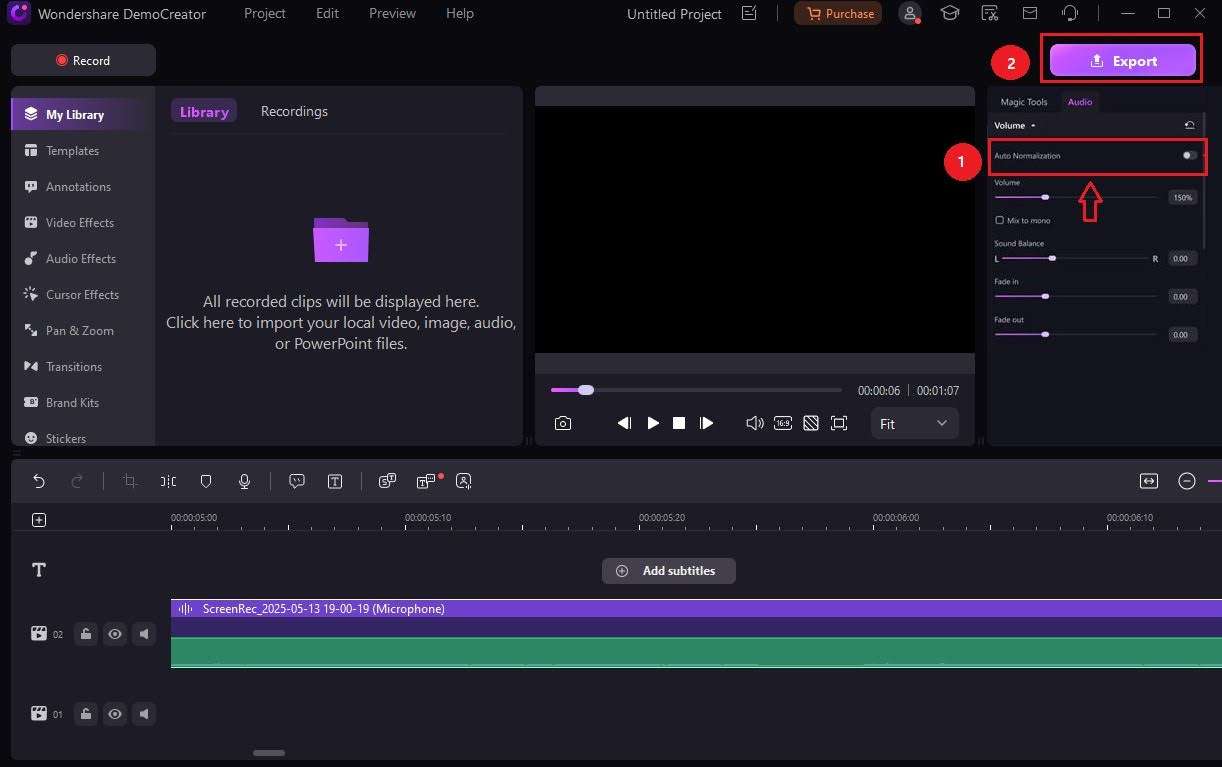
Step 7: Play back your file to ensure volume levels are consistent throughout the project. If loudness is well-balanced and even across your audio file, click the Export button and save it to a new location on your system.
Apart from audio normalization, Wondershare DemoCreator offers an ideal suite of audio editing tools. It includes voice changer, fade in/out, speed control, denoising, and trimming. All these tools enable you to edit your audio files without compromising their original quality.
Tips for the Best Audio Normalization Results
To get the best audio normalization outcomes, ensure to follow the tips below. They will help you get a highly precise, normalized audio as a result.
1. Record in a Quiet Environment
While recording your audio, never forget to ensure that there is no noise in the background. Doing this will help you skip a couple of editing steps.
If there is background noise in your recorded audio, you need to remove it first, as normalization works best on clean audio files. Similarly, if your audio file needs mixing, trimming, or cutting, do these things before you start normalizing the sound levels.
2. Know Your Loudness Targets
Remember, different platforms may have different loudness standards. Considering this thing, you should know your loudness targets. For example, -14 LUFS is the standard for Apple Music, YouTube, and Spotify. The TV broadcast (Europe) standard is -23 LUFS. Whereas, podcast standards are -19 LUFS (stereo) and -16 LUFS (mono).
3. Use Headphones for Final Checks
While reviewing your normalized audio file, don’t forget to use premium-quality headphones. The reason behind this fact is that if an audio track sounds fine on your speakers, you may notice some inconsistencies while listening to it through headphones.
4. Avoid Over-Normalization
Is your audio file already loud? If so, further audio normalization may result in distortion or clipping. Therefore, always ensure to monitor peaks and adjust them accordingly.
5. Combine with Compression
As you know, audio normalization balances overall sound levels. In contrast, dynamic fluctuations are balanced or smoothed in compression. If you want to get a pro-grade audio file at the output, you should use both compression and audio normalization.
Frequently Asked Questions
FAQ
-
What exactly is audio normalization?
Audio normalization makes loud audio quieter or quiet audio louder so that it achieves a target level. The best part? Audio normalization does not compromise the original audio while adjusting its volume levels. -
How is automatic audio stabilization different from an equalizer?
Though automatic audio stabilization and equalizer enhance your audio file, both work differently. The automatic audio stabilization technique adjusts volume levels of your audio files to keep them consistent throughout. Whereas, an equalizer cuts or boosts specific frequencies to change the tone. -
What audio formats does DemoCreator support?
This tool offers profound support for a variety of input/output audio formats, as given below. Input Formats: M4A, MP3, WMA, WAV, OGG, FLAC, MKA, AIF, AIFF, AMR, RA, AU, and APE Output Formats: MP3 and M4A -
Who can benefit most from this feature?
Anyone who consumes or works with audio can benefit from the audio normalization feature. Whether you are a filmmaker, viewer, audio engineer, video editor, listener, musician, or content creator, audio normalization is equally useful for you.
Final Words
Your audio files may have loudness variations that need frequent volume adjustments, spoiling your listening experience. Audio normalization finds quieter and louder volume levels in audio tracks and makes them stable and consistent to offer a smooth listening experience for all users. This technique has proven to be a game-changer in the audio industry. It is equally useful for all content creators, from musicians to filmmakers and podcasters to YouTubers and video editors.
Do some of your audio files have varying sound levels? Isn’t the speaker’s voice clearly audible? If so, try a reliable and efficient audio normalizer like Wondershare DemoCreator. It offers a one-click audio normalization feature to improve the quality of your audio files like never before. Give it a try and see how it converts your audio with fluctuating sound levels into a clean, crisp, and easily audible clip.


