

The rise of video content on platforms like YouTube and TikTok has become prominent, offering a wide range of content catering to various interests. However, not all content gains high engagement, with background noise being a potential distraction. It is important to ensure that videos effectively communicate the message and minimize any background noise for better engagement.
That's where Premiere Pro comes in. It's a popular video editing tool that pros and beginners use to create awesome videos. With its Noise Reduction feature, you can easily clean up your audio and make your videos sound more professional. In this guide, we'll show you how to do noise reduction in Premiere Pro and make your videos stand out. Read on to learn more.
In this article
Can You Reduce Background Noises on Premiere Pro?
Premiere Pro's Noise Reduction feature is a handy tool for improving audio quality. It analyzes your audio track and identifies background noise, such as humming or buzzing. Once it identifies the noise, it applies filters to reduce or remove it. The result leaves you with a cleaner, more professional-sounding audio. This feature is particularly useful when recording audio in less-than-ideal conditions. We could say like in a noisy room or outdoors. Using the Noise Reduction feature, you can enhance the overall quality of your videos. It creates a more immersive experience for your viewers. Check out the following guide to learn how to reduce noise in Premiere Pro.
How to reduce noise in Premiere Pro?
To reduce noise in Premiere Pro, you use its Noise Reduction feature. It cleans up the audio in your videos by identifying and reducing background noise. You can tweak settings like the Noise Reduction slider to get the right balance. Once you're happy with the result, save or export the edited audio for your video project. Here’s the tutorial on how to reduce noise in Premiere Pro.
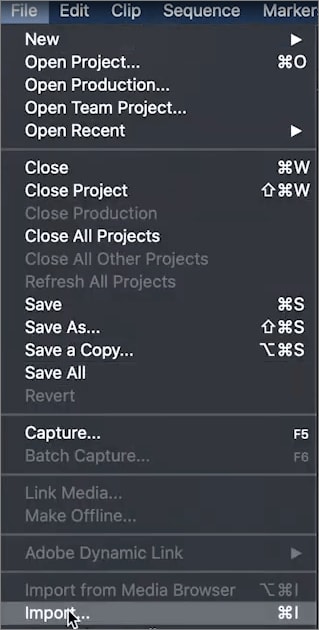
Step 1: Launch Premiere Pro and open the project containing the audio track you want to edit. Or, add the audio track that you wish to modify.
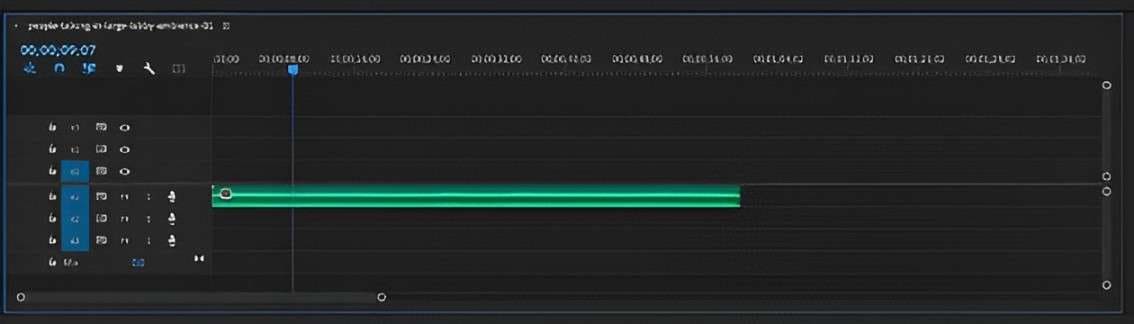
Step 2: Locate the audio track in the timeline that you wish to clean up.
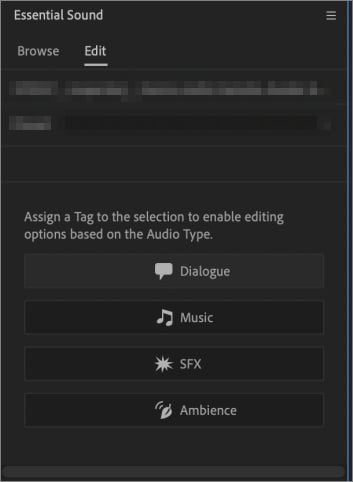
Step 3: Go to the Window menu and open the Essential Sound Panel. Next, select the clip you want to adjust in the timeline and choose Dialogue from the options.
Step 4: In the Effects Control panel, scroll down to the Noise Reduction/Restoration section.
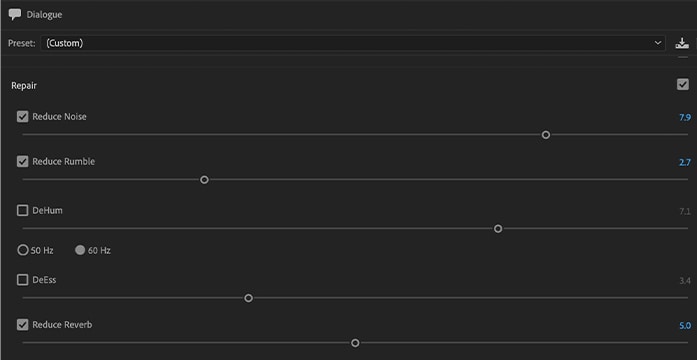
Step 5: Choose the noise reduction effect and modify the slider accordingly.
There are five audio effects available to reduce background noise:
- Reduce Noise. Controls the level of noise removal in the audio clip.
- Reduce Rumble. Minimizes low-frequency noises, plosives, and microphone rumble caused by wind, scratching sounds, or movement.
- DeHum. Reduces hum sounds caused by electrical noise interference.
- DeEss. Lessens harsh "ess" sounds and high frequencies.
- Reduce Reverb. Decreases echo or reverberation in the audio track.
Step 6: Once you've adjusted the settings, preview the audio track to ensure that the background noise has been effectively reduced. You can do this by playing back the audio in the timeline.
Step 7: If unsatisfied with the results, you can readjust the settings until you achieve the desired effect.
Step 8: Once you're happy with the audio, save your project to preserve your edits.
How to Reduce Background Noises Quickly Using Wondershare DemoCreator?
While Premiere Pro’s noise reduction feature is effective, it can be time-consuming, especially for beginners. If you’re looking for a more convenient way to reduce background noises, consider using an AI-powered tool like Wondershare DemoCreator. However, there are times when the built-in noise reduction feature in Premiere Pro may not be sufficient, particularly with videos with poor audio quality. If you encounter this issue with your Premiere Pro videos, Wondershare DemoCreator can be a great alternative for denoising your audio.
In addition to its denoise feature, Wondershare DemoCreator offers several other features to help you tackle your audio issues:
- Preview Feature. Before applying the denoise effect, you can preview it to fine-tune the settings for the best results.
- Easy Export. Once you're satisfied with the denoise effect, export your audio file in your desired format for easy sharing or use in your content.
- Various Noise Removal Options. DemoCreator's powerful algorithm can filter out background noises like hum, hiss, wind, clicks, and fan noise, ensuring your audio sounds flawless.
- Audio Customization. Apart from noise reduction, DemoCreator offers extensive audio customization options. You can adjust the audio speed and convert audio to different formats to suit your needs.
- Wide Range of Supported Audio Formats. DemoCreator supports almost every audio file format, including MP3, M4A, OGG, AU, MP4, MOV, VOB, MTS, and more, making uploading and exporting audio files quick and easy.
Here's a step-by-step guide to using Wondershare DemoCreator's denoise feature:
Step 1: Download Wondershare DemoCreator and follow the installation instructions. Once installed, launch the software on your computer.
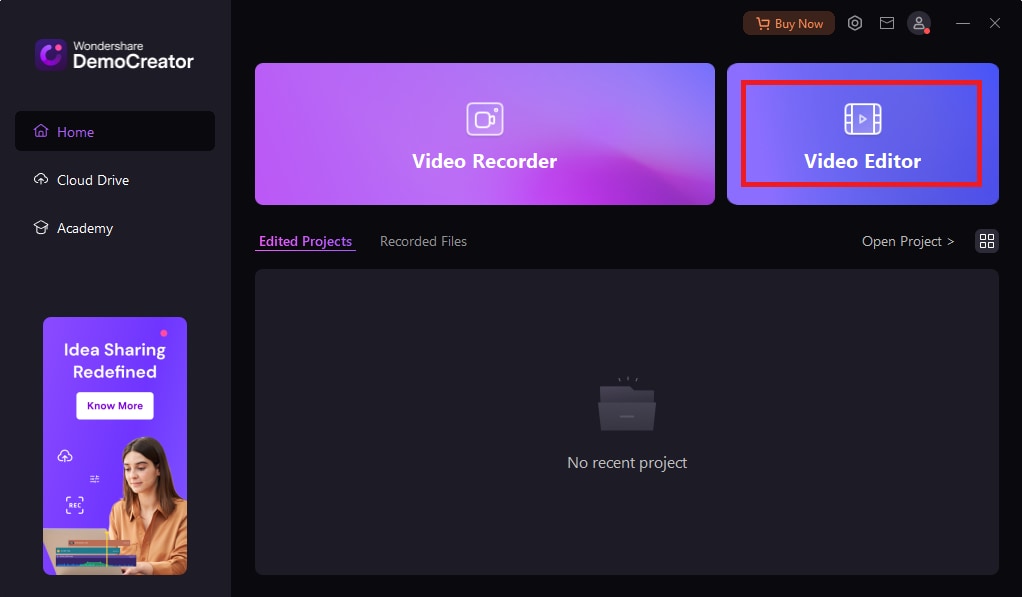
Step 2: In the main dashboard of Wondershare DemoCreator, locate and click on the Video Editor option. This will open the video editor in a separate window.
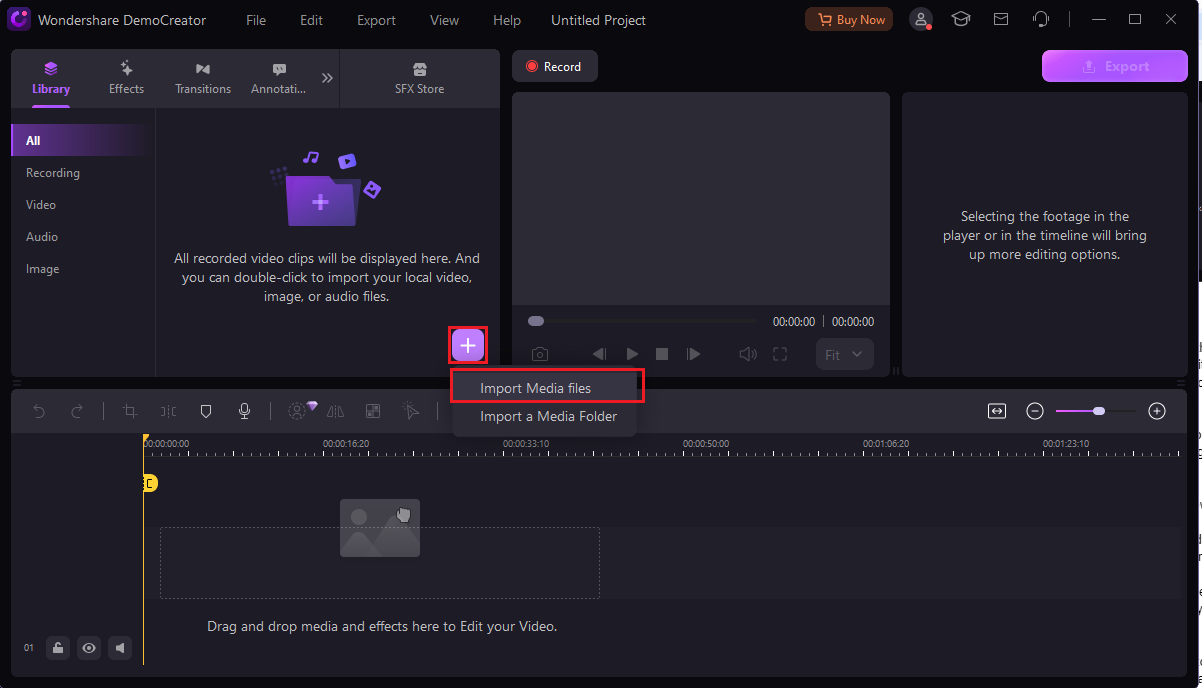
Step 3: To import your video, click the Add (+) button under the Library section. Select Import Media Files and choose the video file you want to denoise from your local folder. Alternatively, you can record a video directly within the software.
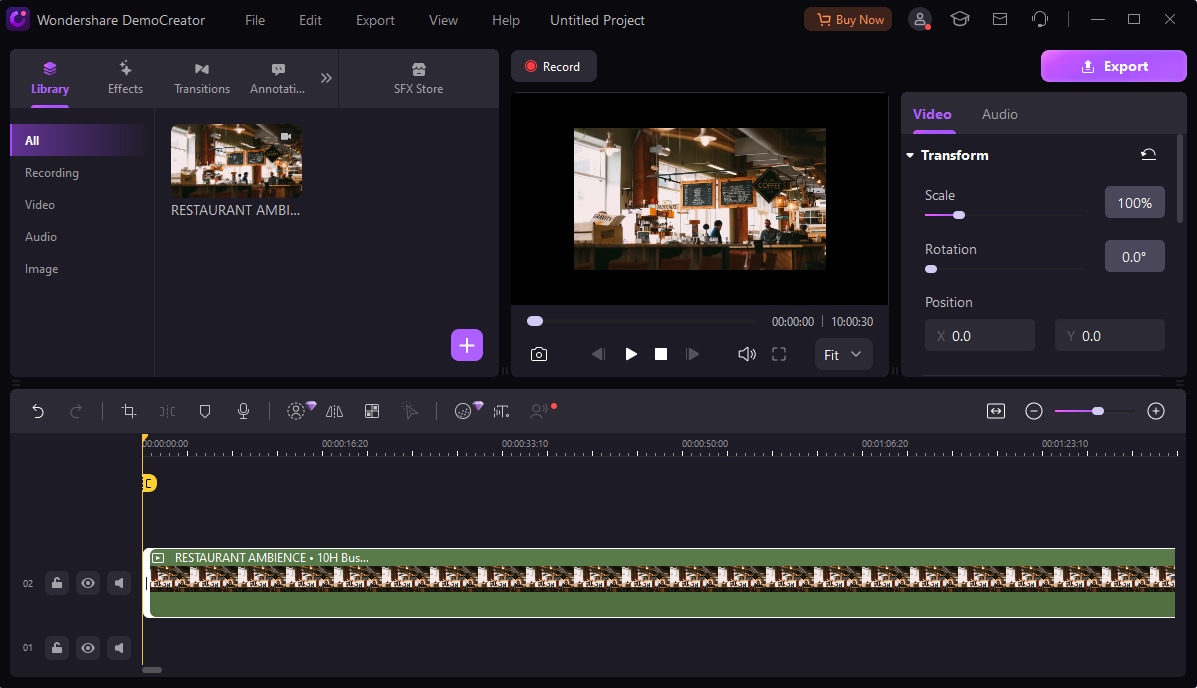
Step 4: Drag the imported video from the library panel to the timeline below. You will be prompted to choose whether to change the video's original project settings. Click Change Settings to adjust the project settings or select Keep Current Settings to retain the existing settings.
Step 5: Navigate to the Audio menu on the right-side panel below the export button. Look for the Denoise settings option.
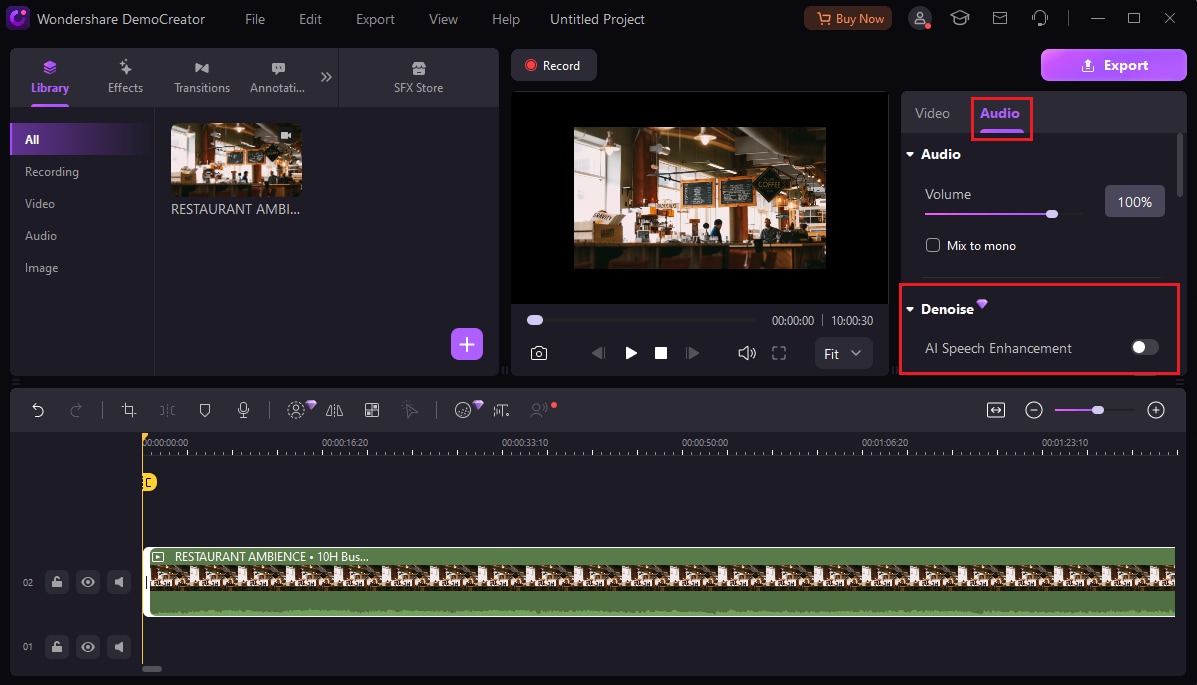
Step 6: Adjust the denoise settings according to the background noise level in your audio file. Wondershare DemoCreator offers various settings to customize the denoise process to your specific needs.
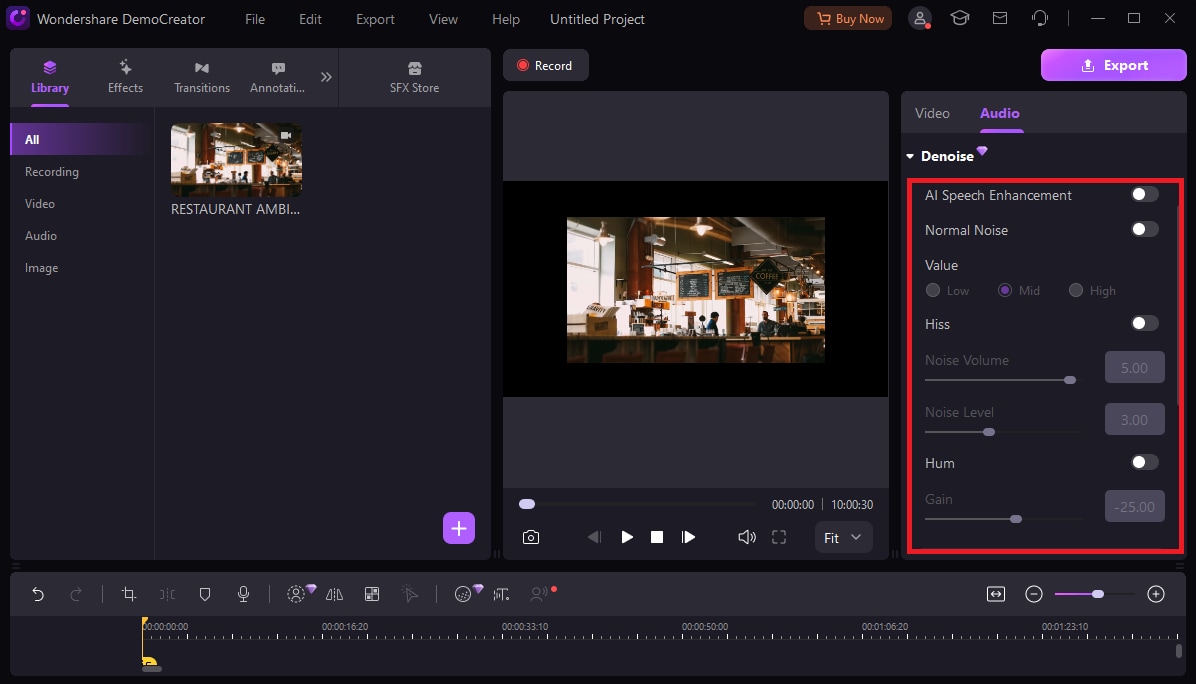
Step 7: Preview the audio before applying the denoise effect to ensure that the background noise is effectively removed. Once satisfied with the result, apply the denoise effect to your audio.
Step 8: After applying the denoise effect, export your audio file to your desired format. Your audio file is now free from background noise and ready to be shared or used in your content.
Conclusion
Reducing background noise on Premiere Pro is made possible by its Noise Reduction feature, which can be effective but may require more time and expertise. For a more convenient and user-friendly experience, especially for beginners, consider using Wondershare DemoCreator's denoise feature. This AI-powered tool can quickly and effectively remove background noise, improving the overall quality of your audio. Following the steps outlined in this guide, you can achieve cleaner audio in your videos, making them more professional and engaging for your audience. Learn how to reduce noise in Premiere Pro and enhance your video editing experience.
FAQ
-
Is Premiere Pro's Noise Reduction feature effective?
Yes, Premiere Pro's Noise Reduction feature effectively reduces background noises from audio tracks. However, how well it works depends on the quality of the audio and the settings you choose. -
Can anyone reduce background noises using Premiere Pro?
Yes, anyone can reduce background noises using Premiere Pro. The software is easy to use and offers a variety of tools and features to help you edit your audio tracks effectively. -
Is Premiere Pro free?
No, Premiere Pro is not free. However, you can download a 7-day free trial of Premiere Pro, which includes all the features and updates in the latest version. After the trial period ends, you must purchase a subscription to continue using the software.


