

In today's digital landscape, video content has become a form of communication, entertainment, and education. Closed caption creators play a crucial role in making video content accessible by providing synchronized text representations of spoken dialogue and audio cues.
This comprehensive guide will explore the art and science of closed caption creators for video content. Whether you're a content creator, filmmaker, educator, or business owner, understanding how to create closed captions is a valuable skill that can greatly enhance the impact and accessibility of your videos.
In this article
Method 1: Use YouTube for Closed Captions Creator
YouTube offers a convenient and user-friendly feature for creating, editing, and automating closed captions for your videos. Whether you're uploading new content or improving the accessibility of existing videos, YouTube's closed captioning tools provide flexibility and control over your captions. Here's a step-by-step guide for each aspect of closed caption management on YouTube:
Adding Subtitles
Below is a step-by-step guide on how to add subtitles to your YouTube videos:
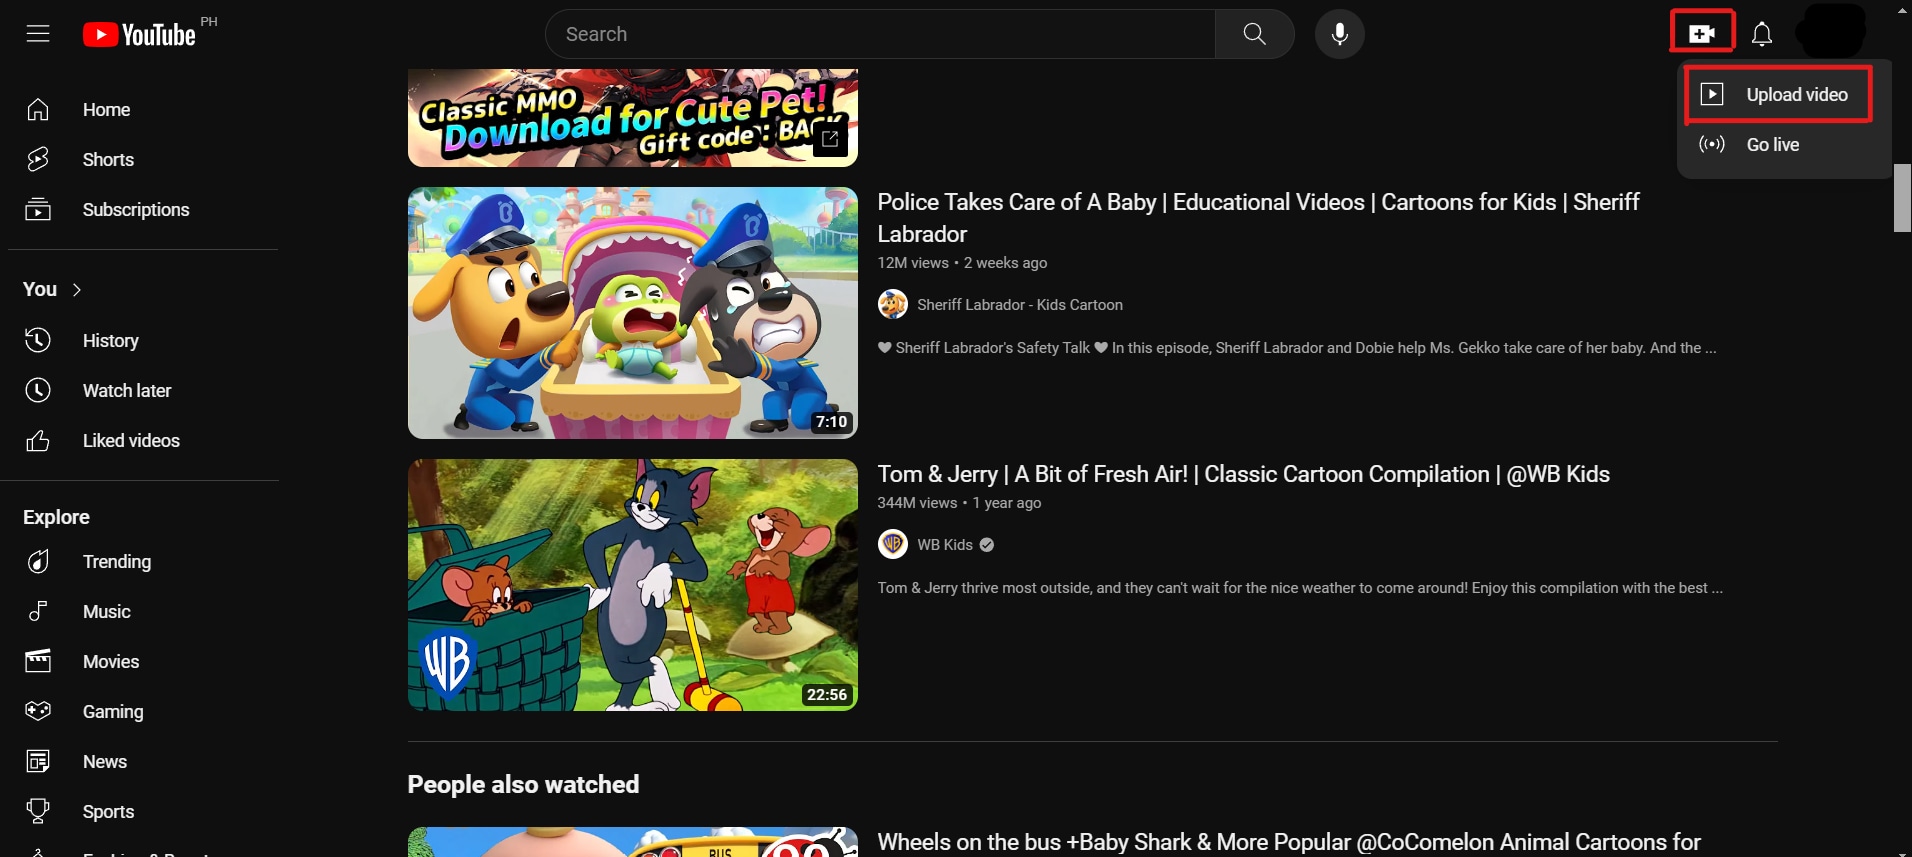
Step 1. Upload your video to YouTube by clicking the Upload button at the top-right corner of the YouTube homepage.
Step 2. Once your video is uploaded, navigate to the video's page on YouTube.
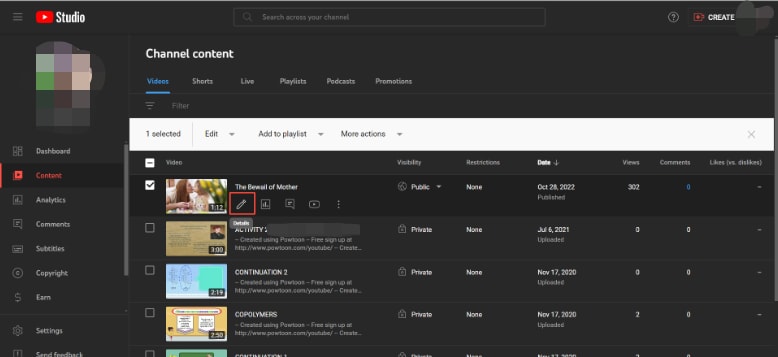
Step 3. Click the Details icon beside the video player.
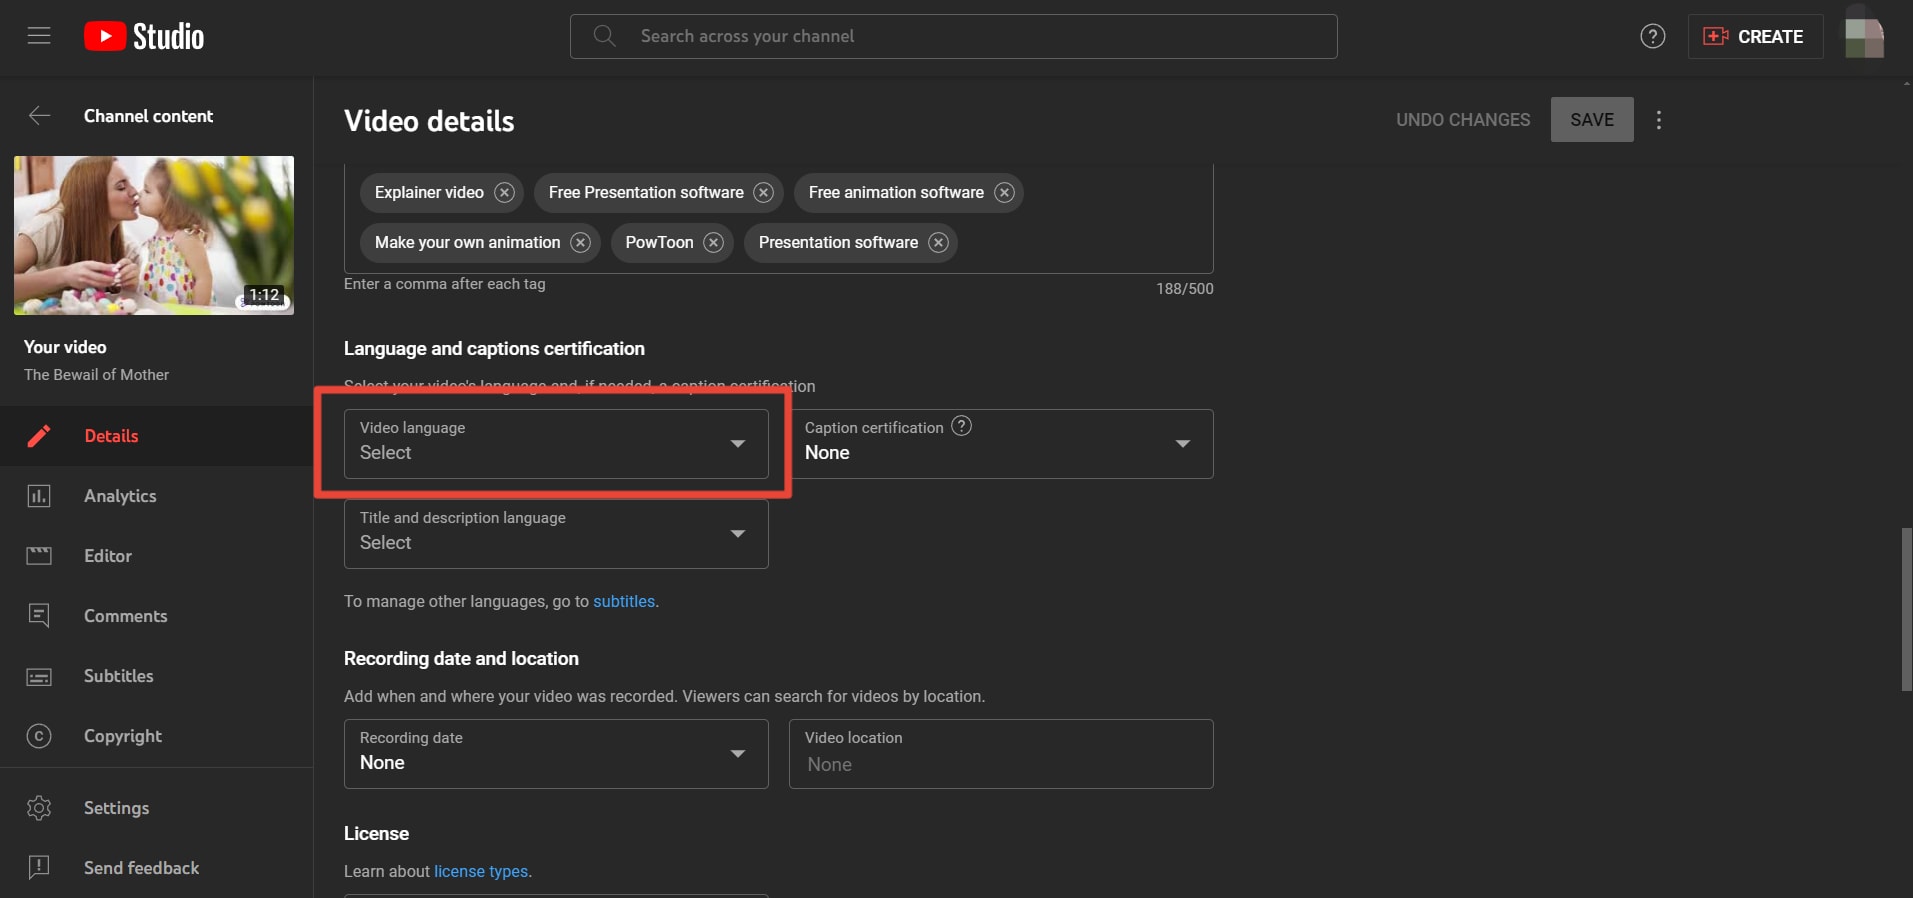
Step 4. Before you can add the subtitle you need to look for “Show more” button ans select your preferred Video language.
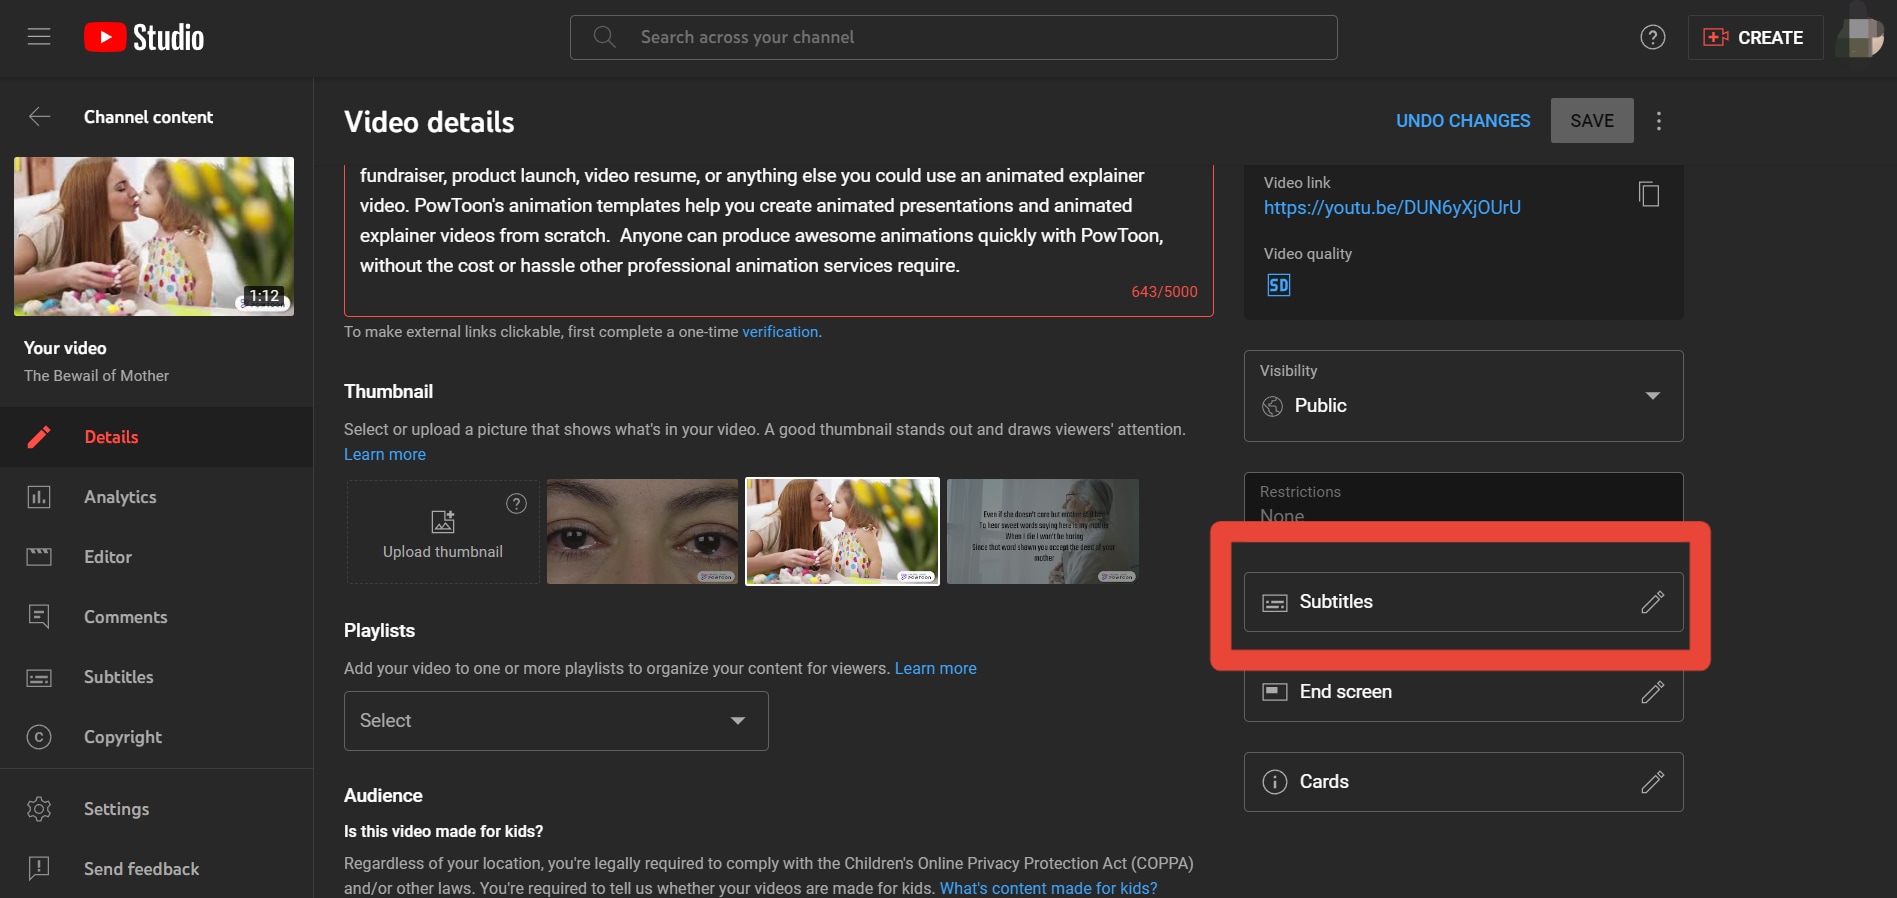
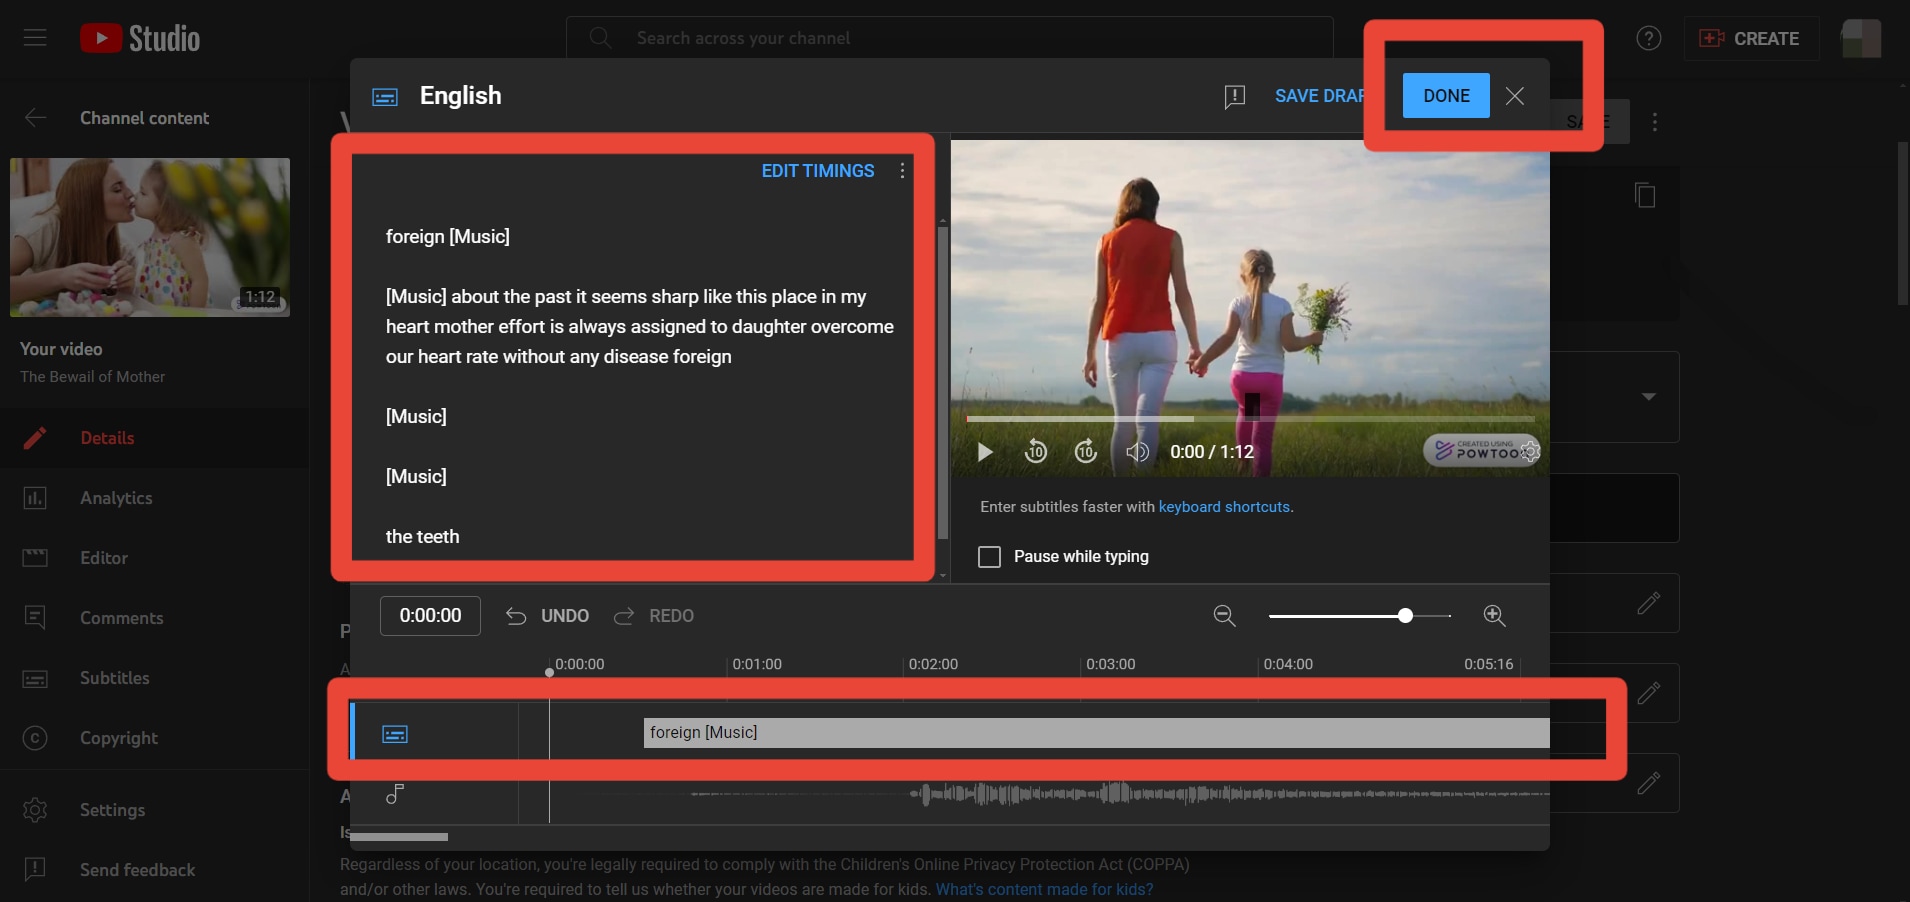
Step 5. After that, scroll up your mouse and look for the Subtitles button to add subtitles.
Here’s what it looks like. You can add and input subtitles on your video easily. Once satisfied, click “Done” and it will automatically saved your video with subtitle on it.
Editing or Removing Captions
Below, we'll outline the step-by-step process for editing or removing captions.
Step 1. Navigate to the video's page on YouTube.
Step 2. Click the Details icon beside the video player.

Step 3. After that, look for the Subtitles button to edit or remove your subtitles.

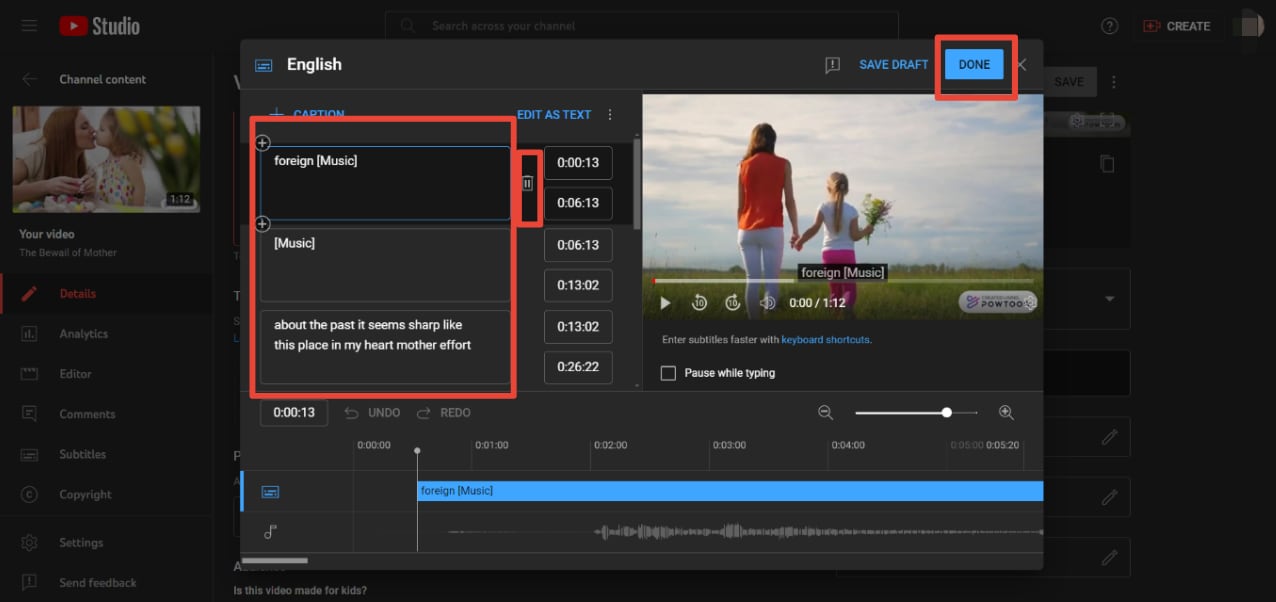
Step 4. Just click on the subtitles box to edit your subtitles. If you want to remove it, just click the Delete icon. Once done, you can select the “DONE” button to update the video.
By following these steps, you can effectively utilize YouTube's closed captioning feature to create, edit, and automate captions for your videos, enhancing accessibility and engagement for all viewers.
Method 2: Use Premiere Pro for Closed Captions Creator
Adobe Premiere Pro is a powerhouse in video editing, offering a wide array of features tailored to professionals and enthusiasts alike. Among its capabilities is the ability to create closed captions directly within the software, providing users with flexibility and control over their captions' appearance and timing.
In this section, we'll explore two methods for creating closed captions in Premiere Pro: importing a caption file from a third-party service and manually transcribing captions. These methods cater to different needs and preferences, allowing users to choose the best approach for their workflow.
Importing a Caption File from a Third-Party Service
Below, we'll outline the step-by-step process for importing caption files from third-party services into Premiere Pro
Step 1: Launch Adobe Premiere Pro and open the project containing your video footage.
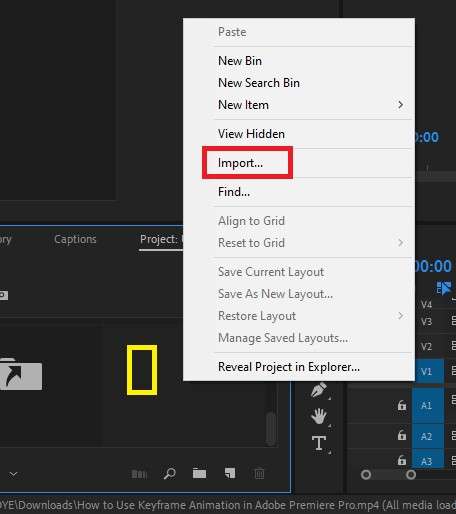
Step 2: Navigate to the File menu and select Import to import the caption file you received from a third-party service. Common caption file formats include .srt (SubRip Subtitle) and .vtt (WebVTT).
Step 3: Locate the caption file on your computer and select it. Click Open to import the file into your Premiere Pro project.
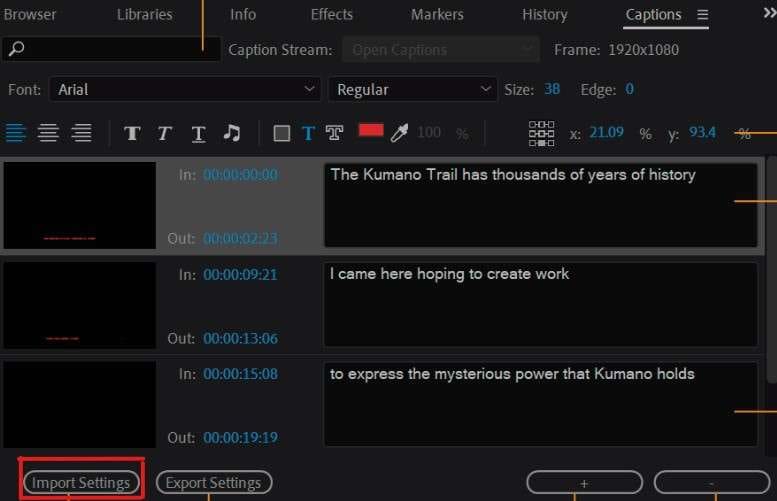
Step 4: Once imported, you'll see the caption file listed in the Project panel. Drag and drop it onto the timeline to create a new caption track.
Step 5: Adjust the Timing and Placement of the captions on the timeline as needed. You can move captions horizontally to synchronize them with specific points in your video and extend or shorten the duration of individual captions.
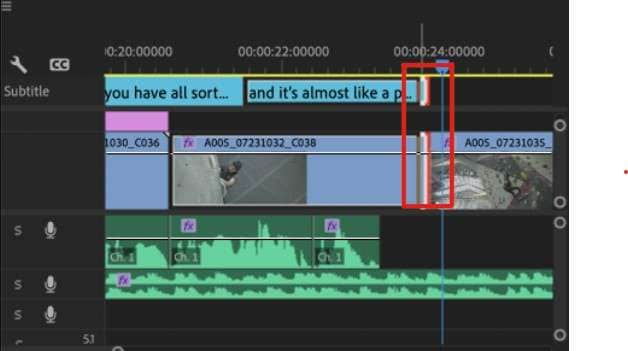
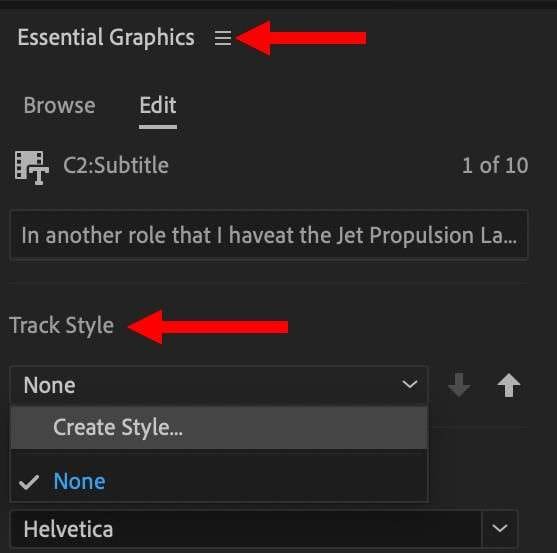
Step 6: Customize the appearance of the captions by selecting the caption track on the timeline and navigating to the Essential Graphics panel. Here, you can modify text attributes such as font, size, color, and alignment to match your preferences and video aesthetics.
Step 7: Preview your video with the imported captions to ensure they are synchronized correctly and appear as desired.
Manually Transcribing Captions
In this section, we'll guide you through the step-by-step process of manually transcribing captions in Premiere Pro.
Step 1: Open Adobe Premiere Pro and load the Project containing your video footage.

Step 2: Select the video clip on the timeline you want to create captions.
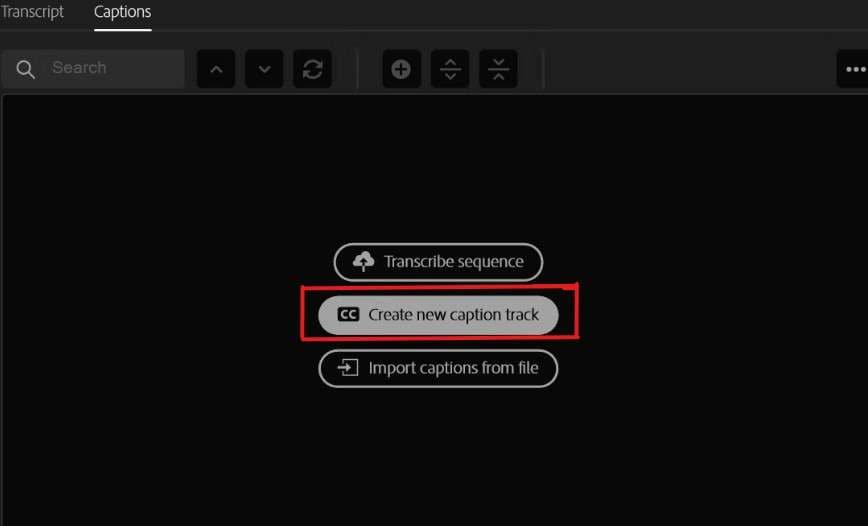
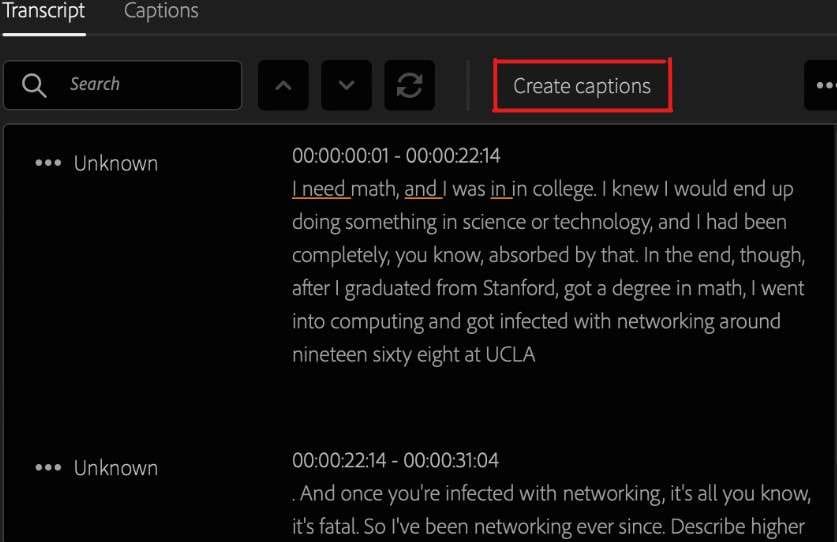
Step 3: Navigate to the Window menu and select Captions to open the Captions panel.
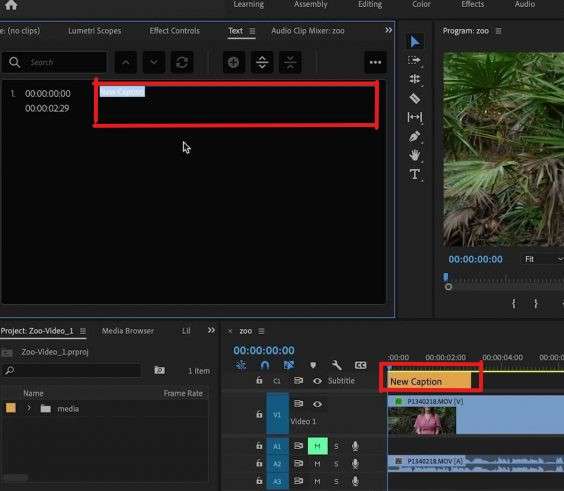
Step 4: In the Captions panel, click the Create new caption track button to generate a new caption track for the selected video clip.
Step 5: Double-click on the first caption in the timeline to begin entering text. Type the dialogue or narration for the corresponding section of the video.
Step 6: Continue adding captions by clicking the Create caption button for each subsequent section of dialogue or narration in the video.
Step 7: Adjust the Timing of each caption by dragging its edges on the timeline to match the corresponding audio or video cues.
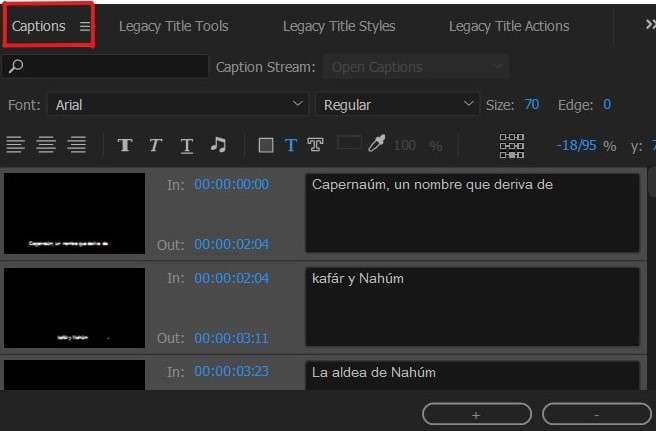
Step 8: Customize the Appearance of the captions in the Captions panel by modifying text attributes such as font, size, color, and alignment.

Step 9: Preview your video with the manually transcribed captions to ensure they are synchronized correctly and appear as desired.
By following these steps, you can create closed captions for your videos in Adobe Premiere Pro using either the import or manual transcription methods.
Bonus Tip: Use Wondershare DemoCreator as Closed Captions Creator for a Fast and Easy Way
If the two are not fast enough to create closed captions, you can use Wondershare Democreator, a software with AI auto-generated closed captions. It is a versatile and user-friendly tool designed to streamline the process of creating closed captions for your videos. With DemoCreator, you can effortlessly add captions to your video content in minutes, thanks to its intuitive interface and powerful features.
Wondershare DemoCreator offers an online version, making it convenient for users to create captions without software installation. Whether you're a content creator, educator, or business professional, DemoCreator provides a reliable solution for enhancing accessibility and engagement in your videos.
Key Features
- Wondershare DemoCreator supports the popular SubRip Subtitle (SRT) file format, easily importing and exporting captions between different platforms and video editing software.
- Leveraging advanced artificial intelligence technology, DemoCreator automatically generates accurate subtitles for your videos, saving you time and effort in captioning. This feature ensures that your captions are synchronized with your video content seamlessly.
- With DemoCreator's AI auto caption feature, you can quickly transcribe spoken dialogue in your videos, eliminating the need for manual transcription. This intelligent automation accelerates the captioning process, enabling you to create captions in a fraction of the time.
By utilizing Wondershare DemoCreator for closed captions creation, you can enhance the accessibility and reach of your video content with minimal effort.
Conclusion
This guide covers two main methods for creating closed captions: YouTube and Adobe Premiere Pro. It walks you through each step, from adding captions to editing and removing them. Additionally, it introduces Wondershare DemoCreator as a simpler alternative. The guide emphasizes the importance of closed captioning for inclusivity and engagement in video content, providing practical techniques and tools to enhance accessibility.
Moreover, by exploring these various methods, users can tailor their approach to suit their preferences and workflow, ensuring a seamless captioning process. With the knowledge and tools provided in this guide, content creators can confidently navigate the intricacies of closed captioning, ultimately creating more inclusive and impactful videos that resonate with a wider audience.
FAQ
-
What are the requirements for closed captioning?
Closed captioning requirements may vary depending on the platform or jurisdiction, but generally, the key requirements include: - Providing accurate transcriptions of spoken dialogue.
- Synchronizing captions with corresponding audio cues.
- Ensuring proper formatting and legibility.
- Complying with accessibility standards such as the Americans with Disabilities Act (ADA) or Web Content Accessibility Guidelines (WCAG).
-
What problems can happen when captions are inaccurate?
Inaccurate captions can pose several challenges for viewers, including misinterpretation of content, confusion, and frustration. Additionally, inaccurate captions may fail to convey important information or context accurately, leading to misunderstandings or exclusion of viewers with hearing impairments. Poorly synchronized captions can also disrupt the viewing experience, making it difficult for viewers to follow along with the video content. -
What is the purpose of closed captioning?
The primary purpose of closed captioning is to enhance accessibility and inclusion by providing a text-based representation of spoken dialogue, audio cues, and other relevant sounds in videos. Closed captions enable individuals with hearing impairments to access and enjoy video content by providing a means to follow the dialogue and comprehend the audiovisual elements. Additionally, closed captioning benefits viewers in noisy environments, non-native speakers, individuals with learning disabilities, and those who prefer to watch videos with the sound muted. Moreover, closed captioning can improve searchability, SEO, and viewer engagement, making it a valuable tool for content creators and distributors.


