
Adobe Premiere Pro is the most popular video proofreader for experts. It's loaded with various elements to tweak your recordings exhaustively. In any case, in some cases, you can become mixed up in every one of the conceivable outcomes to auto-generate captions in Premiere Pro. Adobe hopes to consummate its adaptation in Premiere Pro with Speech to Text, a Sensei-controlled include that will consequently create a record and add subtitles to your video. This isn't the most straightforward thing to do with the proofreader. That is the reason we show you the various ways of making it happen, particularly to caption large video projects productively and at scale.
Handling long recordings can require hours; it can likewise be very troublesome if the sound stream isn't sufficiently clear. Adobe Premiere Pro's Speech Analysis work empowers you to rapidly explore the times at which words are verbally expressed. This, thus, permits you to perform precisely alters and position captions accurately. On the off chance that you make a ton of inscriptions, captions, or typography recordings, this is the best instructional exercise for you. We will show you the staggering Auto captions Premiere Pro apparatuses for auto records and inscribing of your video projects. Find out the details of ways to use Premiere Pro auto subtitles here.
In this article
How Does the Premiere Pro Auto Caption Work?
Adobe Premiere Pro is a video-altering software that permits you to make and add Closed inscription and caption tracks to video projects. Debut inscriptions can be Exports as a side vehicle document or as an encoded video record. Adobe hopes to consummate its form in Premiere Pro with Speech to Text, a Sensei-controlled highlight that will naturally create a record and add inscriptions to your video. In this way, as your subject talks, the inscriptions will be consequently created and changed alongside your alter.
Methods to Add Automatic Subtitles in Premiere Pro
1. Use the Third-Party Service
Assuming you have a long video (or regardless of whether you have a brief video yet don't have any desire to invest the energy physically composing the subtitles and putting them impeccably), you could utilize an outsider inscribing apparatus to let out a planned record and afterward import that into Adobe Premiere Pro utilizing its Captions device. You can add captions to your recordings online for nothing with Adobe Spark.
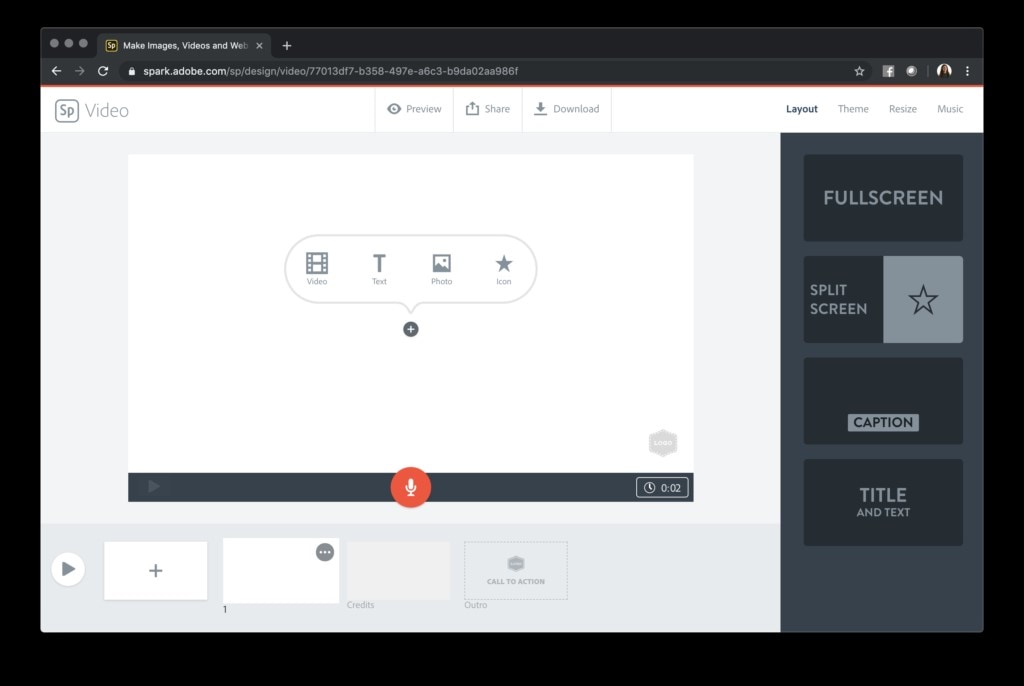
Step1 Select Upload Files
Visit the official profile of your selected platform and transfer recordings or pictures from your gadget, then, at that point, sync your content in the course of events.
Step2 Add Subtitle
On your selected platform, browse different caption design choices and change the text size on an automatic basis.
Step3 Download the File
Quickly download your video to impart to your companions, family, and crowds.
2. Manually Transcribe Captions
For those simply getting going in Adobe Premiere Pro who haven't utilized the stage and the people who probably won't be acquainted with past ages or other NLE applications, adding text isn't that precarious once you get its hang. It simply takes a smidgen of start-up information to realize where things are and how to modify them however you would prefer.
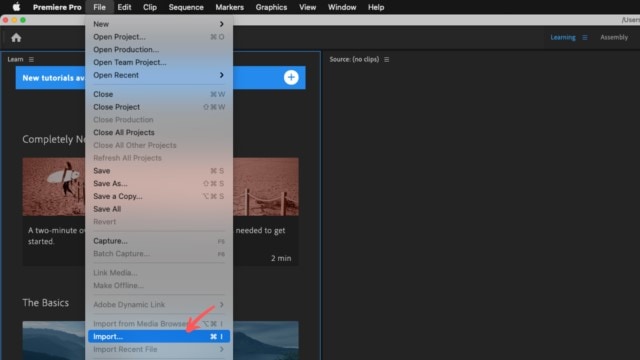
Step1 Import Files
To get everything rolling, import your documents, including the video record in addition to the inscriptions record. In a perfect world, the video record you use ought to be the very one that was utilized to decipher and make the inscription document. Like that, the words and timing of the text will be agreed with the subtitles.
Step2 Change Sound or Text Easily
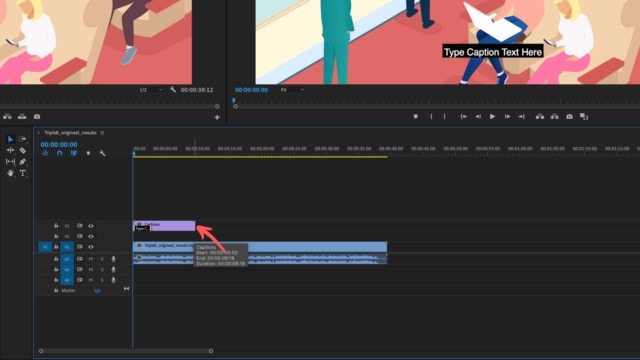
You can change the arrangement of the inscription with the sound or alter the text of the subtitle straightforwardly in Adobe Premiere if necessary. Drag the records into your course of events. You'll see that the sound and video are isolated into various tracks, which can prove to be useful later to overlay different visuals over the comparing sound.
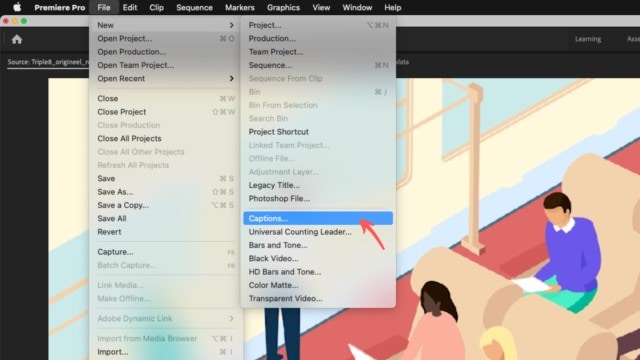
Step3 Drag Document into Course of Events
Drag your inscription document into your course of events (.SRT in this model) and try to add it similar to the claim track, rather than adding it previously or after different records in a similar track.
Step4 Test Subtitles
With the inscriptions presently estimated and found precisely where you need them outwardly, now is the right time to test that the subtitles are coordinated accurately with the sound and video.
An Easier Way to Generate Auto Captions Than Premiere Pro
An adaptable software permits inscription planning and has a wide exhibit of choices to alter the text. From text styles and sizes to diagrams and shade of record, you could pivot them according to the prerequisite and change in like manner on the screen. You can likewise picture, zoom in, and zoom out the sound wave for focusing on the timestamp of inscriptions. Timestamping permits you to replay recordings and let you make changes in the record.
Step1 Install and Sign in to Wondershare DemoCreator
The first and foremost step to learning is to download Wondershare DemoCreator from its official website. The DemoCreator can be downloaded from its official website by clicking a download icon. You can go to its official website at this link.
- After visiting the above link click on the quick download icon.
- After clicking on it, the downloadable file will appear in your downloads folder. Execute the installation file and you will be prompted to the installation procedure. The installation procedure is basic and you will be easily done with it.
- After completing the installation, now it's time to register yourself with Wondershare to start using the application. One of the methods is to sign up using the Wondershare account center.
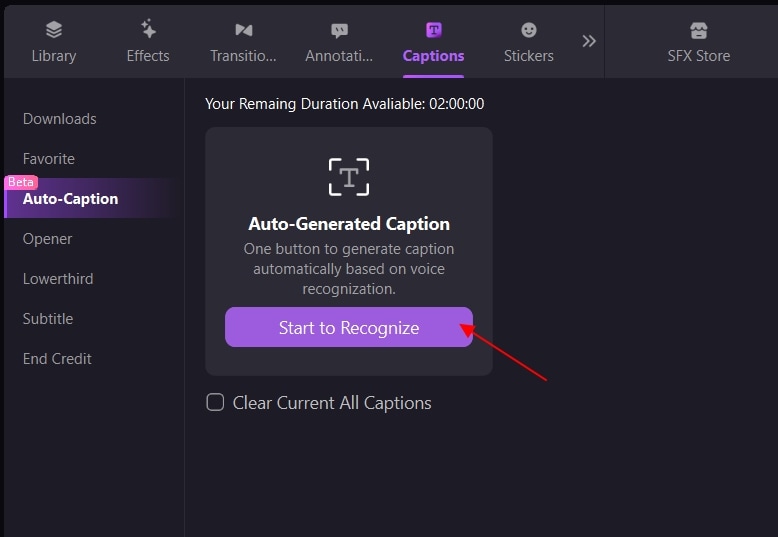
Step2 Start to Recognize
After finishing with the registration process, now it's time to start with the application to enjoy its feature by signing in with the credentials you made. Click the "Start to Recognize" button and select the language you want to transcribe.
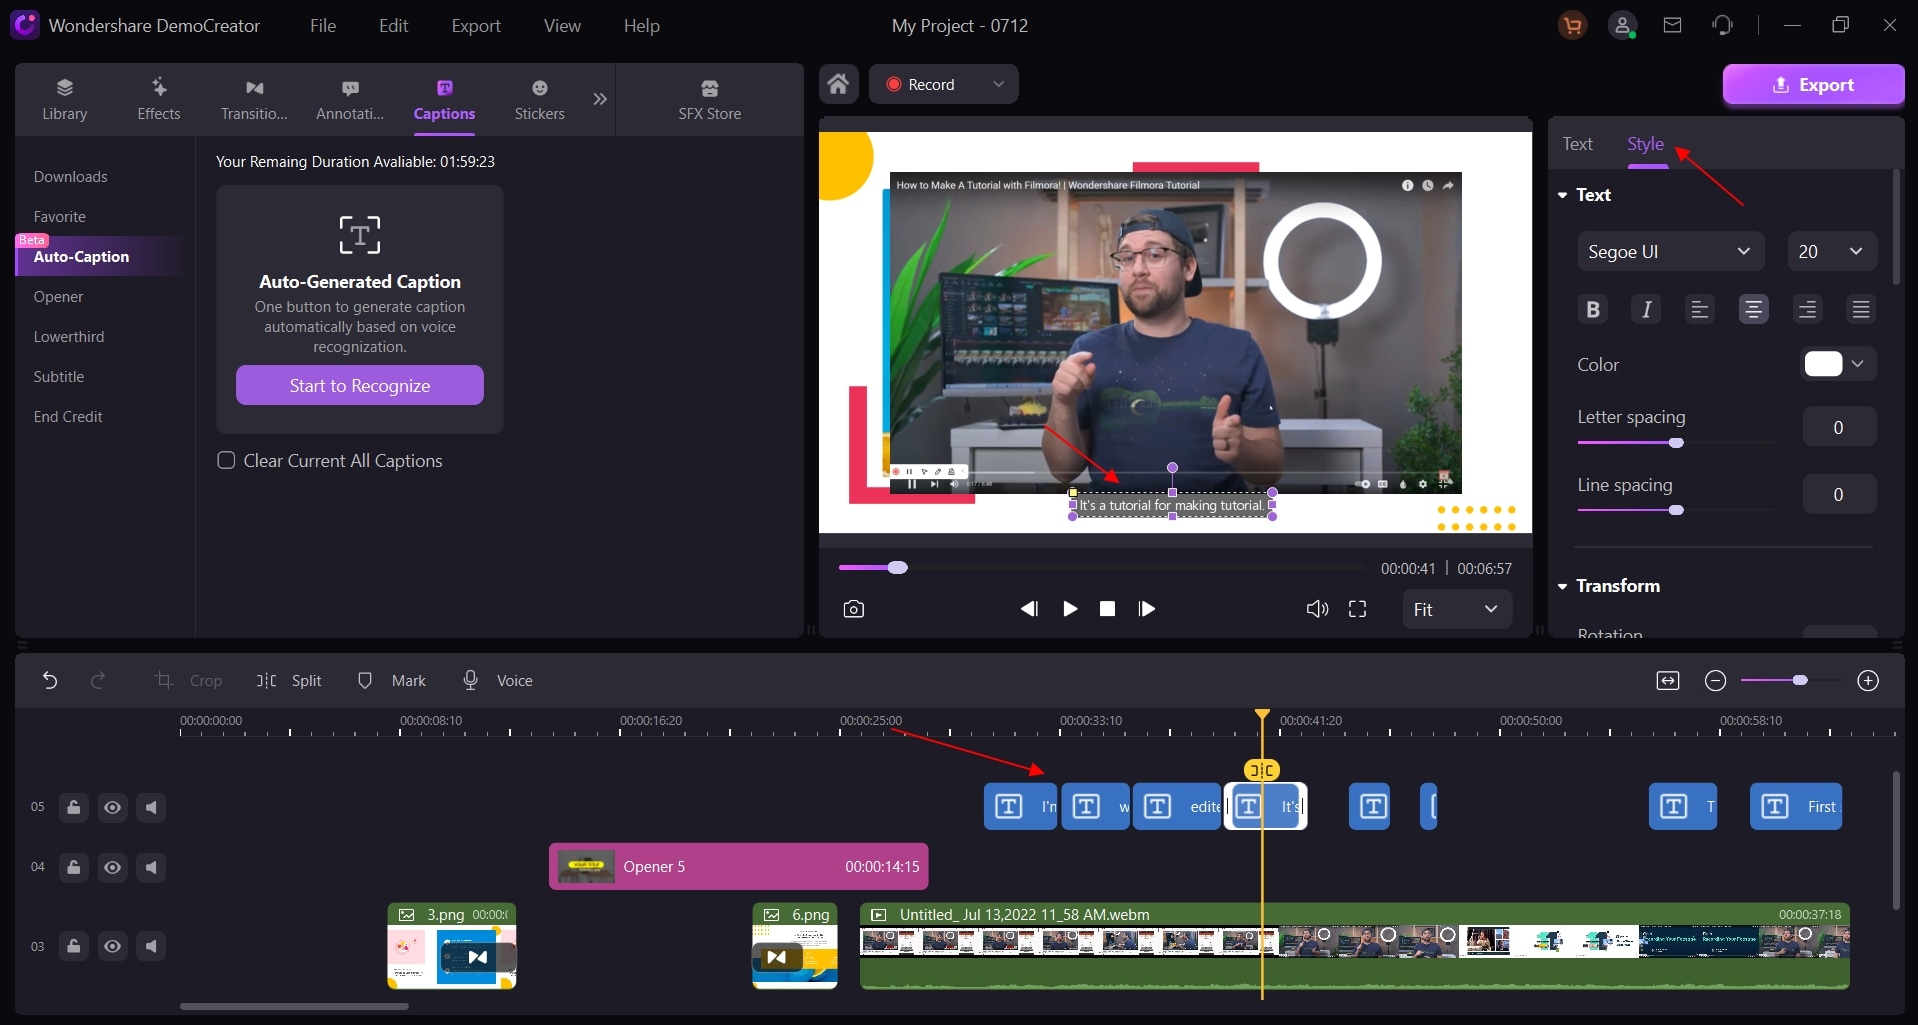
Step3 Preview the Content
Transaction time is determined by the length of the video. Once finished, all the text tracks will be displayed on the timeline, you can check the precision. Also, you can customize the caption (size, color, border, shape...) through the properties panel on the right.
Step4 Export Video
In the end, if you want to avail all the fantastic features of the application, you can buy a premium account and have fun with your videos. Now it's time to save the video. This can be done by following the step given below:
Go to the File option in the top menu tab of the DemoCreator. Click on save the project under the file option. After that, you can click on the Export option in red in the right corner of the DemoCreator app. By clicking Export, a new window will pop up. This window display will contain two options: 1) Storing the video locally on your machine. 2) Publishing it directly on YouTube.
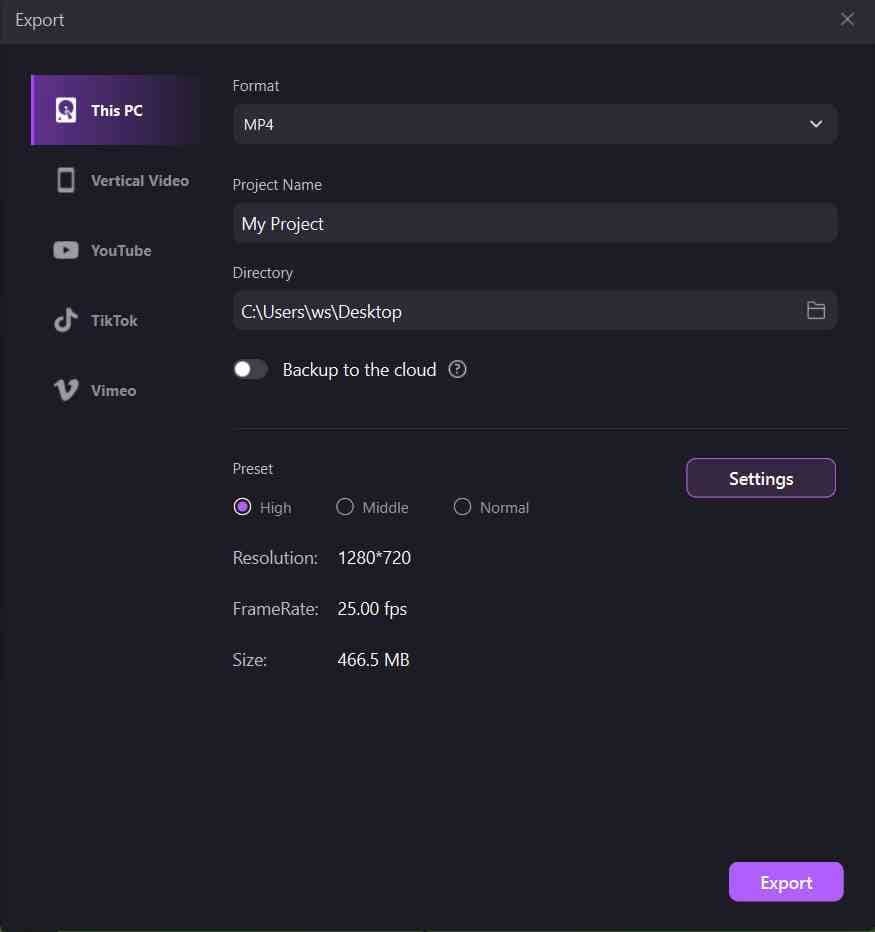
Now it's your choice to save the video on a computer or publish it. Choose the destination, name, format, and preset settings for the video to be saved, if you have opted for saving it on your computer. In the end, click Export with Watermark and your video will be saved. Make sure you are already signed in to avoid any issues during saving the video.
Other Advanced Captions Editing in Premiere Pro
There are many justifications for why you should add text to your video projects in Adobe Premiere Pro. Some of the time you simply need a straightforward title toward the start of your short film. Or then again you could require a credit creep toward the finish of your element. Yet, similarly as frequently, you'll have to add text for inscriptions and captions.
1. Create Styles for Your Captions
On the off chance that you're not anticipating consuming your inscriptions into your video, you should think about altering a portion of the traits above for your Closed subtitles. A significant number of these customization choices will show up on significant video stages and web-based destinations when sent out as a different '.Scc' sidecar record. The two inscriptions and captions typically go best at the lower part of your screen. Be that as it may, assuming you're working with especially brilliant or dull film, you could need to add components like drop-shadow, edges, or foundation tones to make the text stick out and seem comprehensible. You can likewise start moving and molding your crate for its optimal area. Moving and forming the container ought to be as straightforward as when you originally positioned it.
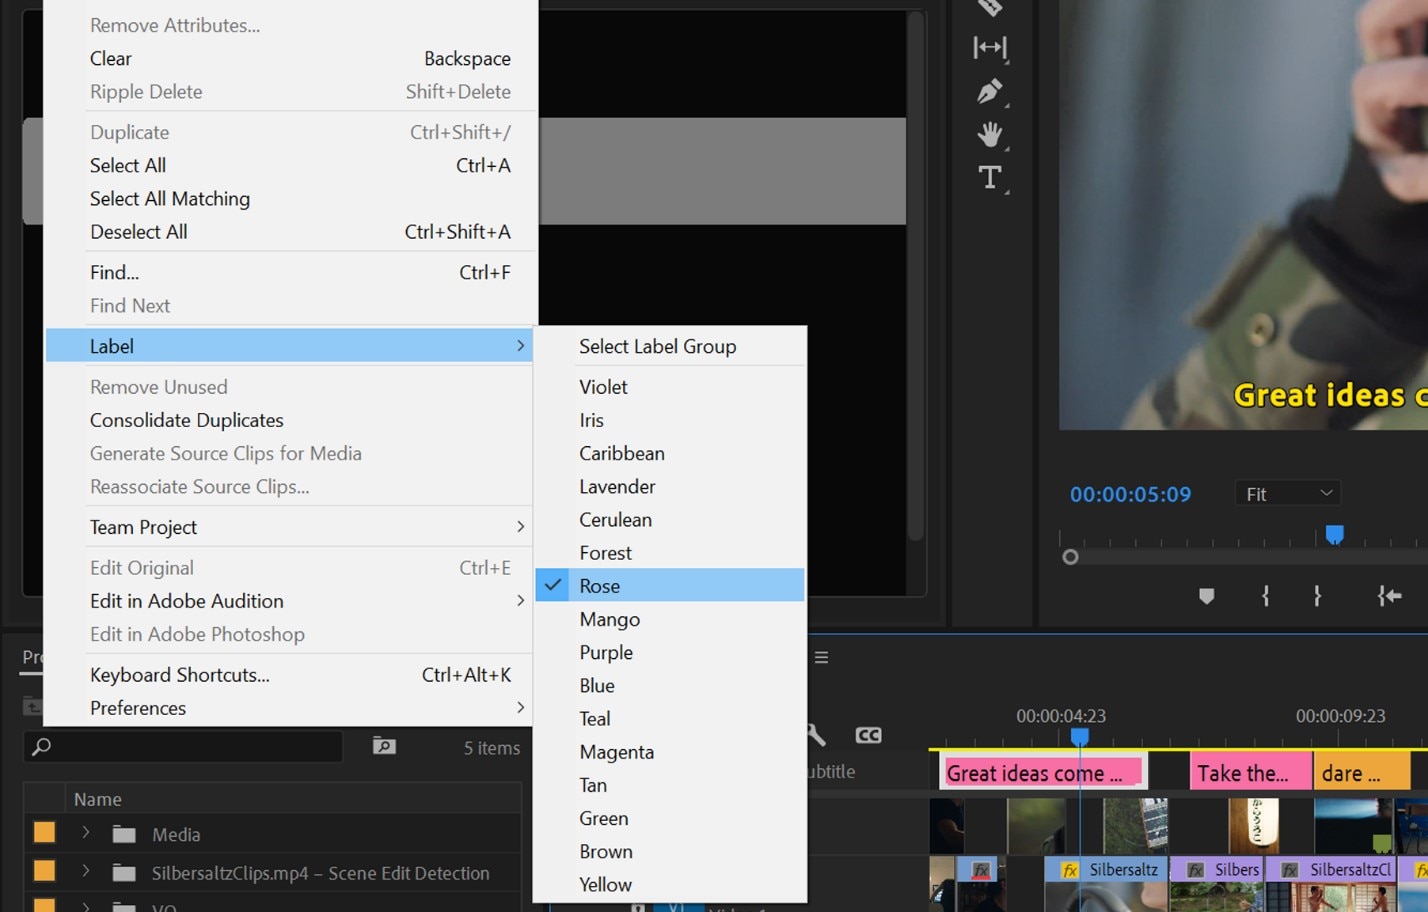
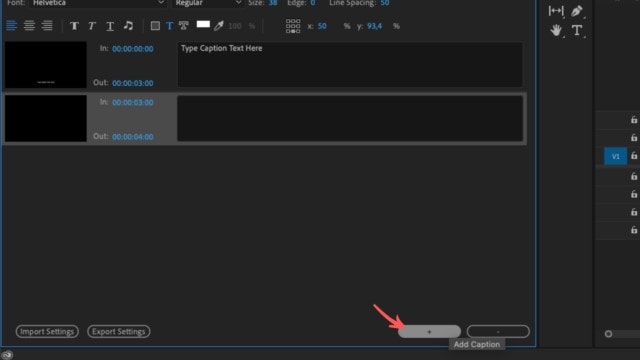
You can likewise start to modify your text in the "Expert *Graphic" "Impacts Controls" board on the upper left half of your screen as well as label it with the favorite stylesheet as shown above. There ought to be a red layout showing your crate on the program screen. Move that around and once again shape it until the text within the crate looks ideal on the screen. A significant number of these controls can go from simple to additional top to bottom. However, the nuts and bolts will all be there: Font, Size, Alignment, Tracking, Kerning, Leading, Opacity, and so forth. However, when you have a text box that looks great and works for your venture's necessities, you can duplicate and copy that text box however many times depending on the situation (make certain to rename it each time). With each new copy, you can add another square of text and change it depending on the situation.
2. Export Captions
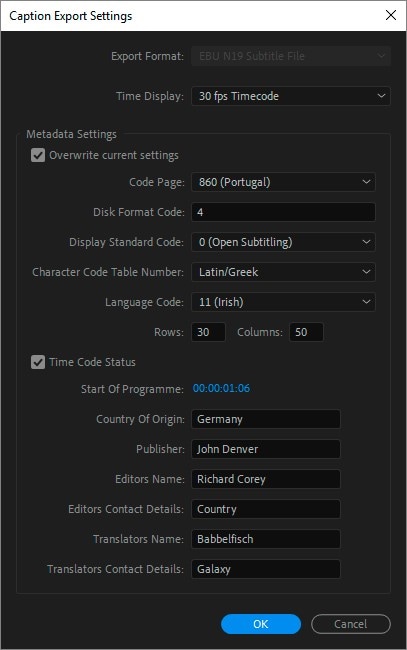
Assuming that you changed the style and position of your Closed inscriptions for stages like real-time, broadcast, or online video, then, at that point, basically Export Closed subtitles as a different sidecar record. You can transfer this new inscription document to the video stage. Now that you have your captions looking exactly how you need them, now is the ideal time to Export your task. To deliver the open inscriptions or unfamiliar captions onto the video for all time, then, at that point, pick Burn Captions into Video. This will re-render your venture with the subtitles layered on top of the video, so make certain to set your best commodity settings. It has different commodity choices accessible in Premiere:
- Export Closed subtitles as a different sidecar document
- Install Closed subtitles into the result document
- Consume open subtitles into the delivered video
Closed subtitles records are acknowledged on the most significant web-based stages; Netflix, Hulu, and Amazon Video. Consider transferring your sidecar subtitles record to these stages as opposed to transferring a video with consuming in inscriptions. You've most likely seen viral recordings and, surprisingly, some film trailers that use open inscriptions to make the discourse "pop." This is particularly significant for the stages that don't acknowledge Closed subtitles yet, so open subtitles assist with making those recordings all the more effectively available for everybody.
Essential demo-making tool that helps learners, educators, freelancers and gamers to take idea-sharing to the next level.


