
Resizing an image seems simple, but if done incorrectly, it can lead to pixelation, distortion, or loss of quality. Whether you need to resize an image for a website, social media post, presentation, or document, understanding how to properly adjust the dimensions while maintaining sharpness is crucial. In this guide, we’ll cover how to resize an image without losing quality, explore best practices, and recommend the best online and offline tools for the job. Additionally, we’ll introduce Wondershare DemoCreator, a powerful tool designed for capturing screenshots and editing images, ensuring high-resolution results with ease.
In this article
Part 1: Understanding Image Resizing & File Types
What Happens When You Resize an Image?
When you resize an image, you're either shrinking or enlarging it. If done improperly, resizing can result in blurry or pixelated images.
- Shrinking an image removes pixels, reducing file size but potentially losing sharpness.
- Enlarging an image increases pixel count, often leading to blurriness if the software isn’t equipped with advanced upscaling algorithms.
Difference Between Shrinking and Enlarging Images
- Shrinking: Reducing the image size while keeping details intact. Works well with vector-based and high-resolution images.
- Enlarging: Increasing the image size without making it blurry requires AI-based upscaling tools or software that fills in missing pixels intelligently.
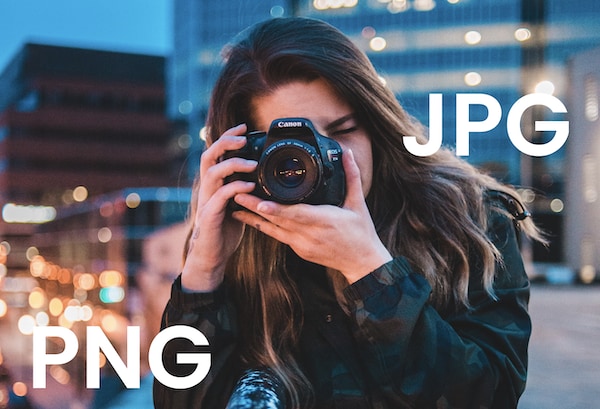
JPG vs. PNG – Which is Better for Resizing?
Understanding image formats is key when resizing:
- JPG (JPEG): Uses lossy compression, meaning image data is lost each time it’s edited. While great for websites and social media due to small file size, resizing may reduce clarity.
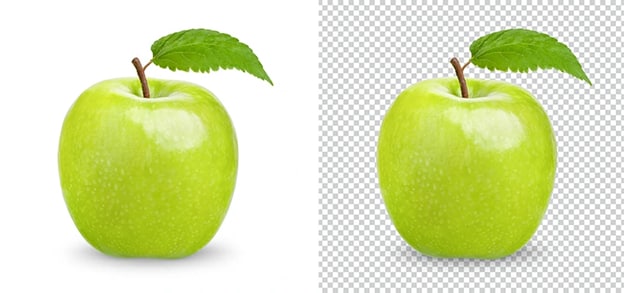
- PNG: Uses lossless compression, preserving details even after resizing. PNG is better for detailed images, graphics, and screenshots, making it ideal for presentations and high-quality visuals.
Which one should you use?
- Use JPG for faster loading speeds on websites.
- Use PNG for clearer images in presentations or videos.
Part 2: Best Practices for Resizing an Image Without Losing Quality
Resizing an image without losing quality is crucial when working with web content, social media posts, documents, and presentations. Without the proper techniques, images can become pixelated, blurry, or stretched, negatively affecting their appearance and effectiveness.
By following best practices, you can maintain image sharpness while reducing file size for faster loading times or adjusting dimensions to fit different platforms. Below are essential guidelines to ensure high-quality resizing results.
Key Tips for Maintaining Image Quality
1. Always resize proportionally One of the most important rules when resizing an image is to maintain its aspect ratio. This prevents distortion, where an image may appear stretched or squished. Most image editing tools provide an option to "lock aspect ratio", ensuring the height and width are scaled together.
2. Use high-resolution images as a starting point When shrinking or enlarging an image, starting with a high-resolution file is essential. A low-resolution image resized to a larger dimension will lose details and become blurry. If possible, use original high-quality images before resizing.
3. Choose the right tool for the job Not all resizing tools are created equal. Simple editors may compress and degrade image quality, while AI-powered tools and professional software can preserve clarity and details. Tools like Photoshop, GIMP, and Wondershare DemoCreator use smart algorithms to maintain quality when resizing images.
4. Optimize the file format based on usage The choice of file format impacts quality after resizing.
- JPG: Best for web and social media due to smaller file sizes but may lose some detail during compression.
- PNG: Ideal for presentations, documents, and high-detail graphics as it supports lossless compression and retains quality even after resizing.
5. Use AI-enhanced scaling when enlarging images Standard resizing methods struggle to increase an image’s size without quality loss. AI-based tools, like Fotor and Photoshop’s Preserve Details 2.0, analyze patterns to reconstruct pixels, preventing pixelation. This method ensures a sharp and clean image even after enlarging.
Optimal Dimensions & File Sizes for Different Use Cases
When resizing an image, it’s important to consider its intended use. Below are the recommended image dimensions and file formats for different platforms to achieve the best quality and performance.
Websites & Blogs: Images used on websites should be optimized for fast loading speeds without compromising clarity.
- Recommended width: 1200px max for main content images
- Best format: JPG, as it provides smaller file sizes and faster page loads
Social Media: Each platform has specific image size requirements for the best visual appearance.
- Instagram: 1080x1080px for standard posts, 1080x1920px for stories
- Facebook: 1200x630px for posts, 1640x856px for cover images
- Twitter: 1600x900px for shared images and banners
- Best format: JPG for compressed images, PNG for higher quality
Using the correct dimensions ensures that images don’t get stretched or cropped unexpectedly on different social platforms.
Presentations & Documents: For PowerPoint presentations, PDFs, and other digital documents, clarity is key.
- Recommended width: 1000px to ensure images remain sharp on slides
- Best format: PNG, as it retains details even when resized or displayed on large screens
- Tip: Avoid large file sizes that increase document load time—compress images before inserting them into presentations.
Part 3: Resize Images Quickly with Wondershare DemoCreator
Wondershare DemoCreator is an efficient tool for capturing, editing, and resizing images while preserving quality. Whether you're working with screenshots, presentation visuals, or tutorial graphics, it provides high-resolution resizing without distortion. The tool allows you to resize images quickly using a simple drag-and-drop interface. With precise aspect ratio control, DemoCreator ensures that your resized images remain sharp and clear. Additionally, it supports various file formats, making it a versatile choice for professionals and content creators.
Key Features of Wondershare DemoCreator for Image Resizing
- Smart Aspect Ratio Control – Maintains the original proportions of an image to prevent stretching.
- Supports Multiple Image Formats – Resize JPG, PNG, BMP, and more without loss of quality.
- One-Click Screenshot Editing – Capture and resize screenshots instantly for presentations and tutorials.
- Batch Resizing Option – Resize multiple images at once for improved workflow efficiency.
- Custom Pixel-Based Resizing – Set exact pixel dimensions for precise image adjustments.
How to resize an image using Wondershare DemoCreator:
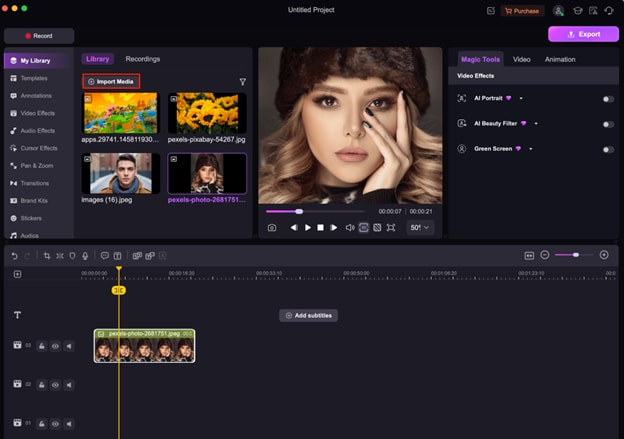
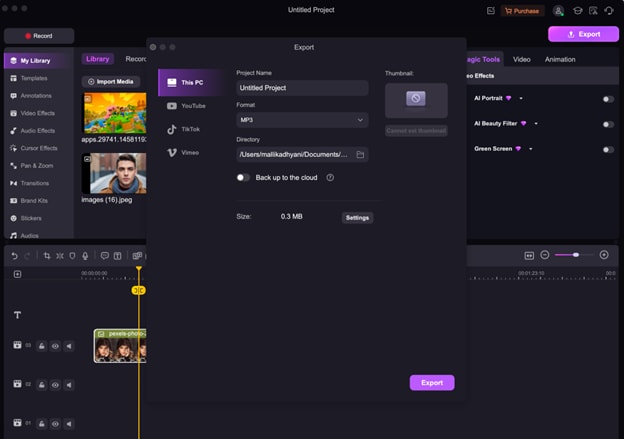
Step 1Open Wondershare DemoCreator and Import the Image
Launch Wondershare DemoCreator and click on Import Media to upload the image you want to resize. The software supports JPG, PNG, BMP, and other common formats, making it easy to work with different image types.
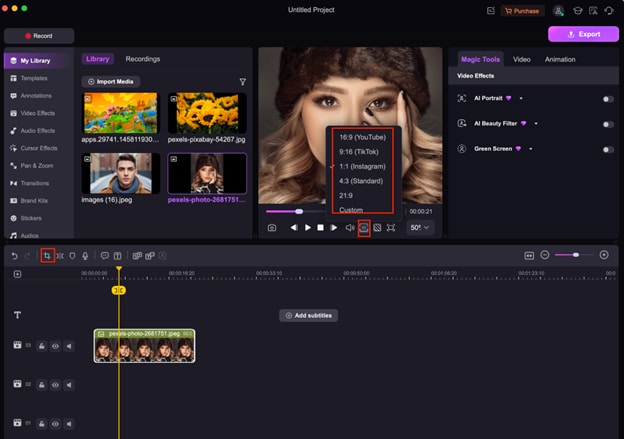
Step 2Select the Resize Option and Adjust Dimensions
In Wondershare DemoCreator, resizing an image is straightforward. Click on the crop/resize tool, which is highlighted in the screenshot. A dropdown menu will appear, allowing you to select from preset aspect ratios such as 16:9 (YouTube), 9:16 (TikTok), 1:1 (Instagram), 4:3 (Standard), and 21:9, or choose a custom size. Select the appropriate ratio or manually enter the dimensions to fit your specific needs.
Step 3Save and Export the Resized Image
Once satisfied with the new dimensions, preview the resized image to check for clarity and sharpness. Click Export, choose the file format, and save it to your device.
How to Resize an Image Without Losing Quality – Online & Offline Tools
There are many tools available for resizing an image without losing quality, but choosing the right one depends on your needs. Online tools provide quick and easy resizing, while offline software offers more advanced features for professional editing. Below, we review the top three online and offline image resizing tools, including key features, pros & cons, and a step-by-step guide for each.
Top 3 Online Tools for Resizing Images:
1. ResizePixel – Free Tool for Scaling Images Without Distortion
ResizePixel is a simple, free, and easy-to-use online tool for resizing images without quality loss. It supports JPG, PNG, and WEBP formats, making it ideal for website and social media optimization. The tool offers basic image compression, cropping, and format conversion, ensuring your resized images remain sharp and clear.

Key Features:
- Supports lossless compression – Allows resizing without affecting image clarity.
- Aspect ratio lock – Prevents image stretching or distortion.
- Supports JPG, PNG, WEBP, and GIF formats – Provides flexibility in resizing different file types.
- Custom pixel dimension input – Manually set width and height for precise resizing.
- One-click compression option – Reduces file size while maintaining quality.
Guide to Resizing an Image in ResizePixel
Step 1Upload Your Image
Visit ResizePixel.com and click on the Upload Image button. Select the image you want to resize from your computer. The tool supports JPG, PNG, WEBP, and GIF formats.
Step 2Set the New Dimensions
Enter the desired width and height while ensuring the "Maintain Aspect Ratio" box is checked. This prevents your image from becoming stretched or distorted.
Step 3Download the Resized Image
Click Resize and wait for the process to complete. Once done, click Download to save your resized image in your preferred format.
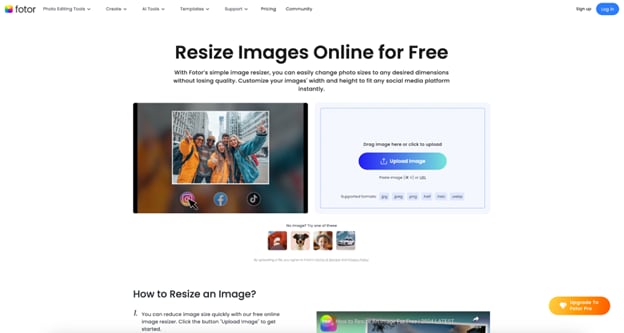
2. Fotor – AI-Powered Resizing with Format Conversion
Fotor is an AI-enhanced online editor that allows high-quality image resizing with automatic adjustments. It supports batch processing, making it ideal for users who need to resize multiple images at once. The tool provides social media presets for platforms like Instagram and Facebook, ensuring your images are perfectly formatted. With its real-time preview, users can make precise adjustments before downloading their resized images.
Key Features:
- AI-enhanced upscaling – Enlarges images while maintaining sharpness.
- Batch resizing support – Resize multiple images at the same time.
- Social media presets – Offers predefined dimensions for Instagram, Facebook, and Twitter.
- Real-time preview – See changes before applying them.
- One-click format conversion – Easily switch between JPG, PNG, and PDF.
Guide to Resizing an Image in Fotor
Step 1Open Fotor and Upload Your Image
Go to Fotor.com and select the Resize Image tool. Click Upload Image and choose the file you wish to edit. The tool supports multiple formats, including JPG, PNG, and PDF.
Step 2Adjust the Image Size
Enter custom dimensions or use the preset sizes available for social media and web use. Enable the AI-powered scaling feature for high-quality resizing without loss of clarity.
Step 3Download the Resized Image
Once satisfied with the new dimensions, click Apply and then Download. Choose between JPG or PNG format to save your resized image.
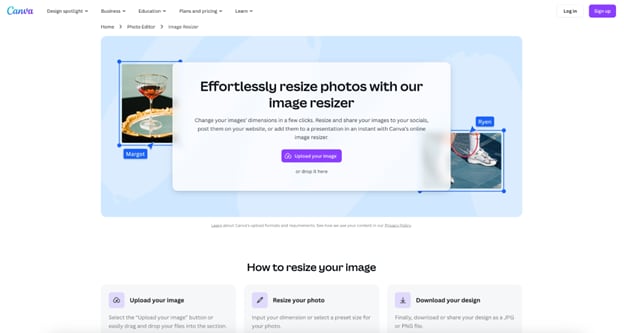
3. Canva – Great for Social Media Images with Predefined Templates
Canva is a user-friendly design tool that offers built-in image resizing for social media, presentations, and marketing content. It provides predefined templates for various platforms, allowing users to resize images without manual dimension adjustments. The drag-and-drop interface makes it easy for beginners to resize, crop, and edit images quickly. With cloud storage integration, users can save and access their resized images from any device.
Key Features:
- Drag-and-drop resizing – Adjust image size instantly using an intuitive interface.
- Preset social media dimensions – Optimized for Instagram, Facebook, LinkedIn, and Twitter.
- Cloud storage integration – Save and access resized images across devices.
- Transparent background support – Resize images with transparent backgrounds (Pro feature).
- Instant cropping and scaling – Resize images while keeping key elements visible.
Guide to Resizing an Image in Canva
Step 1Upload Your Image to Canva
Log in to Canva.com and click Create a Design. Select the Resize Image tool and upload your image. Canva allows drag-and-drop editing for easy adjustments.
Step 2Choose a Predefined or Custom Size
Use Canva’s preset dimensions for social media, blogs, or presentations. If needed, enter custom dimensions manually to maintain precise image scaling.
Step 3Export and Download Your Resized Image
Click Download, choose the format (PNG, JPG, or PDF), and adjust the quality settings if necessary. Save the resized image to your device or share it directly from Canva.
Top 3 Offline Software for Image Resizing:
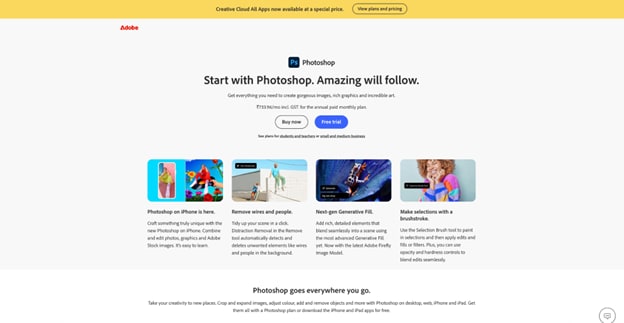
1. Adobe Photoshop – Best Professional Tool with Advanced Resizing Options
Adobe Photoshop is the gold standard for professional image editing, offering powerful resizing features for both shrinking and enlarging images. It includes AI-powered upscaling with Preserve Details 2.0, which prevents pixelation when enlarging photos. The software supports batch resizing, making it ideal for photographers and designers working with multiple images. With its layer-based editing system, users can resize specific elements within an image while maintaining overall composition.
Key Features:
- Preserve Details 2.0 – AI-based upscaling for enlarging images without pixelation.
- Content-aware scaling – Maintains subject focus while resizing background.
- Batch resizing and automation – Resize multiple images efficiently.
- Supports RAW and high-resolution formats – Ideal for professional photography.
- Layer-based editing – Resize individual layers within an image.
Guide to Resizing an Image in Adobe Photoshop
Step 1Open Your Image in Photoshop
Launch Adobe Photoshop and open the image you need to resize. Navigate to Image > Image Size from the top menu to access resizing settings.
Step 2Adjust Dimensions with Preserve Details 2.0
Enter the new width and height while ensuring "Constrain Proportions" is enabled. For enlarging images, use Preserve Details 2.0 Upscale to maintain quality.
Step 3Export the Resized Image
Go to File > Export > Save As, then choose your preferred format (JPG, PNG, or TIFF). Adjust the compression level for the best balance between size and quality.
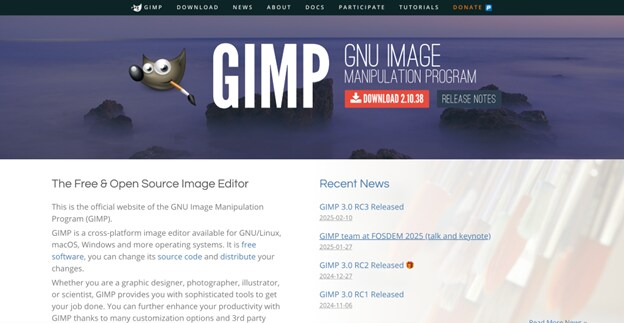
2. GIMP – Free Alternative with High-Quality Scaling Features
GIMP is a free, open-source image editor that provides high-quality scaling and resizing tools comparable to Photoshop. It supports multiple file formats and offers customizable resampling methods, ensuring minimal quality loss when adjusting image dimensions. Advanced users can automate batch resizing through scripts, making it efficient for handling large volumes of images. Additionally, GIMP’s color profile management helps maintain color accuracy after resizing.
Key Features:
- Scale Image with Sinc (Lanczos3) Interpolation – Ensures minimal quality loss during resizing.
- Open-source with full customization – Allows script-based automation for resizing.
- Supports multiple file formats – Works with JPG, PNG, GIF, and TIFF.
- Color profile management – Maintains color accuracy when resizing.
- Advanced resampling algorithms – Provides sharper details when reducing image size.
Guide to Resizing an Image in GIMP
Step 1Open GIMP and Import Your Image
Launch GIMP and click File > Open to load your image. GIMP supports a wide range of formats, including JPG, PNG, GIF, and TIFF.
Step 2Resize Using the Scale Tool
Go to Image > Scale Image, then enter the desired width and height. Select Cubic or Sinc (Lanczos3) as the interpolation method for the best quality.
Step 3Save the Resized Image
Click File > Export As, choose your format, and adjust compression settings if necessary. Save the image to your device and use it for your project.
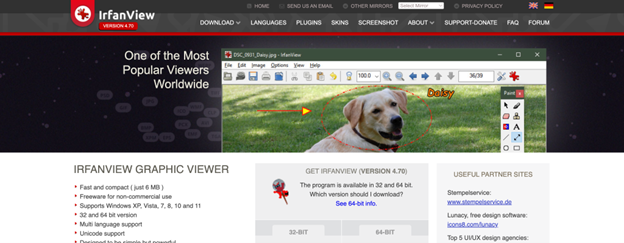
3. IrfanView – Lightweight Tool for Batch Image Resizing
IrfanView is a fast and lightweight image viewer and editor that excels in quick resizing and format conversion. It is optimized for batch processing, allowing users to resize multiple images simultaneously with minimal effort. The software includes lossless rotation and cropping, ensuring images remain sharp even after modifications. IrfanView’s custom DPI settings make it a great choice for optimizing images for both web and print applications.
Key Features:
- Batch resize & rename – Process multiple images at once.
- Lossless rotation & cropping – Edit images without recompressing them.
- High-speed processing – Resize images quickly with minimal resource usage.
- Custom DPI settings – Adjust resolution for print and web.
- Plugin support – Extends functionality with extra tools.
Guide to Resizing an Image in IrfanView
Step 1Open IrfanView and Load Your Image
Launch IrfanView and open the image you want to resize. If resizing multiple images, select Batch Conversion/Rename from the File menu.
Step 2Set New Dimensions
Go to Image > Resize/Resample, then enter your desired dimensions. Choose Lanczos resampling for the best quality when shrinking or enlarging an image.
Step 3Save the Resized Image
Click OK and then File > Save As to export your resized image. Select JPG or PNG, adjust quality settings, and save the file.
Conclusion
Resizing an image without losing quality is essential for creating high-quality visuals across different platforms. By following best practices, choosing the right tools, and maintaining the correct aspect ratio, you can ensure sharp and clear images for web, social media, and presentations.
For users looking for an easy and effective way to resize images, Wondershare DemoCreator provides a complete screenshot and image editing solution. Whether you need to resize an image for a presentation or capture and edit visuals for video projects, DemoCreator ensures your images remain crisp and high-resolution.
FAQs
-
1. What is the best format to resize an image without losing quality?
PNG is the best format for resizing images while maintaining quality because it uses lossless compression. It retains fine details and transparency, making it ideal for professional use. JPG is better for web images but may lose some quality due to compression. -
2. How do I make an image smaller without making it blurry?
To reduce an image’s size without blurriness, use high-resolution images and resize them with AI-powered tools like Fotor or Photoshop's Preserve Details 2.0. Always enable aspect ratio lock to maintain sharpness. -
3. Can I resize an image without stretching or distorting it?
Yes, to prevent stretching, use the "Maintain Aspect Ratio" option in editing tools like Wondershare DemoCreator, Canva, or Photoshop. This ensures the image is resized proportionally without distortion. -
4. What’s the best free tool for resizing images?
ResizePixel, GIMP, and Fotor are great free tools for resizing images without quality loss. GIMP offers advanced options, while ResizePixel and Fotor provide easy, AI-powered resizing for beginners.


