Voice-to-text on Android devices offers a convenient way to simplify text input by allowing users to dictate messages with ease. With voice-to-text on Android, you can streamline your communication, save time, and improve efficiency in everyday tasks. This feature is particularly useful for those looking to type less and say more.
This guide provides step-by-step instructions to activate Android voice-to-text, troubleshoot common issues, and enhance your dictation experience. Whether you're using Android talk to text or exploring advanced speech-to-text on Android capabilities, you'll discover practical tips to make the most of this powerful Android speech-to-text tool.
In this article
- How to Turn on Voice to Text on Android
- How to Use Voice to Text (Google Voice Typing) on Android
- Android Voice to Text Tips & Tricks
- Common Issues with Speech-to-Text on Android
- Troubleshooting Steps for Voice-to-Text Android Issues
- Top Three Voice-to-Text Apps for Android
- Bonus Tool: Wondershare DemoCreator is Your Best Choice
Part 1:Overview of voice-to-text technology

Voice-to-text technology, also known as speech recognition, converts spoken language into written text, enhancing communication and productivity across various fields. Its importance lies in facilitating hands-free text input, making it invaluable for accessibility and efficiency in both personal and professional settings. This article focuses on enabling and troubleshooting voice-to-text on Android, providing users with practical guidance to optimize their dictation experience, along with a list of essential tools that utilize Android voice-to-text features for a seamless experience.
Part 2: How to Turn on Voice to Text on Android
Activating Android talk-to-text functionality is a straightforward process that enhances your texting experience by allowing you to dictate messages instead of typing. Follow these steps to enable voice-to-text on Android:
- Accessing Settings: Open the Settings app on your Android device.
- Navigating to General Management or Languages & Input: Scroll down and select either "General Management" or "Languages & Input," depending on your device model.
- Enabling Google Voice Typing or Gboard: Tap on "On-screen keyboard" or "Virtual keyboard," then choose "Gboard" or "Google Voice Typing." Ensure that Google Voice Typing is enabled as your input method.
- Tips for Effective Usage: When using voice-to-text, speak clearly and at a moderate pace for better accuracy. Utilize punctuation commands, such as saying "comma" or "period," to improve the readability of your text.
By following these steps, you can easily turn on voice-to-text on Android and enjoy a more efficient way to communicate.
Part 3: How to Use Voice to Text (Google Voice Typing) on Android

Using speech-to-text on Android is a powerful feature that allows you to dictate messages and commands seamlessly. Here’s how to effectively utilize Google Voice typing in various apps:
- Open Any App: Launch an application where you can input text, such as Messages, Gmail, or Notes.
- Tap the Microphone Icon: When the keyboard appears, locate and tap the microphone icon, typically found on the Gboard or Google keyboard.
- Speak Clearly: Begin dictating your message or command. For accurate transcription, it's crucial to speak clearly and at a steady pace. This helps the voice recognition software understand your speech better.
- Use Punctuation Commands: To enhance your text, you can insert punctuation by saying specific commands like "comma," "period," or "question mark." This ensures your dictated text is coherent and properly formatted.
- Edit with Voice Commands: If there are any mistakes in the transcription, you can correct them using voice commands. For example, say "delete" to remove the last word or "select [word]" to highlight specific text for editing.
By following these steps, you can make the most of the voice typing feature on your Android device, enhancing both your productivity and communication efficiency.
Part 4: Android Voice to Text Tips & Tricks
To enhance your experience with Android speech-to-text, try these quick tips:
- Speak Clearly: Articulate words and maintain a steady pace.
- Choose Quiet Spaces: Dictate in noise-free environments for better accuracy.
- Use Punctuation Commands: Say "comma," "period," or "new paragraph" for clear text.
- Practice Often: Regular use helps improve recognition over time.
- Check Settings: Adjust voice input settings if recognition is lacking.
These tips will help you make the most of Android speech-to-text for efficient communication.
Part 5: Common Issues with Speech-to-Text on Android

Voice-to-text on Android has become an essential feature, allowing users to convert spoken words into written text effortlessly. However, common issues can arise that hinder the effectiveness of this functionality, often due to settings, permissions, or software glitches. Here are five steps to troubleshoot and resolve these common problems:
- Check Microphone Permissions: Ensure that the app you are using has permission to access your device's microphone. Go to Settings > Apps & notifications > [Your App] > Permissions and enable the microphone access if it’s disabled.
- Verify Language Settings: Incorrect language settings can lead to poor transcription accuracy. Navigate to Settings > System > Languages & input > Languages, and ensure the correct language is selected for voice input.
- Update Software and Apps: Keeping your device and apps updated is crucial for optimal performance. Check for system updates by going to Settings > System > System update, and update any relevant apps through the Google Play Store.
- Clear Cache and Data: Clearing the cache and data of the speech-to-text app can resolve persistent issues. Go to Settings > Apps > [Your App] > Storage, then tap on Clear Cache and Clear Data before restarting your device.
- Restart Your Device: A simple restart can often fix temporary glitches affecting voice recognition. Turn off your device completely, wait a few seconds, and then turn it back on to refresh all system processes.
Part 6: Troubleshooting Steps for Voice-to-Text Android Issues
To effectively resolve issues with the Android speech-to-text feature, users can follow a series of troubleshooting steps. These include checking microphone permissions, ensuring a stable internet connection, and verifying that the correct language settings are enabled to enhance performance and accuracy.
- Update Your Software: To ensure your device is running the latest software version for optimal performance of the Android talk-to-text feature, follow these steps. First, open your device's Settings app and navigate to "About Phone" to check your current Android version. Then, go to "System" and select "Software Update" to check for available updates and install them if necessary, ensuring you benefit from the latest enhancements and fixes.
- Check Permissions: To verify and adjust microphone permissions for the speech-to-text on Android feature, start by opening the Settings app on your device. Navigate to "Apps," select your keyboard app (like Gboard), and then tap on "Permissions." Ensure that the microphone permission is enabled by selecting "Allow Only While Using the App" to allow voice typing functionality.
- Reset Speech-to-Text Settings: If issues persist with the Android speech-to-text feature, resetting the settings can help restore functionality. To do this, open the Settings app, navigate to "Accessibility," and select "Text-to-speech output." From there, look for the option to reset or restore default settings, which will revert any changes made and may resolve ongoing problems with the speech-to-text functionality.
Part 7: Top Three Voice-to-Text Apps for Android
The top three voice-to-text Android apps provide users with reliable and efficient dictation capabilities tailored to various needs. These apps enhance productivity by offering features like high accuracy, easy integration, and collaborative transcription options.
1. Dragon Anywhere
Dragon Anywhere is a robust mobile talk-to-text app for android free, delivering high-accuracy dictation capabilities. It allows users to create and edit documents of any length using advanced speech recognition that adapts to individual voices. With features like auto-text commands and cloud integration, it streamlines documentation processes and enhances productivity. Additionally, users can easily import and export documents, facilitating efficient content management across devices.
- Languages Supported: English primarily; limited support for other languages in specialized versions.
- Best Usage: Business documentation, legal or medical transcription.

Key Features:
- High accuracy dictation
- Customizable voice commands
- Cloud storage integration
- Document editing capabilities
- Cross-device synchronization
Steps to Use Dragon Anywhere
Step 1: Download and Install:
Visit the Google Play Store, search for Dragon Anywhere, and download the app to your Android device.
Step 2: Set Up Your Account:
Open the app and create an account or log in to your existing account to access features and settings.
Step 3: Start Dictating:
Tap the microphone icon to begin dictation, speak clearly, and use voice commands to edit or format your text as needed.
2. Google Gboard
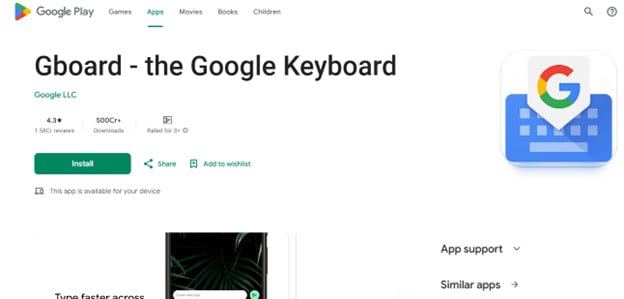
Gboard is a versatile voice-to-text app Android free that enhances the typing experience with its built-in dictation capabilities. It supports multiple languages, allowing seamless switching for multilingual users while providing accurate predictive text. The app integrates Google services, enabling users to search and share information directly from the keyboard. With features like glide typing and customizable themes, Gboard caters to diverse user preferences and improves overall productivity.
- Languages Supported: 916 languages and dialects.
- Best Usage: Everyday texting, emails, and notes.
Key Features:
- Built-in dictation functionality
- Supports multiple languages
- Voice commands for punctuation
- Customizable keyboard settings
- Real-time text recognition
Steps to Use Gboard
Step 1: Install and Set Up:
Download Gboard from the Google Play Store and set it as your default keyboard in the device settings.
Step 2: Open a Text Field:
Open any app that allows text input, such as messaging or notes.
Step 3: Activate Voice Typing:
Tap the microphone icon on the keyboard and start speaking to dictate your message or text.
3. Otter.ai
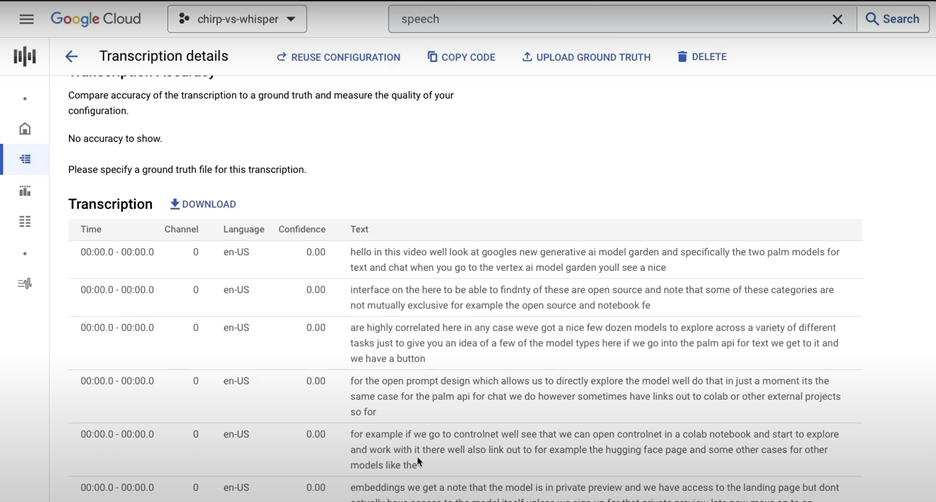
Otter.ai is a leading voice-to-text app for Android that utilizes AI technology to provide accurate transcription services for meetings and conversations. It allows users to record audio and transcribe it in real time, making note-taking effortless and efficient. With features like speaker identification and cloud integration, users can easily manage and share their transcriptions. Otter.ai is particularly useful for professionals needing reliable meeting notes and collaboration tools.
- Languages Supported: Primarily English; limited support for other languages.
- Best Usage: Professional settings, meetings, lectures.
Key Features:
- Real-time transcription capabilities
- Speaker identification for clarity
- Cloud-based storage for transcripts
- Custom vocabulary for accuracy
- Integration with video conferencing
Steps to Use Otter.ai on Android
Step 1: Download and Install:
Go to the Google Play Store, search for Otter.ai, and download the app to your Android device.
Step 2: Sign In or Create Account:
Open the app and sign in with your existing account or create a new one to start using the service.
Step 3: Start Recording:
Tap the record button to begin capturing audio, and Otter.ai will transcribe the conversation in real-time.
Part 8: Bonus Tool: Wondershare DemoCreator is Your Best Choice
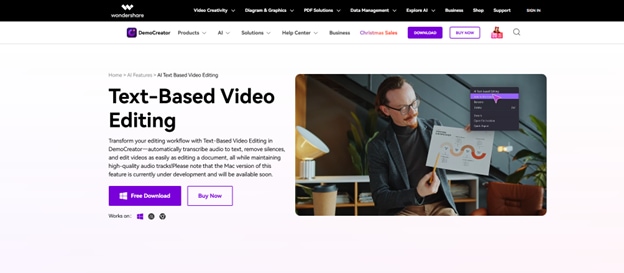
The previously mentioned tools for voice-to-text Android are great, but Wondershare DemoCreator stands out as it runs on Windows and Mac. This tool offers a robust voice-to-text transcription feature that allows users to record audio and automatically generate captions for their video content. With its intuitive editing interface, users can easily refine transcriptions and enhance their videos with annotations and effects. Additionally, DemoCreator supports multiple audio inputs, ensuring high-quality transcription for various recording scenarios.
Key Features:
- Screen recording with audio
- Automatic voice-to-text transcription
- Video editing tools and effects
- Supports multiple audio formats
- Real-time collaboration options
Steps to Use Wondershare DemoCreator
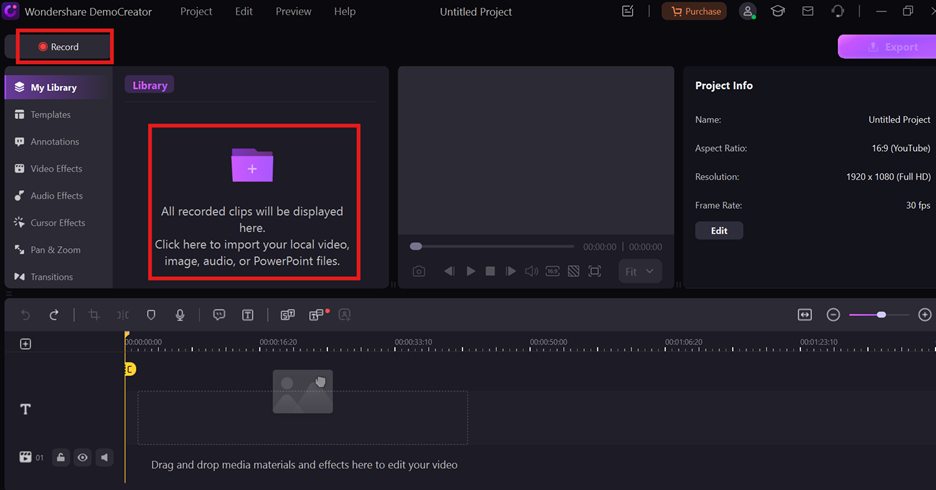
Step1Launch DemoCreator
Start by opening the Wondershare DemoCreator software and signing in to your Wondershare account to unlock all available features.
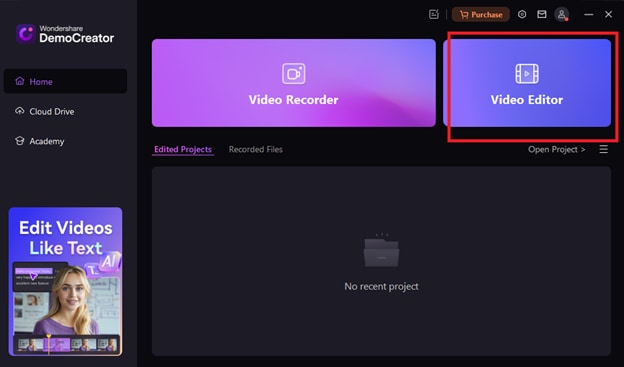
Step2Import Audio or Video
Choose the video editing mode and import the audio or video file that contains the spoken content you want to transcribe.
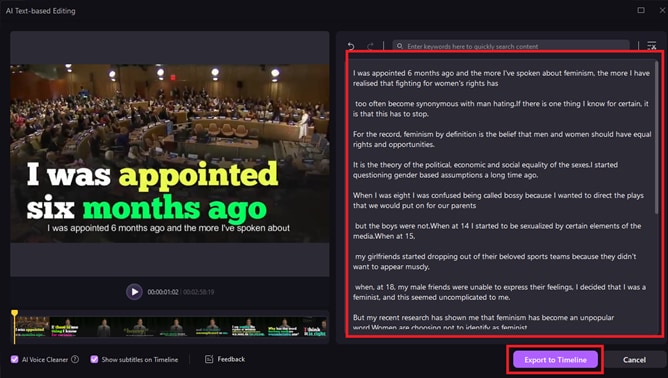
Step3Access AI Text-Based Editing
Go to the AI Text-Based Editing tab to access the transcription feature specifically designed for converting audio into text.

Step4Select Language:
Pick the language of the audio to ensure accurate transcription, as DemoCreator supports a variety of languages.

Step5Generate Transcription and Export
Click on the option to generate text from the audio, then wait for the software to process and create the transcript. Once the transcription is complete, review the generated text for accuracy, after finalizing your transcript, you can export it as a text file or integrate it into your video project before sharing it online.
Conclusion
In conclusion, the various tools and features for voice-to-text Android significantly enhance the user experience by providing efficient and accurate transcription capabilities. With built-in functionalities like Google Voice Typing, users can easily convert spoken words into text across different applications. These technologies not only save time but also improve accessibility for individuals who may struggle with traditional typing methods. As voice recognition technology continues to advance, the potential for seamless communication and documentation will only grow.
FAQs
-
How do I enable voice-to-text on my Android device?
To enable voice-to-text Android, go to your device's Settings, then navigate to "Languages & Input." From there, select your keyboard and enable Google Voice Typing to start using the feature.
-
Why is my voice-to-text feature not working properly?
If your Android speech-to-text feature isn't working, ensure that microphone permissions are granted and that your device's language settings match your spoken language. Additionally, check for any software updates that might resolve functionality issues.
-
What should I do if my voice typing stops working after an update?
If voice typing stops functioning after an update, try restarting your device and checking the settings to ensure Google Voice Typing is still enabled. If the problem persists, consider reinstalling the keyboard app or resetting the app preferences.
-
Are there any third-party apps that enhance voice-to-text functionality on Android?
Yes, there are several third-party apps available that enhance voice-to-text Android capabilities, offering features like improved accuracy and additional languages. Popular options include dedicated transcription services and enhanced keyboard apps that support advanced dictation features.
-
Can I use voice-to-text in multiple languages on Android?
Android speech-to-text supports multiple languages, allowing users to switch between them easily. Ensure that the desired languages are downloaded and selected in your device's language settings for optimal performance.


