Do you want to make a video from many short clips? Well, DemoCreator is a proficient all-in-one software that performs many video editing and creation. From screen recording, editing videos, publishing demo presentations, creating tutorials to many more amazing video creation features. DemoCreator enables gamers, entrepreneurs, creators, and educators to record their astonishing moments on their gadgets. The latest version provides many features to Mac users, and it enables Mac users to combine several of their clips and make a great video to showcase or upload on media. Here are several tutorials on how to combine videos on Mac.
In this article
Part 1. How to Combine Videos on Mac - 3 Easy Steps
Sometimes it's hard for you to control much of your videos, so a great tool to combine videos is needed. If you want to use the Mac built-in tool to combine videos it seems not so convenient. Here we recommend one tool called Wondershare DemoCreator. It's a tool not only that can be used for combining videos but also for screen recording and video editing. Most important, it's simplified for all. The Mac and Windows both suited.
Below are the 3 easy steps about how to use Wondershare DemoCreator to combine videos:
Step1Import the videos you want to combine
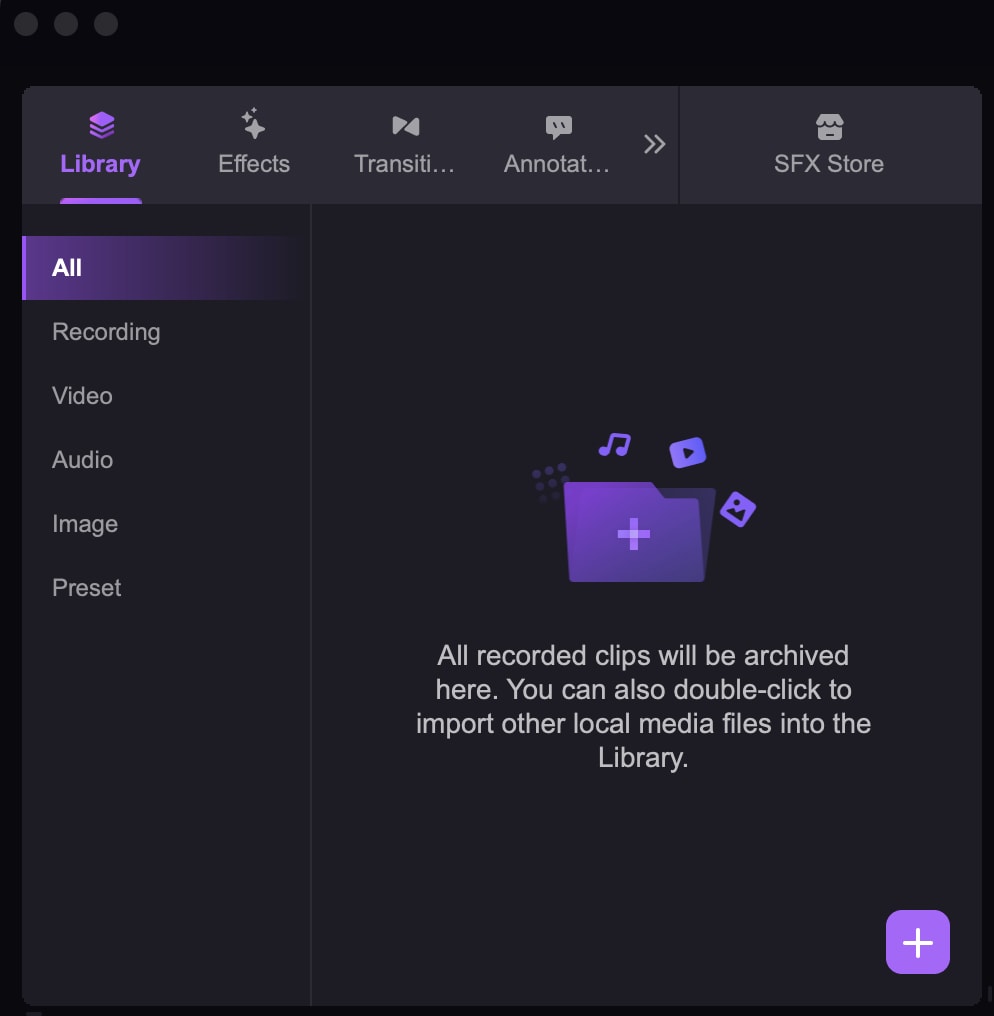
First, download and install Wondershare DemoCreator, and then launch it. Go to “Editor”, then click “Import” to import the media files you want to combine.
Step2Drag the media files to timeline
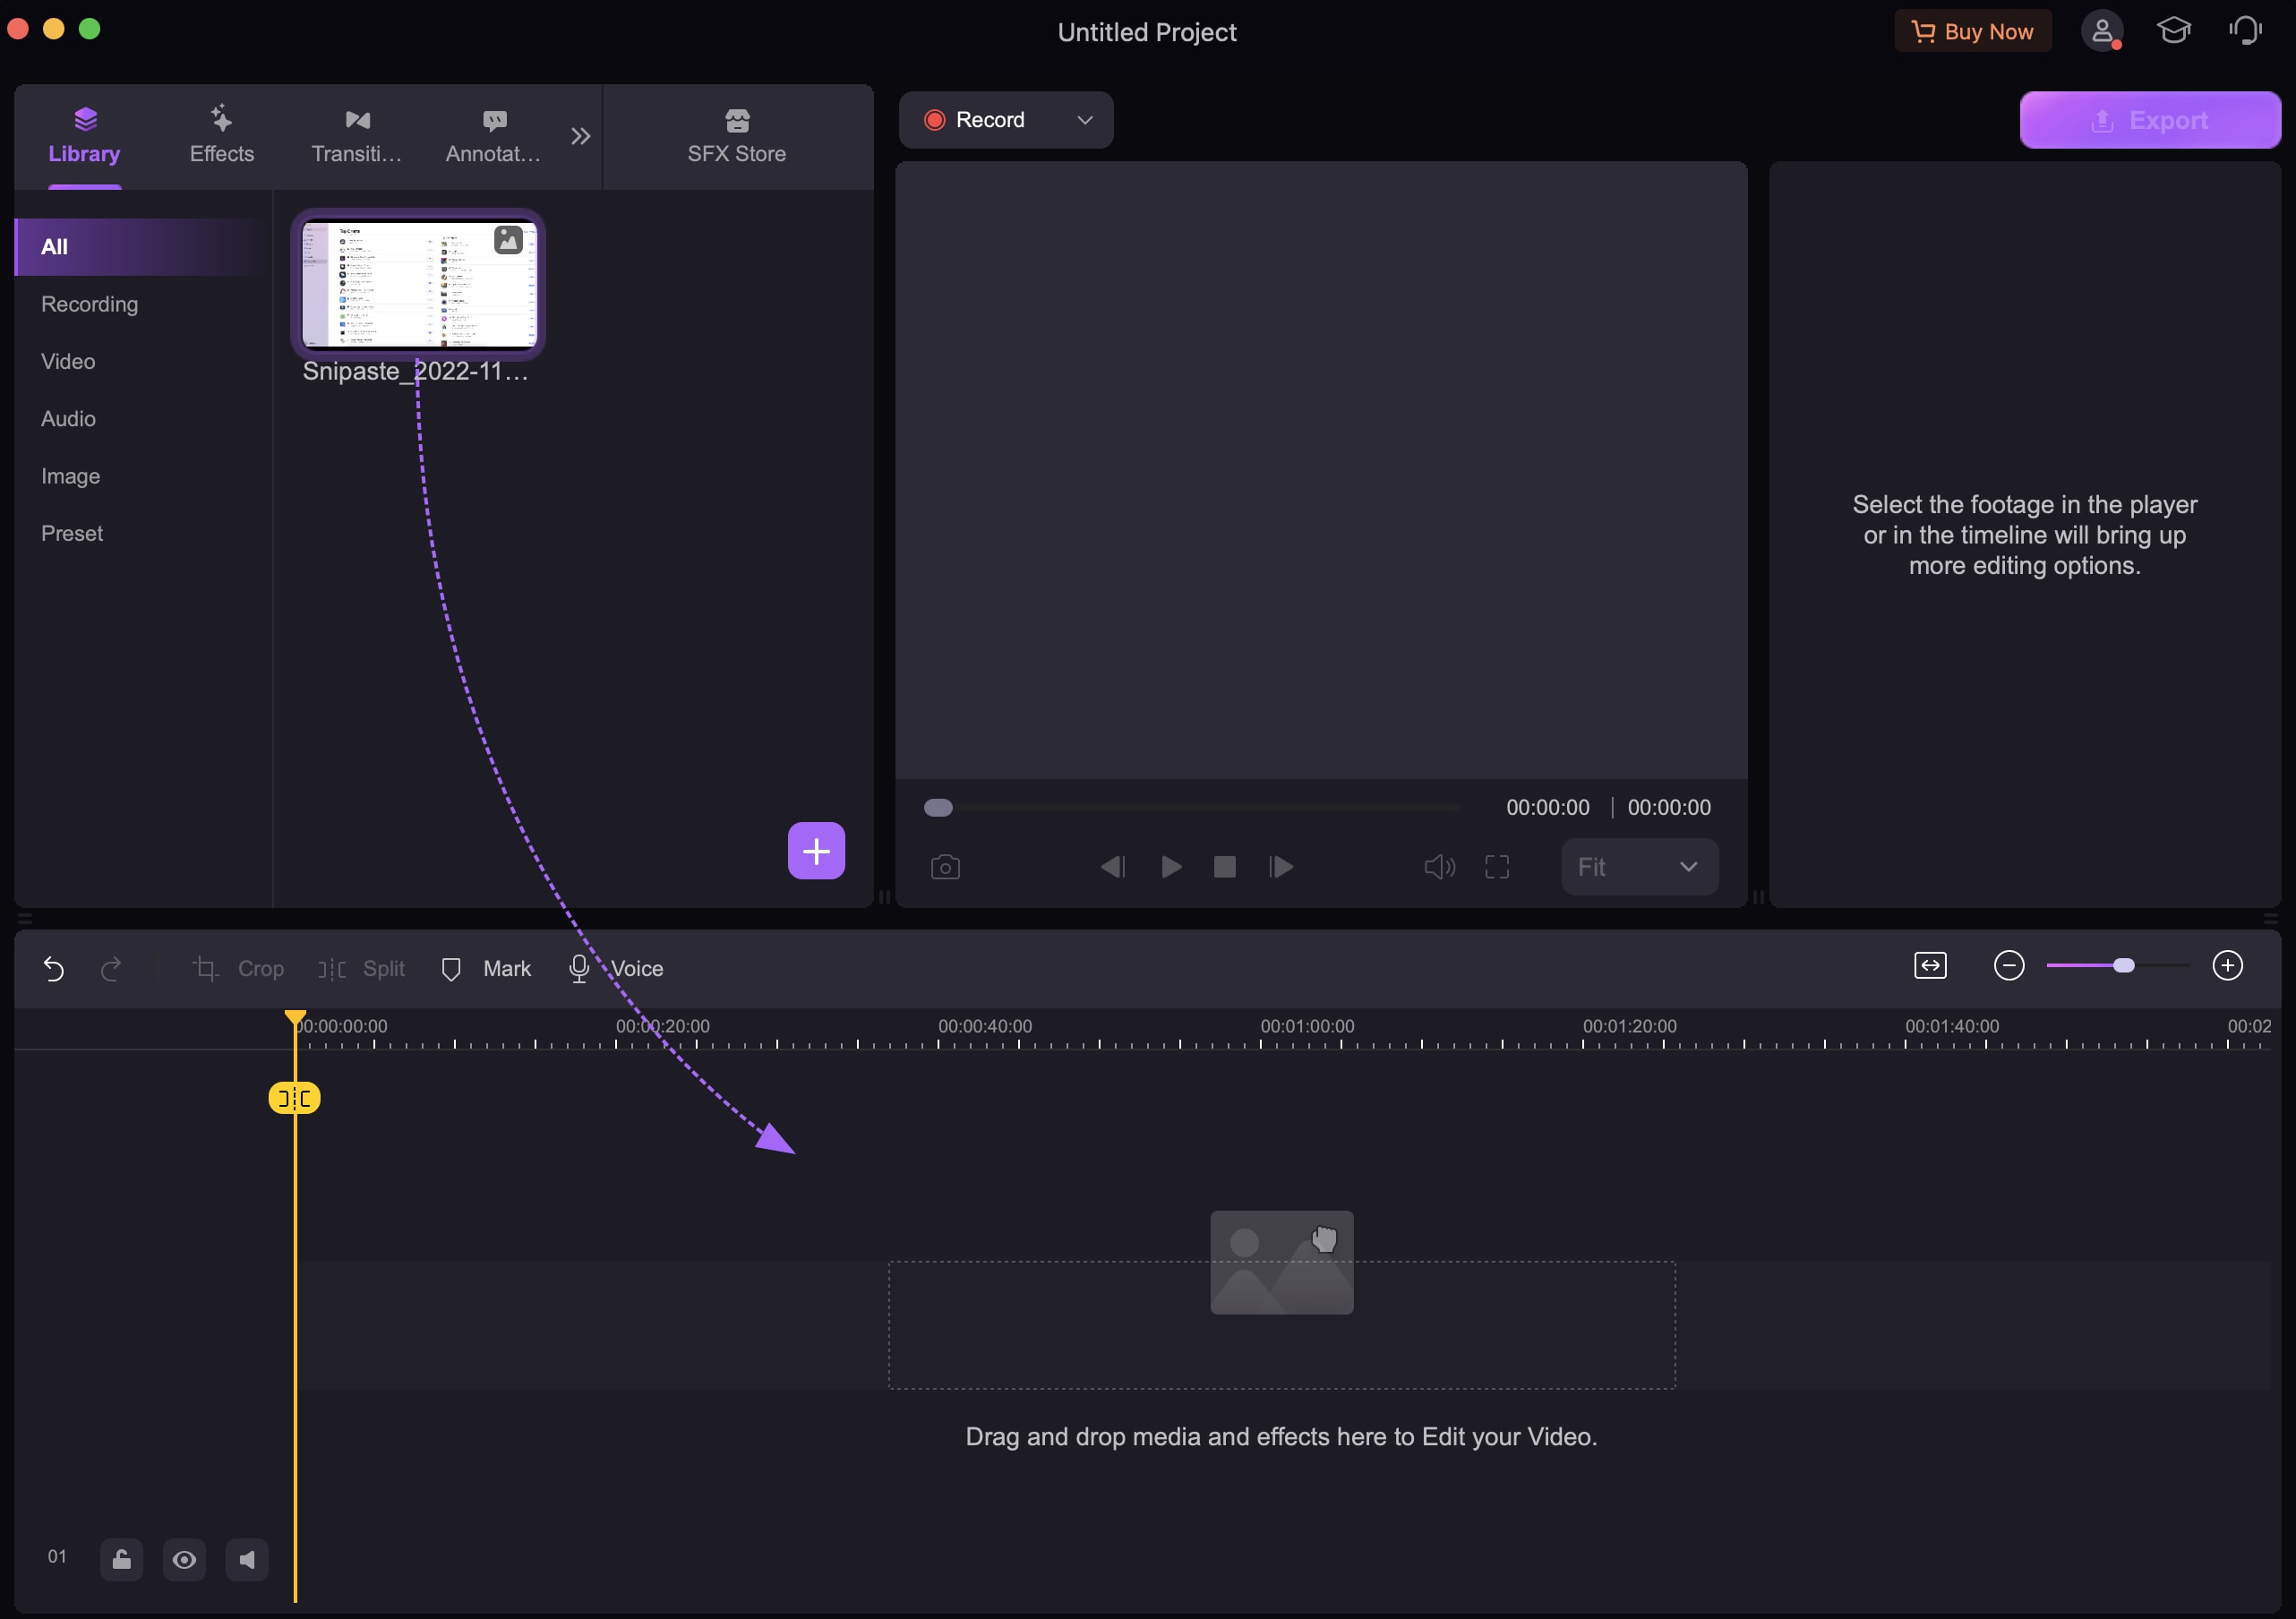
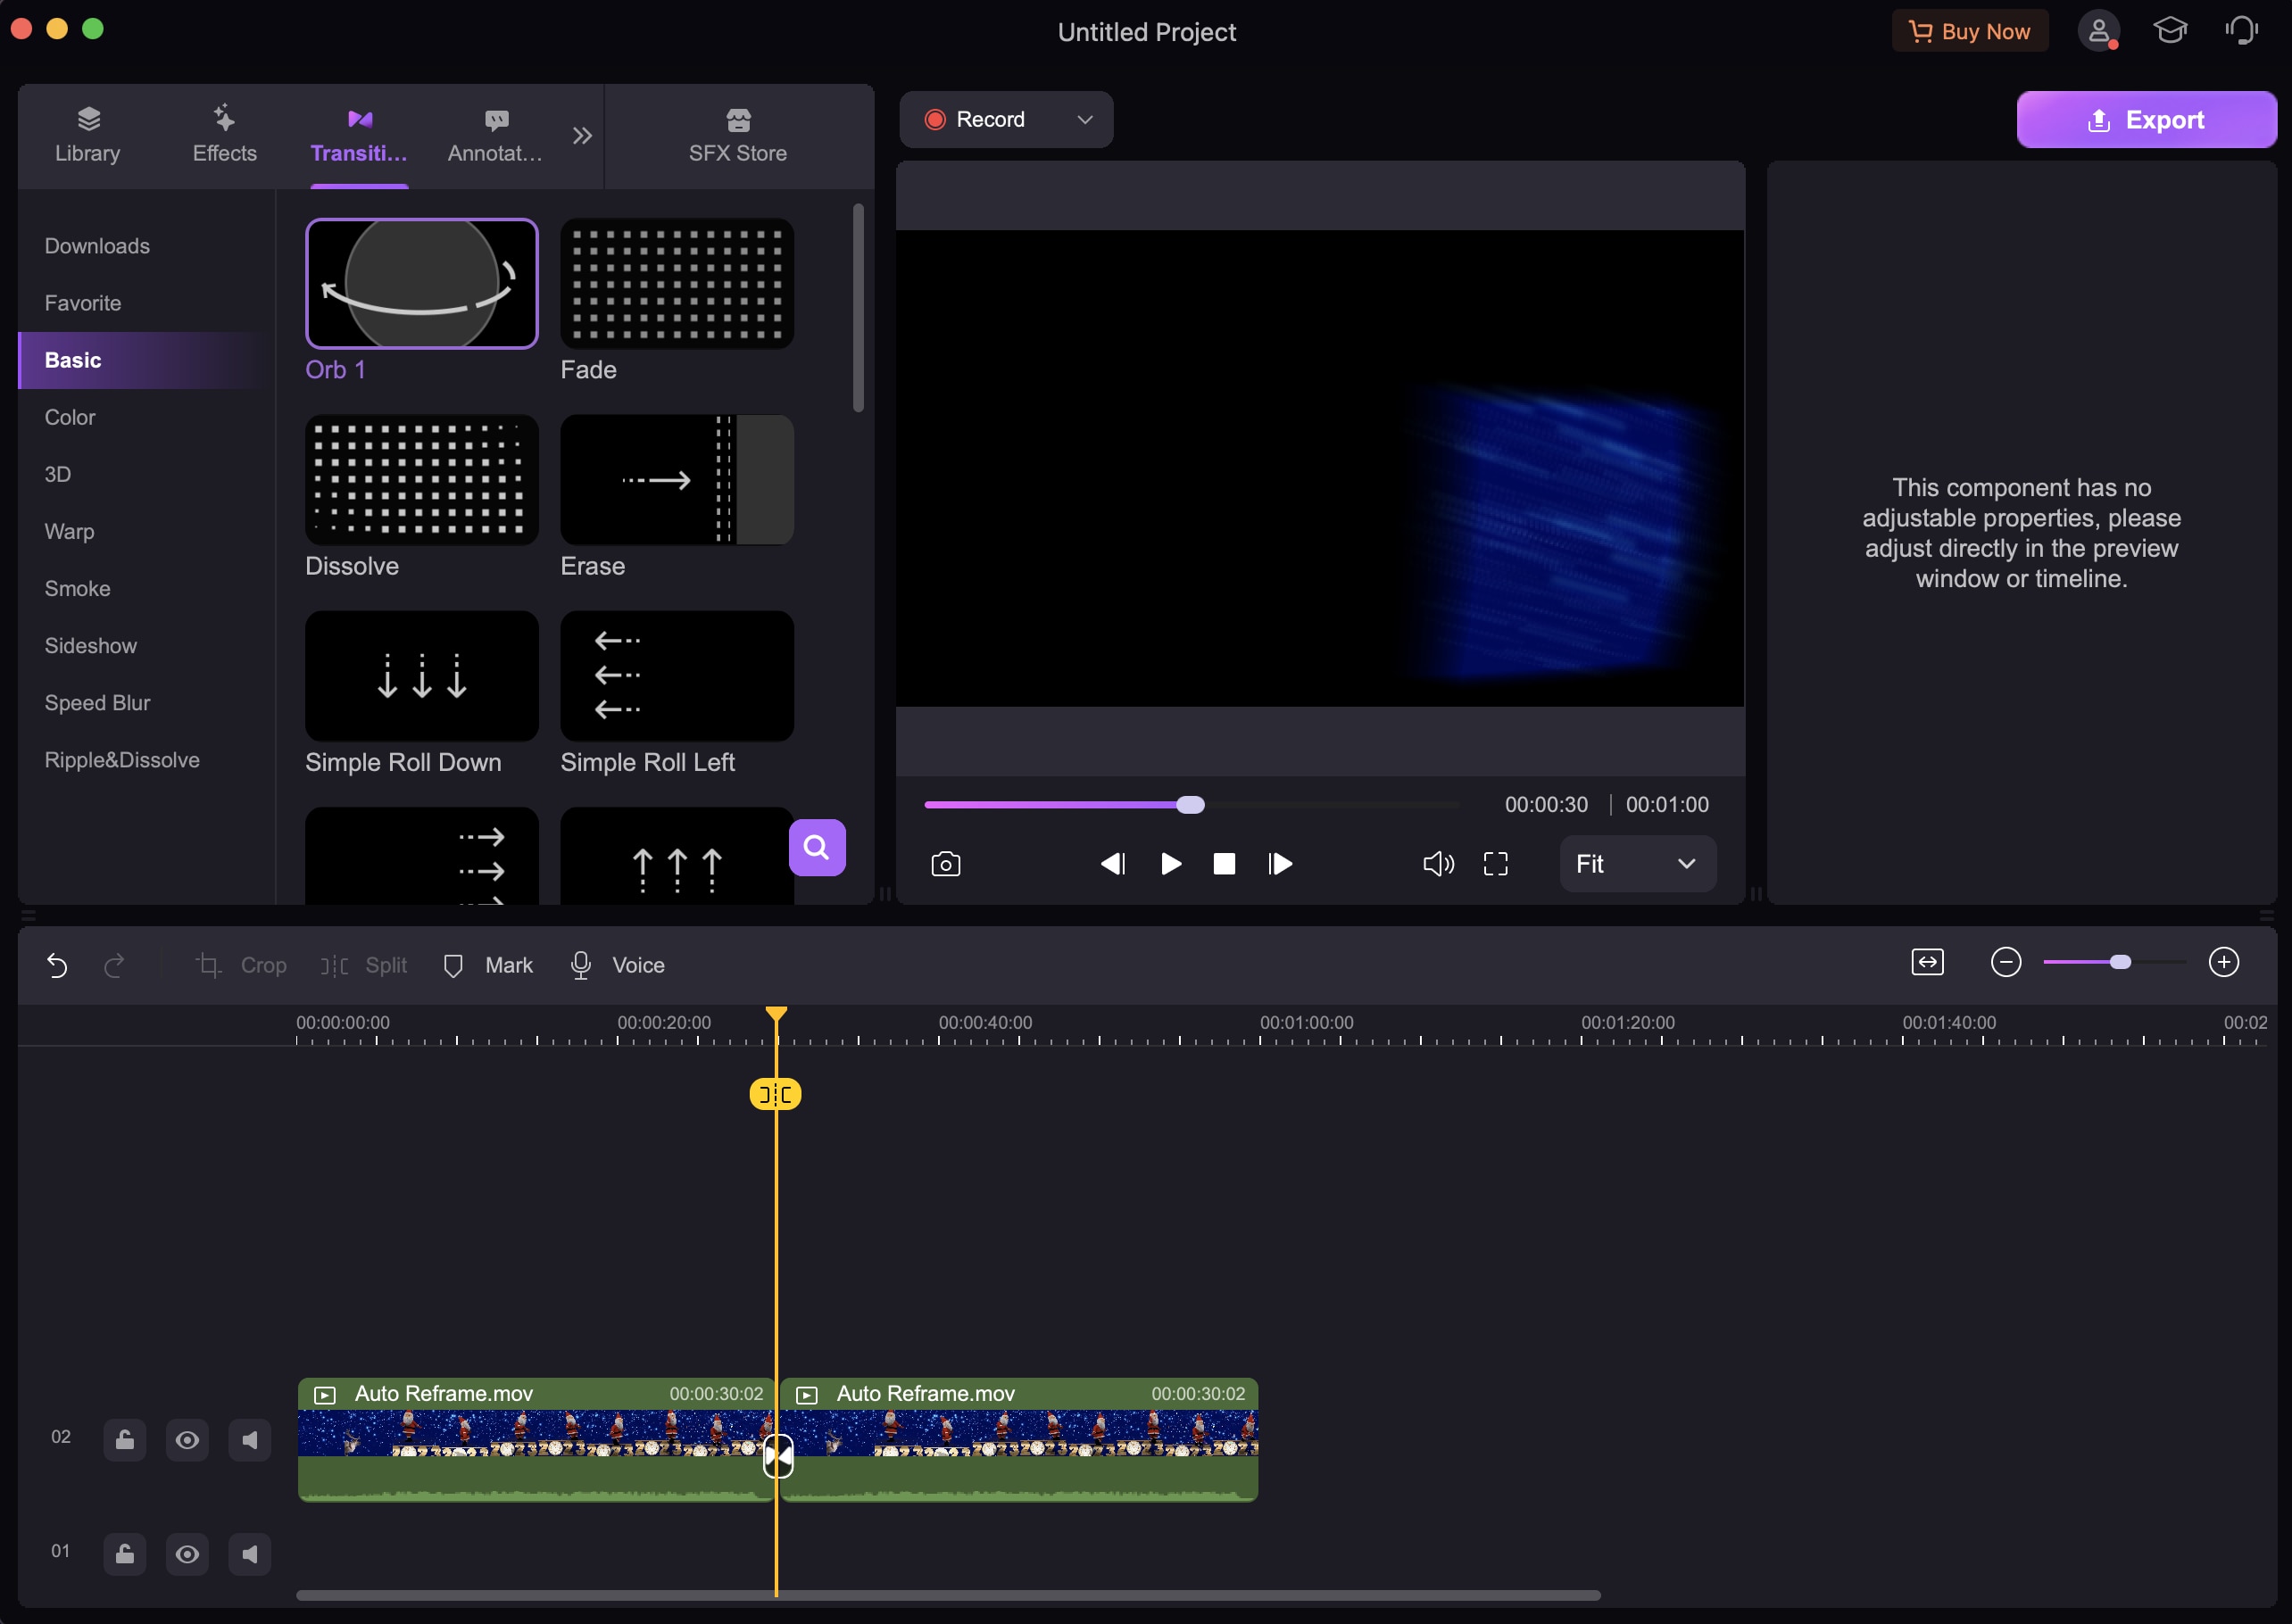
Drag the media files to the timeline and then adjust them into a row. Also, you can right-click on every audio file and select ‘Add to timeline at playhead’ to add the files to If needed, you can add the transition effects between 2 videos, which can make the video looks more smooth.
Step3Export the combined video
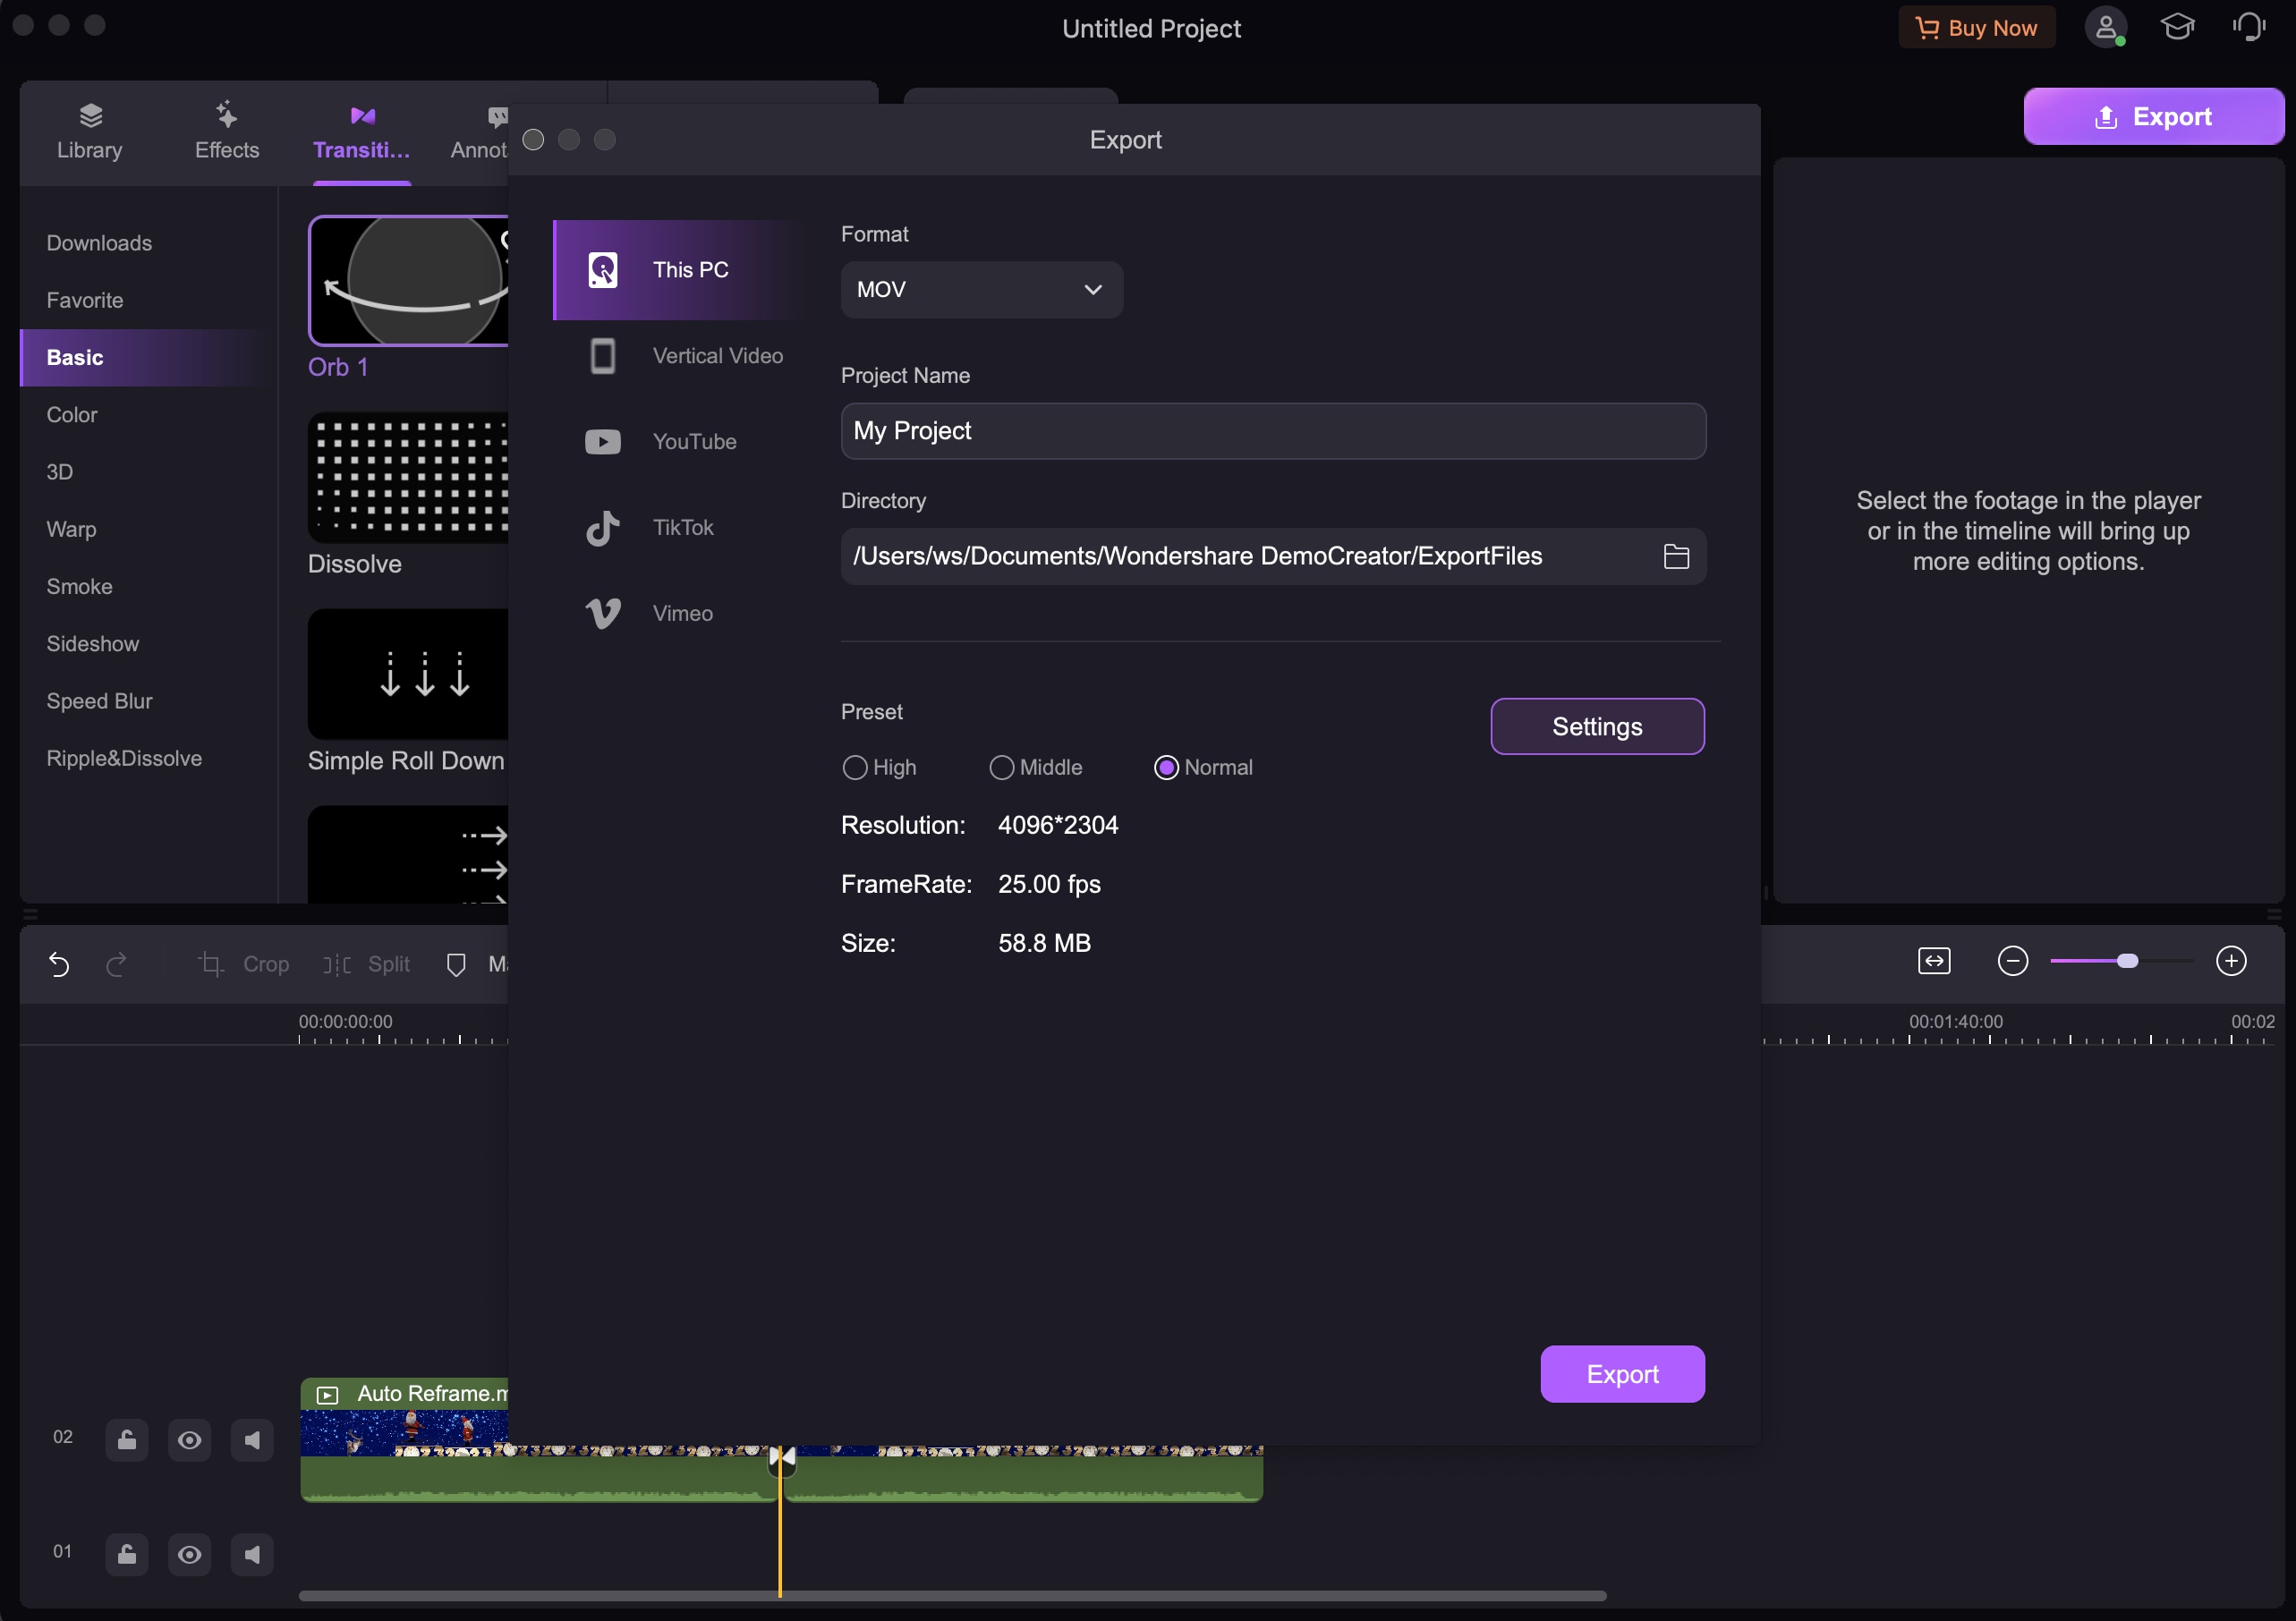
To get the combined video. Click the “Export” in the top right corner. Then it will pop up a window, you can choose the video format that you want to export. And select the higher frame rate can make your video high quality. Also, you'd better choose the right resolution to fit your video.
1. How to combine audio on Mac
It is hard for you to control much of your audio recording when recording videos. You will later realize your video has sounds that you don’t need, or you intend to replace the sound. Adding or editing sounds in videos is made possible using DemoCreator. Capturing unnecessary sounds is where you realize you need a professional editing tool for your video audio. Follow the below simple steps.
Step1Import the Audio File and drag to timeline
Click “Import” to import the audio file and then draft to the timeline. Immediately once your files are here, choose the sequence of your audio files that should be merged. Drag and drop your audio files to the timeline following the sequence you want them to appear in.
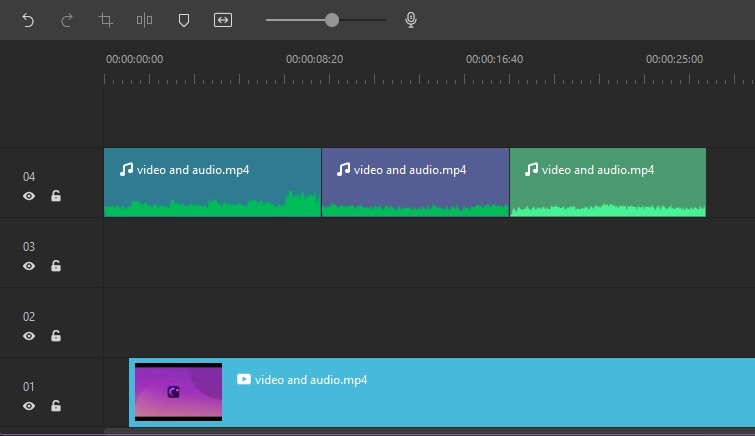
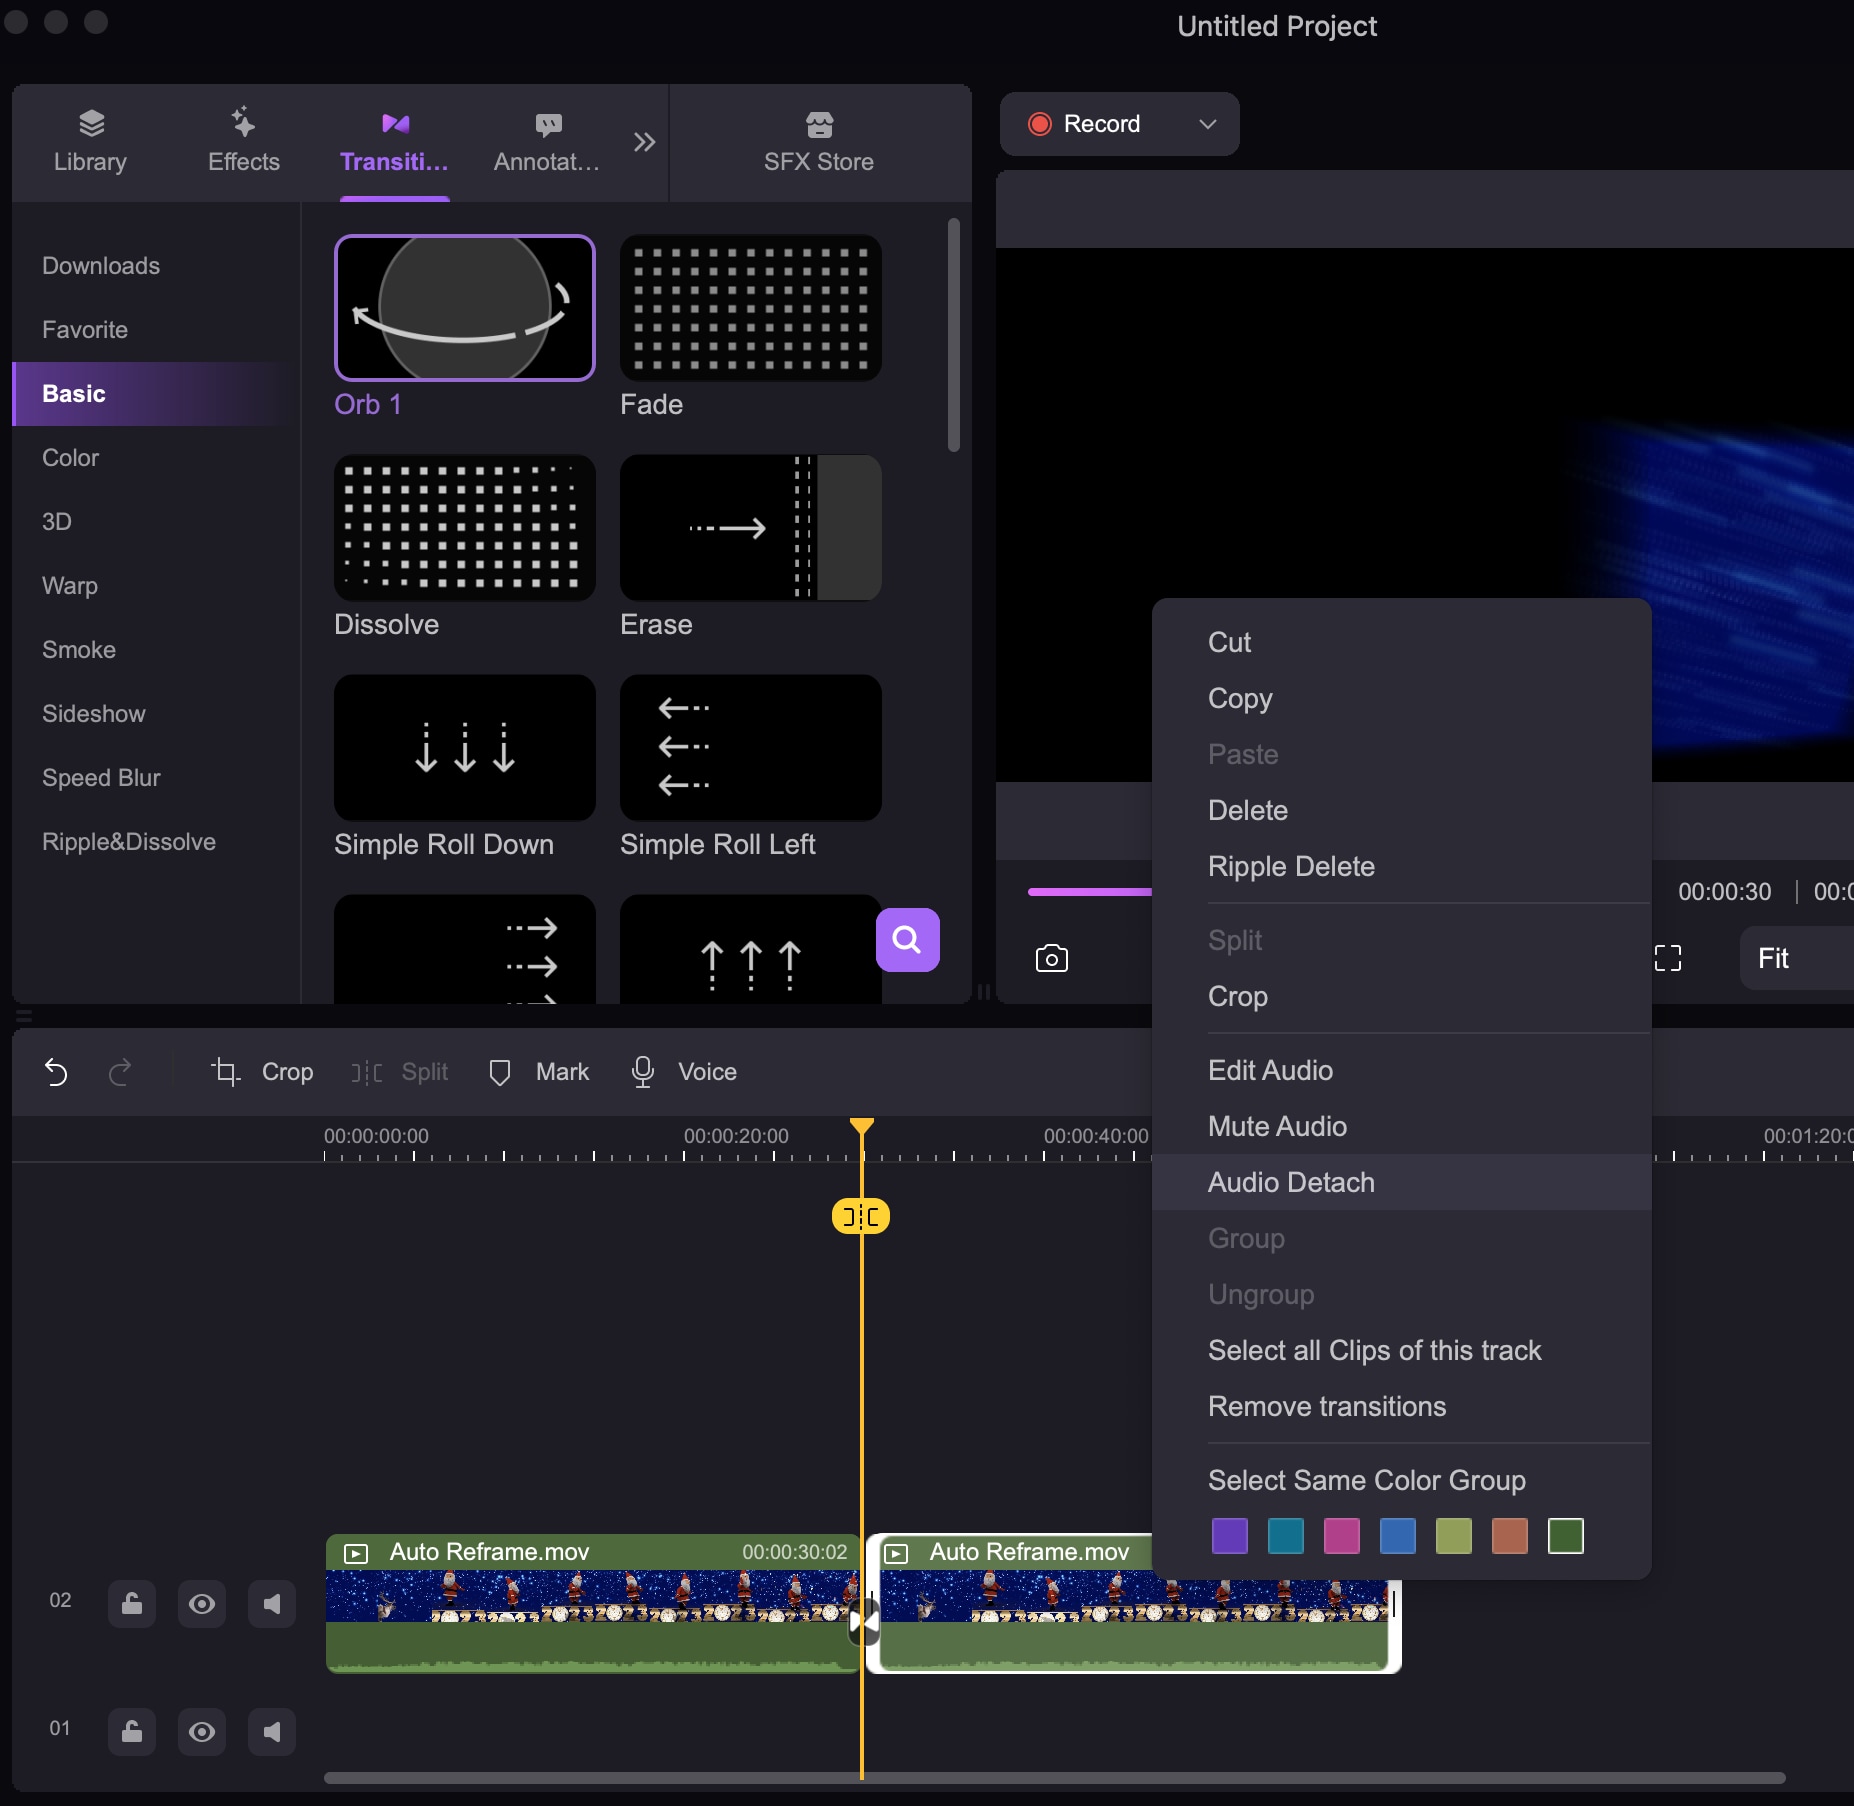
If the audios you want to combine are not separate, but attached in the video. You can first import the video and then select “audio detach”, then you can get separate audio to merge.
Step2Save and Export Your Audio File
Finally, proceed to export the content and have one single audio file from several files. To save the audio file, you will need to choose the file format, bit rate, along many other features to have your audio successfully exported.
2. How to combine multiple videos on Mac
The steps were the same with combine 2 videos on Mac using DemoCreator. But one more thing, you should drag the multiple videos side by side to the timeline. And between different videos, you can add the transition effects, to make the whole video smoothly.
Part 2. Using QuickTime to Merge Video Files on Mac
QuickTime combine videos on a Mac is another tool you can use to merge your multiple films into one. While most people use QuickTime to play and view videos on Mac, the lightweight app can be used to combine video files. The app comes with a video combining feature as an essential function. You need not worry about extra costs to combine two videos QuickTime. Here are a few simple steps on how to join videos using QuickTime.
Step1Launch the App
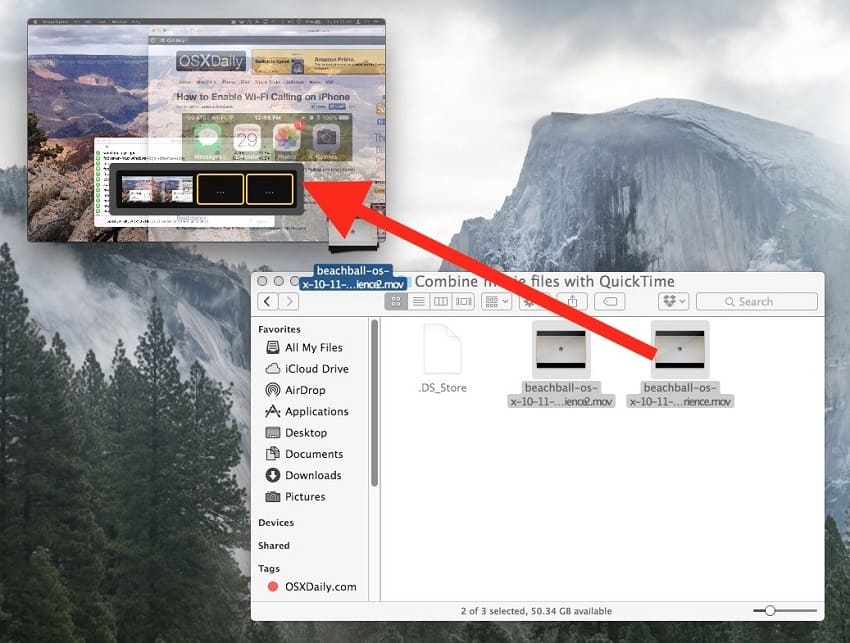
Locate one of the video files you want to merge from your desktop. Open the video file using QuickTime for viewing. Once QuickTime launches, select the files you want and drag them atop the already playing video. Make sure you drag and drop them sequentially.
Step2Order Your Video clips
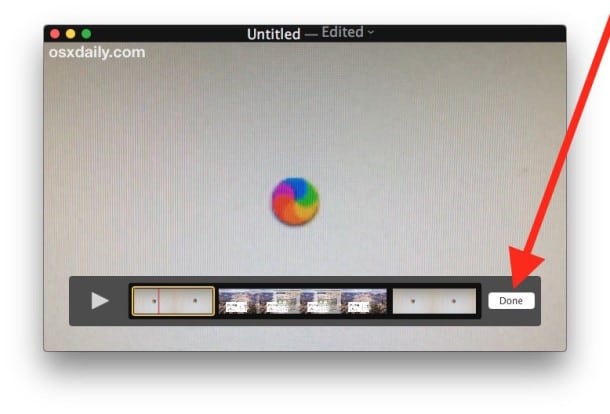
After adding your video files atop the playing video, use the indicated clips to rearrange and order the videos and sort them out as you need them in sequence.
Step3Save and Share the video file
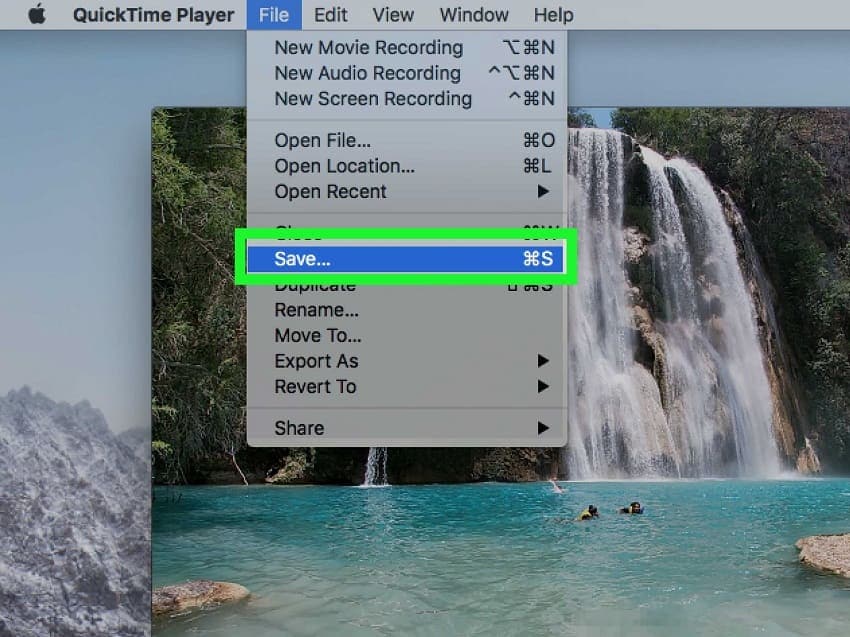
Lastly, you have your video in order, proceed to the ‘File’ menu and export your merged video file. Click the ‘Save’ tab to have your file saved on the desktop, or you can use the ‘Export’ option.
Once complete, select ‘Done.’
Part 3. Combining Videos through the VLC
Almost everybody has used this popular media player tool. VLC is a widely used tool, and it is free to access, and it supports several platforms other than Mac. You have some videos you want to combine and have one long film; VLC will sort you with that. Read on and find how to combine video on a Mac using VLC.
Step1Open Multiple Files
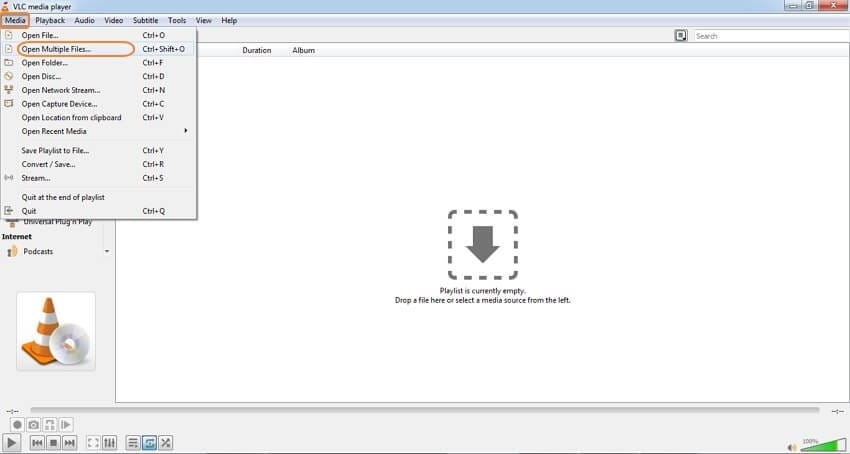
First, you should download and install the VLC media player on your system. Launch the media player, and from the interface, select the ‘Media’ button; from the proceeding sub-menu, choose the ‘Open Multiple Files.’
Step2Add Video Files to Merge
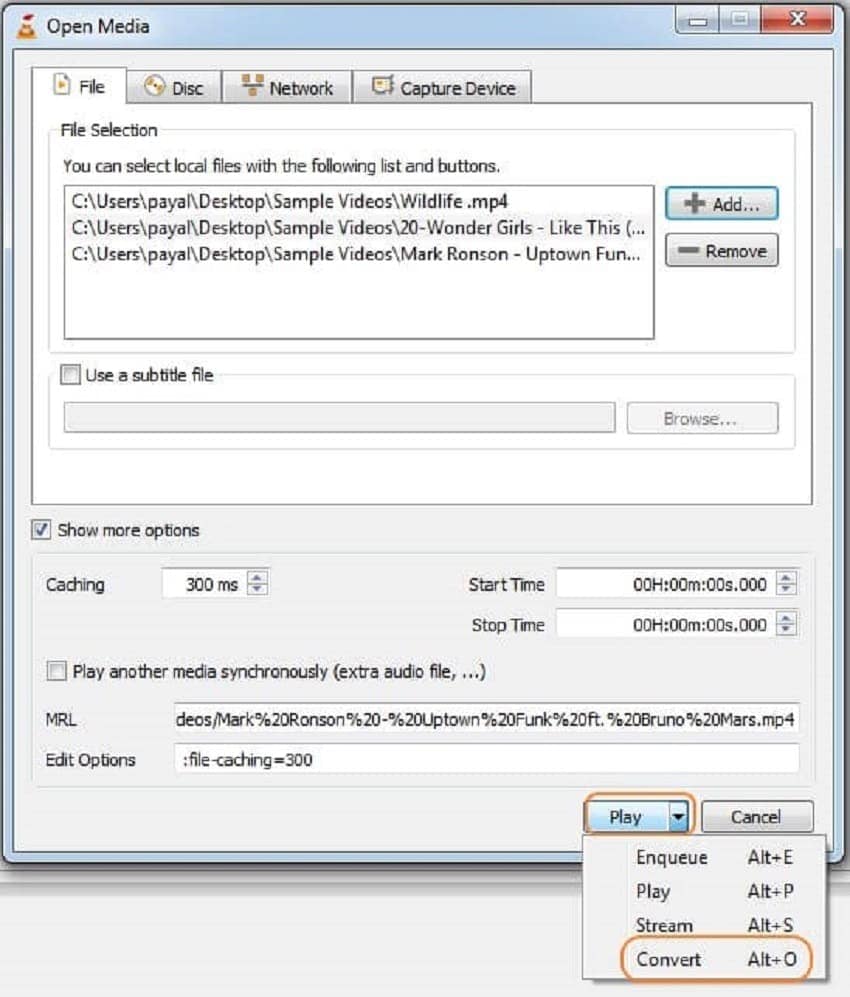
A pop-up window launches immediately when you select the Open Multiple Files option. On the window, click the ‘File’ button and proceed to select the ‘Add’ tab to choose and select the video files you want to combine.
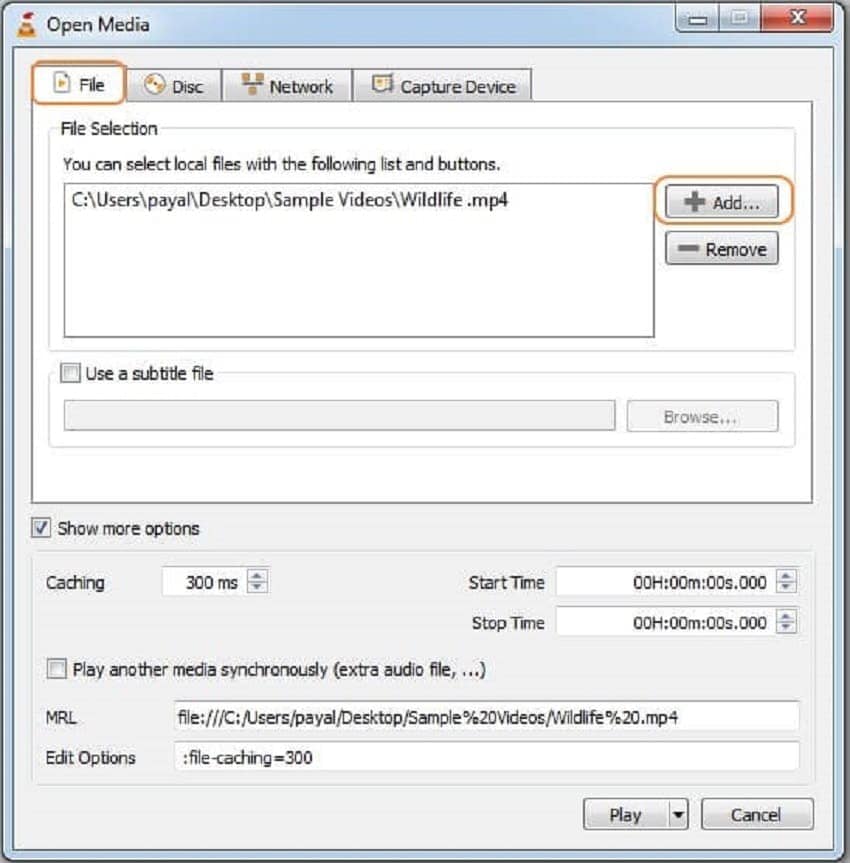
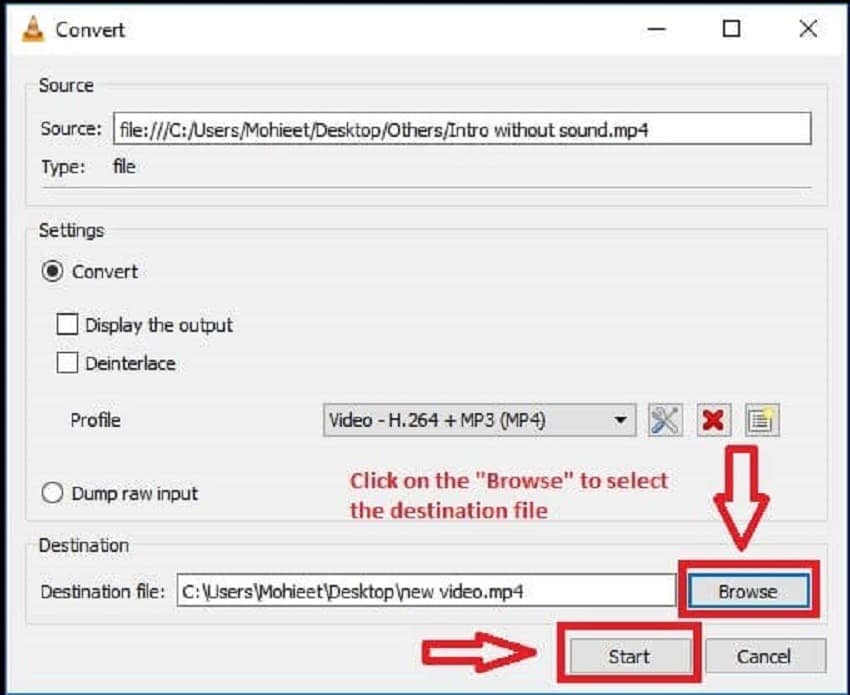
Once you have added your media files for merging, located at the bottom of the interface, click the drop-down button next to the ‘Play’ button. From the drop-down menu, click ‘Convert’ or use the keyboard shortcut ‘Alt+O’ to begin combining your video files into one.
Step3Convert and save the file
Lastly, when you click ‘Convert,’ a new window will pop up. From the window, you have the option to choose where to save your video files after merging. Use the ‘Browse’ tab to select your file destination on your mac system. Once done, click start to begin merging your files and let VLC save them for you at your preferred location.
