
Reversing a video is a fun and creative way to add an extra flair to your content. Whether you’re making social media posts, editing a YouTube video, or simply experimenting with new effects, learning how to reverse videos can help you create unique and engaging content. In this guide, we’ll explore various methods to reverse videos using iPhone apps, free online tools, and professional software solutions. Let’s dive into the step-by-step process!
In this article
Part 1: Reversing Videos on iPhone Using Third-Party iOS Apps
For iPhone users, several third-party apps make it easy to reverse videos with just a few taps. These apps provide simple interfaces and various features to help you add a creative twist to your videos.
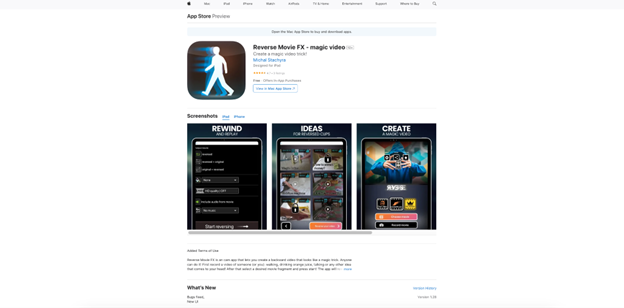
1. Reverse Movie FX
Reverse Movie FX is a popular iOS app that allows you to reverse video clips with ease. It’s designed specifically to apply the reverse effect to videos, and its simple interface makes it easy for anyone to use. You can import videos from your camera roll, reverse them, and even add audio effects to enhance the experience. This app is perfect for creating fun, engaging videos for social media or personal use.
Key Features:
- Reverse entire videos or select parts.
- Allows the addition of background music or sound effects.
- Quick processing time for video reversal.
- No watermarks in the full version.
- User-friendly interface for easy navigation.
Step-by-Step Guide:
- Step 1: Open Reverse Movie FX: Launch the app and tap “Select Video.” Choose a video from your camera roll that you want to reverse.
- Step 2: Choose the Reversal Settings: Select whether you want to reverse the entire video or a specific part. You can also adjust speed and add effects if desired.
- Step 3: Save and Share: Once the video is reversed, preview it. If satisfied, tap "Save" to store the video or share it directly to social media platforms.
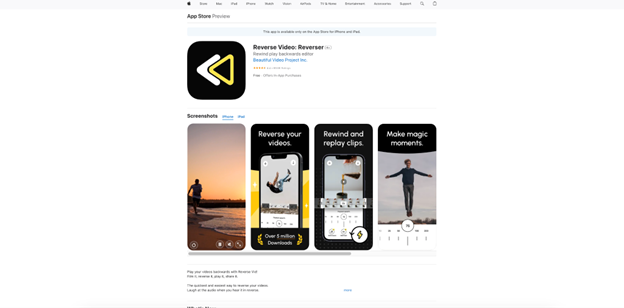
2. Reverse Video: Reverser
Reverser is a simple and effective iOS app designed for reversing videos quickly and efficiently. The app is perfect for anyone looking to create fun, engaging content with minimal effort. With just a few taps, users can reverse video clips, adjust speed, and export their final product. Whether you’re a social media enthusiast or just want to add a creative twist to your footage, Reverser makes it easy to reverse videos on your iPhone.
Key Features:
- Simple Interface: Easy-to-use design for beginners and casual users.
- Reverse Entire or Partial Clips: Choose to reverse the whole video or just a specific section.
- Speed Adjustments: Control playback speed for smoother results.
- Preview Feature: View the reversed video before saving or sharing.
- High-Quality Export: Export videos without compromising on quality.
Step-by-Step Guide:
- Step 1: Open Reverser and Select Video: Launch the Reverser app on your iPhone and tap “Pick Video” to import a video from your gallery.
- Step 2: Choose Reversal Settings: Decide whether to reverse the entire video or a specific segment. You can also adjust the playback speed to make the reversal faster or slower.
- Step 3: Export or Share the Reversed Video: Once you’re happy with the reversed video, preview it. Tap “Save” to store it in your photo library or directly share it to your social media platforms.
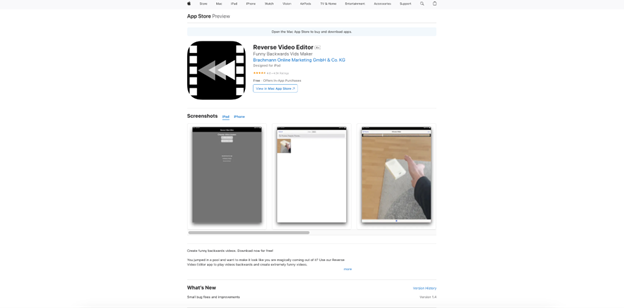
3. Reverse Video Editor
Reverse Video Editor is a powerful app for iPhone users that allows you to reverse video clips easily. With its user-friendly interface, it lets you apply the reverse effect with just a few taps. Whether you’re working on a short clip or a longer video, this app provides a quick and simple way to reverse your footage. It’s perfect for content creators, video editors, and anyone looking to add a unique twist to their videos.
Key Features:
- Quick and Easy Video Reversal: Reverses entire videos or specific parts with ease.
- Simple Interface: Designed for users of all experience levels.
- Playback Speed Control: Adjust the speed of the reversed video for different effects.
- Preview Feature: Check how the reversed video looks before saving it.
- Export in High Quality: Save your reversed videos without losing resolution.
Step-by-Step Guide:
- Step 1: Open Reverse Video Editor and Select a Video: Launch the Reverse Video Editor app and tap "Import Video" to select a video from your iPhone’s photo library or camera roll.
- Step 2: Reverse the Video: Once the video is imported, choose whether to reverse the entire clip or a specific section. You can also adjust the speed settings to create the desired effect.
- Step 3: Preview and Save or Share the Video: Preview the reversed video to ensure it meets your expectations. Tap “Save” to store it on your device, or use the sharing options to upload it directly to social media.
Part 2: Using Online Tools to Reverse Videos
Online tools provide a quick and easy way to reverse videos without needing to install any software. These tools allow you to upload videos directly from your device or even from YouTube, making the process fast and convenient.
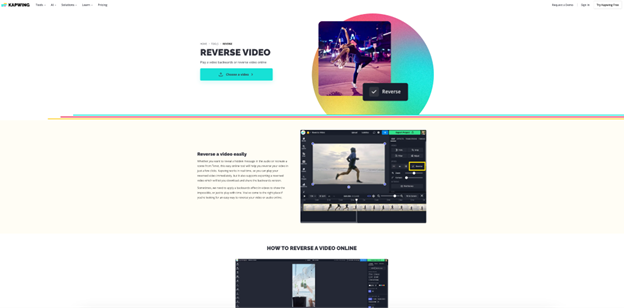
1. Kapwing
Kapwing is a versatile online video editing tool that allows users to reverse videos quickly and without any software installation. Whether you’re working with videos from YouTube or personal clips, Kapwing’s user-friendly interface makes it easy to apply the reverse effect. With additional editing features like trimming, adding text, and resizing, Kapwing offers an all-in-one platform for content creators. It's perfect for social media videos, memes, or any project where you want to add a creative twist to your footage.
Key Features:
- Direct YouTube URL Input: Reverse YouTube videos by pasting the video URL.
- Supports Full or Partial Reversal: Reverse the entire video or just selected parts.
- Fast Video Processing: Quickly apply the reverse effect and preview the result.
- Additional Editing Tools: Trim, resize, add text, and more.
- Free with Watermark: Free to use with a watermark, premium version removes it.
Step-by-Step Guide:
- Step 1: Go to Kapwing and Upload Your Video: Visit the Kapwing website and click on "Start Editing." Upload your video from your computer or paste a YouTube URL to import the video.
- Step 2: Apply the Reverse Effect: Once your video is uploaded, select the "Reverse" button from the editing toolbar. You can reverse the entire video or a specific section by adjusting the timeline.
- Step 3: Export and Download the Reversed Video: Click on the "Export Video" button to apply the reverse effect. After processing, download the video or share it directly to social media platforms.
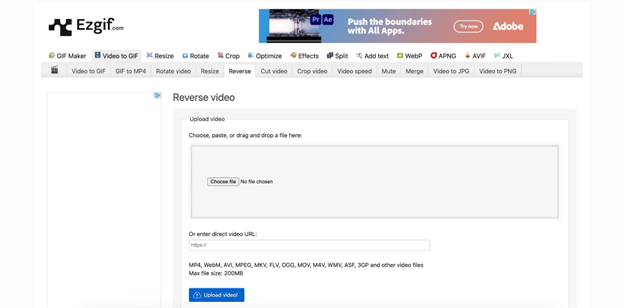
2. EZGif
EZGif is a straightforward online tool that is widely used for creating GIFs, but it also offers an easy way to reverse videos. This free online tool allows users to upload videos from their device or use video URLs from YouTube. With a simple interface and quick processing time, EZGif makes video reversal fast and hassle-free. It’s ideal for users who need to reverse short clips for social media or personal projects.
Key Features:
- Works with YouTube Videos: Upload videos from YouTube or your device.
- Quick Processing: Reverses videos in a matter of minutes.
- Free to Use: No cost for basic video reversal functions.
- Supports Multiple Video Formats: Works with various video file types.
- Easy-to-Use Interface: No sign-up or complex setup required.
Step-by-Step Guide:
- Step 1: Go to EZGif’s Website: Visit the EZGif website and select "Reverse Video" from the menu. Paste the video URL or upload a video file from your computer.
- Step 2: Apply the Reverse Effect: Once the video is uploaded, click the "Reverse Video" button. The tool will process the video and apply the reverse effect.
- Step 3: Download the Reversed Video: After the reversal is complete, preview the video. If satisfied, click “Save” to download the reversed video to your device.
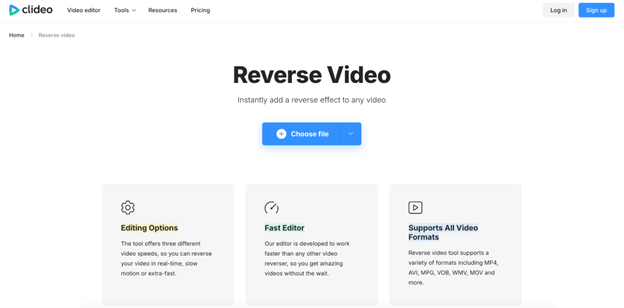
3. Clideo
Clideo is a versatile online video editing tool that allows users to easily reverse their videos with a simple interface. Whether you're working with videos from YouTube or uploaded directly from your device, Clideo makes reversing footage quick and straightforward. It supports multiple file formats and also offers a range of additional video editing options. Clideo is ideal for both casual users and those who need a fast, hassle-free way to reverse videos online.
Key Features:
- Supports YouTube and Cloud Uploads: Reverse videos directly from YouTube or cloud storage (Dropbox, Google Drive).
- Fast Processing Speed: Quickly reverses videos without long wait times.
- No Software Installation: Works directly in your browser without needing to install anything.
- Variety of Export Options: Allows exporting in different formats and resolutions.
- Free Version Available: Basic features are free to use, with a watermark on exported videos.
Step-by-Step Guide:
- Step 1: Visit Clideo’s Website: Go to Clideo’s website and select the “Reverse Video” tool. Paste the video URL or upload your video file from your device or cloud storage.
- Step 2: Upload Your Video: Click on "Choose File" to upload the video from your device, or paste a YouTube video URL into the designated box. The video will be added to the editing interface.
- Step 3: Reverse and Download the Video: Click on the “Reverse” button to apply the effect. Once processed, preview the reversed video, and then click “Download” to save it to your device or share it online.
Part 3: Using Software to Reverse Videos on Desktop
Desktop video editing software offers more advanced tools and greater control for reversing videos. These programs are ideal for users who need high-quality results and want to apply additional editing features to their reversed footage.
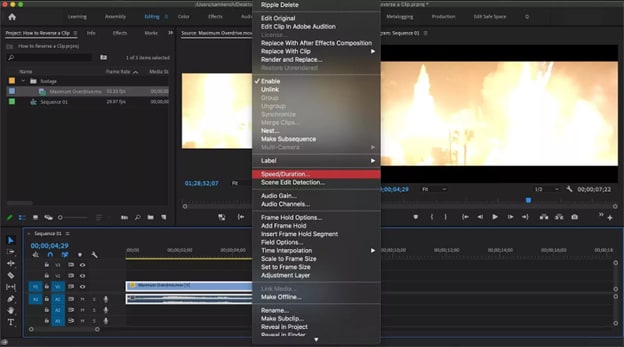
1. Adobe Premiere Pro
Adobe Premiere Pro is a professional-grade video editing software widely used by filmmakers, YouTubers, and video editors around the world. It offers a robust set of tools for all aspects of video editing, including the ability to reverse clips. Known for its precision and advanced features, Premiere Pro is perfect for those looking to achieve high-quality video edits. While it is a paid software, its comprehensive tools make it the go-to choice for professionals in the industry.
Key Features:
- Advanced Video Editing Tools: Includes features like multi-layer editing, color correction, and audio editing.
High-Quality Video Reversal: Allows users to reverse video clips with high precision and quality. - Supports Multiple File Formats: Works with virtually any video format.
- Comprehensive Export Options: Offers a wide variety of export settings including resolution, format, and compression.
- Integration with Adobe Creative Cloud: Seamless integration with other Adobe tools like After Effects and Photoshop.
Step-by-Step Guide:
- Step 1: Import Your Video: Open Adobe Premiere Pro and create a new project. Import the video clip you want to reverse by going to "File" > "Import" or dragging the file directly into the project panel.
- Step 2: Reverse the Video: Drag the video to the timeline. Right-click on the video clip in the timeline and select Speed/Duration from the context menu. Check the “Reverse Speed” box to apply the reverse effect to the clip.
- Step 3: Export the Reversed Video: Once you're happy with the reversed video, go to "File" > "Export" > "Media." Choose your desired export settings (format, resolution) and click "Export" to save the reversed video.
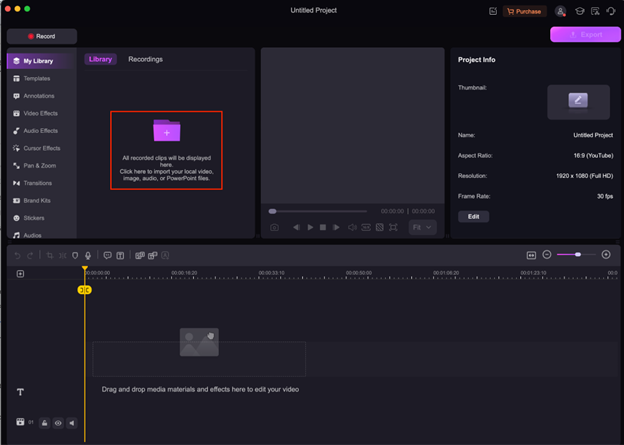
2. Wondershare DemoCreator

Wondershare DemoCreator is an easy-to-use video editing and screen recording software that caters to both beginners and professionals. With a range of editing tools at your disposal, DemoCreator is perfect for creating high-quality videos quickly. It simplifies the editing process, allowing users to trim, cut, and add effects effortlessly. While the video reversal feature is currently in the pipeline, DemoCreator still offers a comprehensive suite of editing tools for creating professional-level videos. Whether you’re working on tutorials, presentations, or social media content, DemoCreator provides everything you need to enhance your videos.
Key Features:
- User-Friendly Interface: Designed for ease of use with drag-and-drop functionality.
- Screen Recording: Capture your screen to create tutorials, presentations, or gameplay videos.
- Advanced Editing Tools: Trim, cut, add text, transitions, and more to enhance your footage.
- High-Quality Export: Exports videos in multiple formats and resolutions while maintaining video quality.
- Comprehensive Editing Options: Ideal for editing, adding voiceovers, and polishing your video projects.
Although Wondershare DemoCreator does not yet support video reversal, this feature is soon to be released, making it an even more powerful tool for video creators. Keep an eye out for updates!
Guide to Video Editing in Wondershare DemoCreator
Step1Import Your Video
Launch Wondershare DemoCreator and create a new project. Click on the “Import Media” button to add your video clips. Once the video is imported, drag it onto the timeline to start editing.
Step2Edit Your Video
Use the editing tools to trim, cut, and adjust your video. Add text, transitions, and effects as needed. You can also adjust the speed, audio, and other elements to enhance your video before the reversal feature becomes available.

Step3Export Your Edited Video
Once you're satisfied with the edits, click on the "Export" button. Choose your preferred file format, resolution, and other export settings, and then click "Export" to save your edited video. Once the reverse function is implemented, you'll be able to apply the reverse effect to your project during the editing phase.

Part 4: Troubleshooting Common Issues When Reversing Videos
Reversing videos is a simple process, but there can be occasional issues depending on the tool or method you’re using. Here are some common issues and how to troubleshoot them:
- Slow Processing Speed: Some online tools might take longer to reverse videos, especially if the video file is large. Try using a smaller file or upgrading to a paid version for faster processing.
- Poor Video Quality: Reversing a video can sometimes result in reduced quality, especially if the original video was low resolution. Use high-resolution videos for the best results.
- Audio Issues: If your reversed video has distorted audio or no audio, try removing the audio or using a dedicated audio editing tool to fix it. You can also separate the audio track and reverse it independently if necessary.
- Exporting Problems: Some users encounter issues when exporting reversed videos, such as the video not saving or not rendering correctly. Ensure that you’re using the correct export settings and check if there is enough storage space on your device. Try exporting in different formats if the issue persists.
- Unsupported File Formats: Certain tools may not support specific video formats. If your video format isn’t supported, convert it to a more compatible format (e.g., MP4 or AVI) before attempting to reverse it. Many video editors and online tools offer format conversion features.
Conclusion
Reversing videos is an easy and creative way to enhance your content, whether you’re editing for social media, creating memes, or making instructional videos. In this guide, we explored how to reverse videos using iPhone apps, online tools like Kapwing, EZGif, and Clideo, as well as professional desktop software such as Adobe Premiere Pro and Wondershare DemoCreator. Depending on your needs, you can choose a free online tool for quick edits or a professional editing software for more control over the process.
FAQs
-
Can I reverse part of a video instead of the entire video?
Yes, most online tools and video editing software, like Wondershare DemoCreator and Kapwing, allow you to reverse a specific section of the video.
-
Does reversing a video affect its quality?
Reversing a video doesn’t significantly degrade its quality, but using lower-resolution videos can result in a lower-quality output. Always work with high-quality videos for the best results.
-
Can I reverse a YouTube video without downloading it?
Yes, tools like Kapwing, EZGif, and Clideo allow you to reverse YouTube videos directly by pasting the video URL.
-
How long does it take to reverse a video?
The time it takes to reverse a video depends on the video length and the tool you're using. Online tools typically process videos faster than desktop software, but it may vary depending on your internet speed and the size of the video.


