Are you looking to create a professional-looking facecam border for your live streams but don’t have the design experience needed to create your own from scratch?
Well, we’re here to help.
In this article, we’re going to show you how you can easily create a facecam overlay for your videos with easy steps.
In this article
Basic Introduction to the Webcam Border
- What is Webcam Border
A webcam border (also known as a facecam overlay) is a graphic that sits over your live stream feed. It’s typically just a border around your webcam footage to make it look good as it sits over your gameplay. Having a high-quality webcam overlay helps your channel and streams look more professional and can help.
- Facecam border size, dimensions, format
Make sure when creating your webcam overlays to stick to the ideal specifications:
Dimensions: No larger than 1920px wide and 1080px high (16:9 or 4:3 ratios work best)
File size: 10 MB max
Format: Can be JPG, PNG, or GIF
3 Easy Steps to Add Webcam Borders
Wondershare DemoCreator is an all-in-one video presentation tool. DemoCreator is not only a screen recorder but also a video editor that provides numerous video effects and special packs. Except for the basic video-editing suite, DemoCreator is embedded with more animations, motion effects, transitions, and audio effects, DemoCreator is aimed to make video editing easy for everyone.
DemoCreator offered 50+ animation effects, including text behaviors and video clip motion, which can help you make your video creation more engaging and attractive. For border overlays, in DemoCreator includes not only stable video borders but also animated video borders.
Below are the steps about how to add borders to a video:
Step1 Select Video Editor
DemoCreator is an all-in-one tool. So, if you want to go to the editor to make further video editing, you need to select “Video Editor” mode in the DemoCreator start-up window.

Step2 Import Video Files and Select the “Border Overlay”
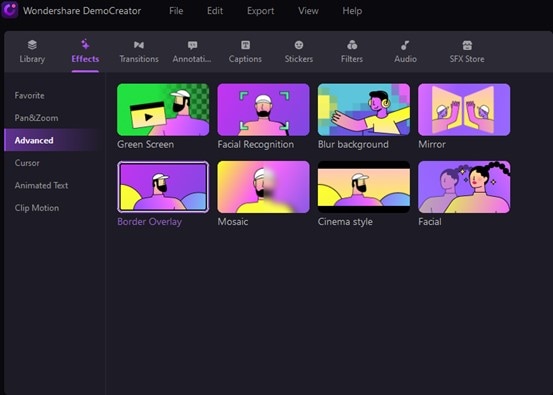
After selecting the “Video Editor”, then come to the Editor panel. First, you need to import your media files. Then find Border Overlay under the Effects>Advanced.
Step3 Drag Media Files and Border Overlay to the Clip
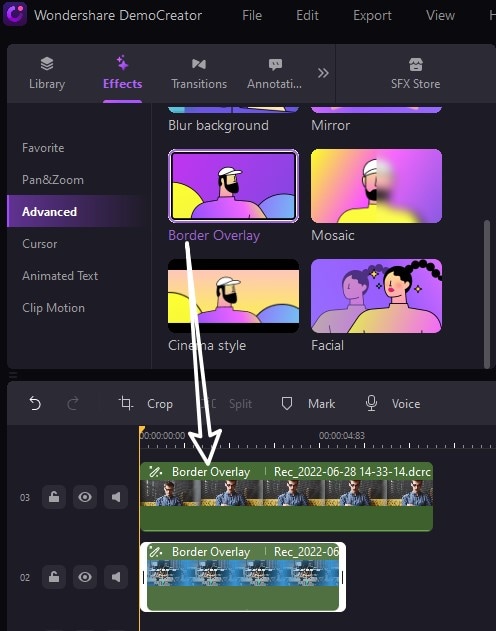
First please drag your media files (webcam recording files) to the timeline. Then drag the Border Overlay effect to your clip. If your clip shows the “Border Overlay”, that means it has been added successfully.
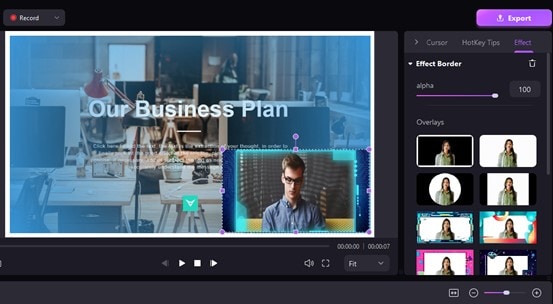
Then at the right properties window, choose the borders you want. The animated border overlays are included. After selecting, you can preview the effects in the preview window.
Creating a facecam border with Canva
Canva is another online design tool that is super easy to use. They have a huge variety of different templates and tools to help you create incredible designs with ease.
With Canva you can also create your designs by modifying existing templates that they have provided but we’re going to show you how to create a facecam border from scratch because it’s so easy to do in Canva.
We won’t show you all the different ways to use Canva, so if you need a full run-through we recommend watching this video.
Step1 – Click ‘Create a design’
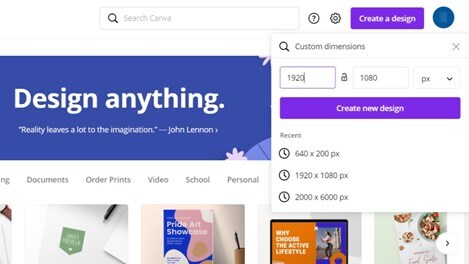
Go to the homepage on Canva and click the ‘Create a design’ button at the top right. Then click the ‘Custom dimensions’ option and put in 1920x1080px, and click ‘Create a new design’.
Step2 – Create your facecam border
On the left side of the editor click on ‘Elements’, go to the ‘Shapes’ category and find a shape that fits with the look you want for your facecam border (we chose a normal rectangle):
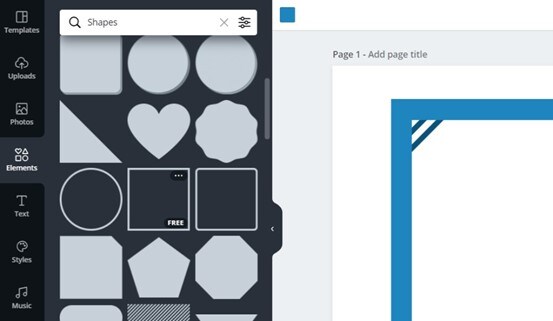
There are plenty of elements you can use to create a great-looking facecam border. Not all of the elements on Canva are free to use however, some are for Canva Pro users only.
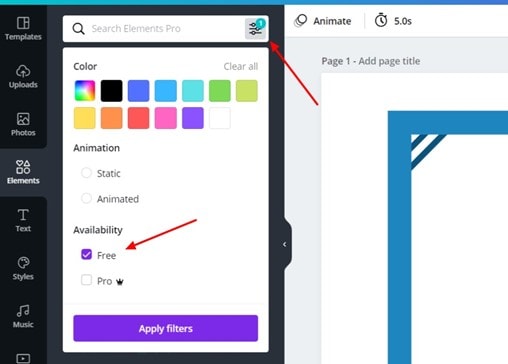
Note: To see only the free elements on Canva click the filter button in the search bar and select free elements only:
Step3 – Download your design
When you’ve completed all the customizations and are happy with your final facecam border design it’s time to download it.
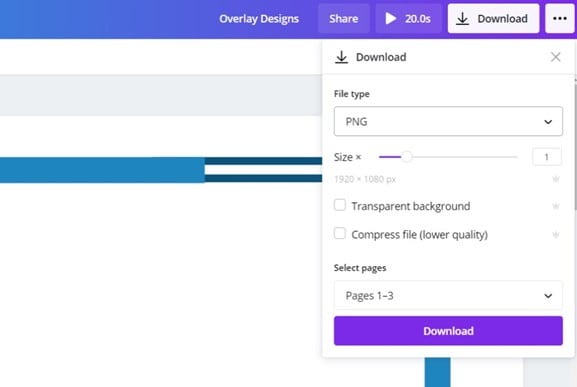
We recommend you download it as a PNG file to get the best possible quality:
An essential demo-making tool that helps learners, educators, freelancers, and gamers to take idea-sharing to the next level.

