In this article
Best Way to Add Border to Video [Recommended]
Wondershare DemoCreator is an all-in-one video presentation tool. DemoCreator is not only a screen recorder but also a video editor that provides numerous video effects and special packs. Except for the basic video-editing suite, DemoCreator is embedded with more animations, motion effects, transitions, and audio effects, DemoCreator is aimed to make video editing easy for everyone.
DemoCreator offered 50+ animation effects, including text behaviors and video clip motion, which can help you make your video creation more engaging and attractive. For border overlays, in DemoCreator includes not only stable video borders but also animated video borders.
Below are the steps about how to add borders to a video:
Step1 Select Video Editor
DemoCreator is an all-in-one tool. So, if you want to go to the editor to make further video editing, you need to select “Video Editor” mode in the DemoCreator start-up window.

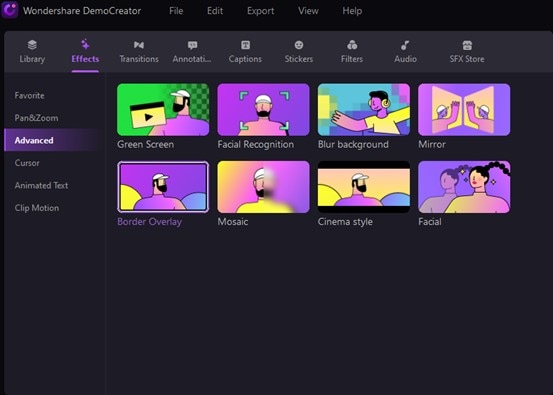
Step2 Select the “Border Overlay” in Editor Panel
After selecting the “Video Editor”, then come to the Editor panel. Find Border Overlay under the Effects>Advanced. And import your media files that need to add borders.
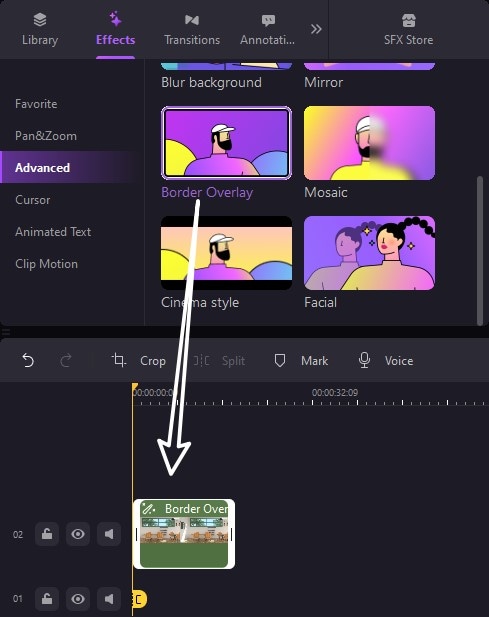
Step3 Drag Border Overlay to the Clip
Drag the Border Overlay effect to your clip on the timeline. If your clip shows the “Border Overlay”, that means it has been added successfully.
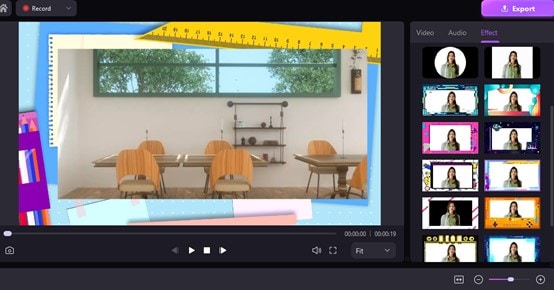
Then at the right properties window, choose the borders you want. The animated border overlays are included. After selecting, you can preview the effects in the preview window.
Add Frames to Video with Filmora
Wondershare Filmora is an efficient post-production application that gives tough competition to the industry-standard tools like Adobe Premiere Pro, Final Cut Pro X, etc. The program is available for both Windows and Mac platforms and is extremely lightweight so the processor and GPU don’t get much overhead while editing and rendering.
You can learn how to add a border to the video in Wondershare Filmora X by following the instructions given below:
Method 1 Using the Border Preset
This method adds a simple border style to the video.
Step1 Import the Source Video
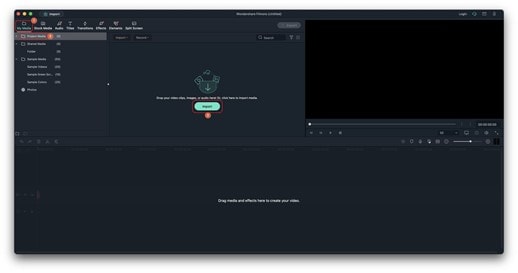
Launch Wondershare Filmora X on your Windows or Mac computer (MacBook Pro M1 is used here for demonstration), click to select My Media from the menu bar at the top, and then select Project Media from the navigation pane on the left. Next, from the Media box, click Import and select and import the source video from your PC to Filmora X.
Step2 Add Video to the Timeline
Drag the video from the Media box to the Timeline at the bottom, and when the resolution confirmation box appears, click either the button under the Keep Project Settings label or the one below Match to Media.
Step3 Add Border to Video
Click to select Effects from the menu bar at the top, click to select the Default tab from the top of the navigation bar on the left, select Utility from the available options in the navigation pane, and from the presets box, drag the Border tile over the footage track in the Timeline to add a white border to video. Alternatively, you can also place the Border preset on a separate layer above the video to get the same output.
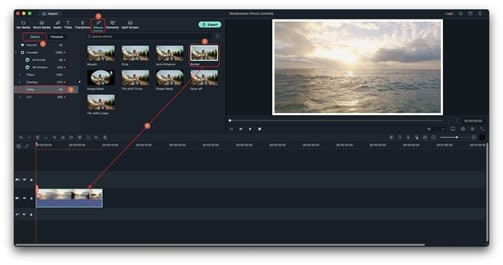
Step4 Customize the Border
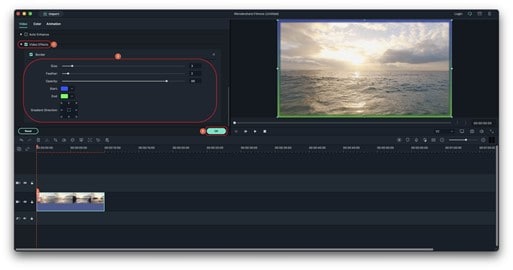
In the Timeline, double-click the video layer with the border, expand the Video Effects tree from the upper-left box of the interface, and use the Size, Feather, and Opacity sliders to customize the border.
You can also use the Start and End boxes to change the border color as needed, and click any of the available arrows next to the Gradient Direction label to specify how and in which direction the two colors of the border would blend.
Add Border to Video Online with Kapwing
Step1 Upload Video
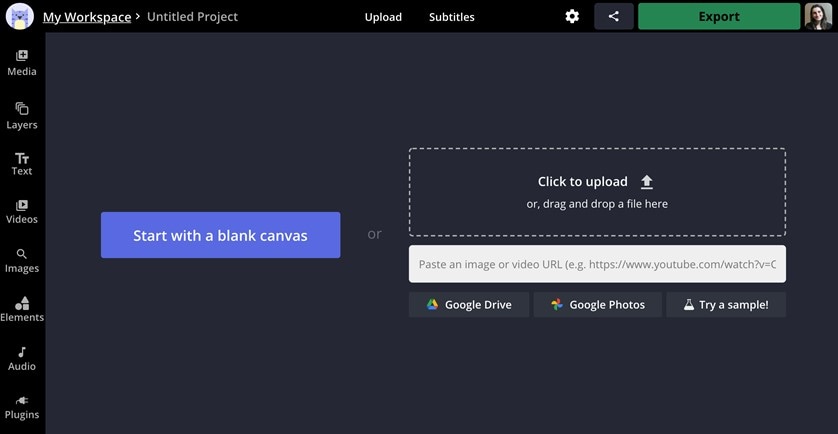
You can start with a blank canvas sized for social media (like a 1:1 post for Instagram) or upload your video. Drag and drop a video from your device directly to the rectangle or select “Click to upload” to select the files. This also works for photos and GIFs.
Step2 Add a border to your video
There are several ways to add borders to your video in Kapwing. You can either zoom your video out and use the background canvas as your video border, or you can simply add an outline around your video.
To add a solid outline around your video, select the video layer and find the "Outline Color" option. Choose one of the preset colors or enter a custom hexcode to set a background color. Then, adjust the thickness of the border with the "+" and "-" buttons.
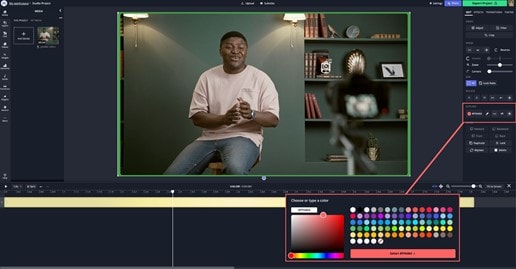
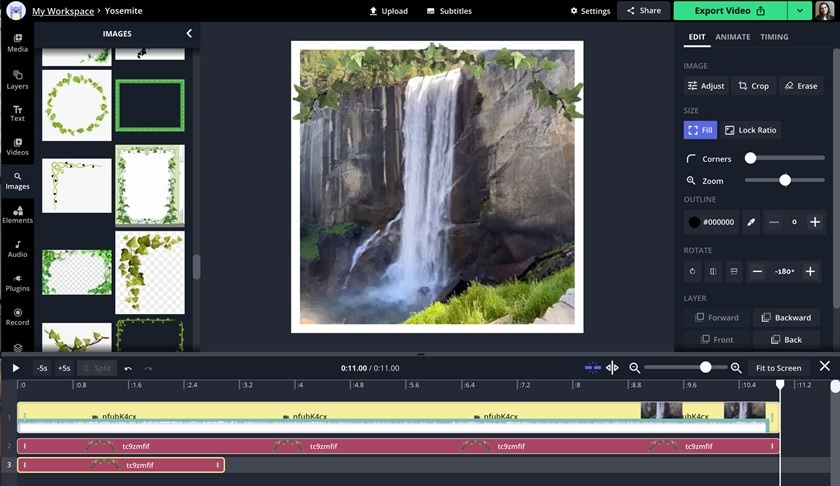
You may want to frame your video in an existing border-image. For example, you might put your video inside a polaroid border or a branded image frame. In the below example, I added a garland sticker as a border over an Instagram video.
Add Frame/Border to Video with iMovie Mac
iMovie is a proprietary application developed by Apple Inc. and is available for iPhones, iPads, and Mac computers. Because the app detects and checks for genuine Apple hardware, it can’t be installed even on the virtual machines running macOS.
The process to add a border to a video with iMovie on Mac is given below:
Step1 Add the Source Video to the Timeline
Go to the My Media tab, click Import and import the source footage to iMovie. Next, drag the clip from the media box and place it on a new layer right on top of the solid preset track in the Timeline. Optionally, drag the Settings slider from the upper-right area of the Timeline itself to reduce the size, and finally drag the solid track to match the length of the video footage.
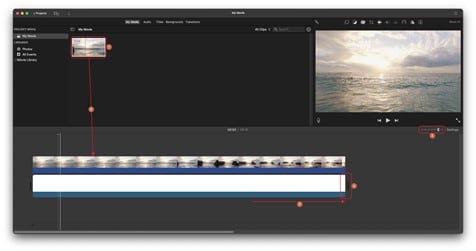
Step2 Add Border to Video with iMovie
Click the Video overlay settings icon from the top of the preview window, expand the Overlay menu, and click to select Picture in Picture from the list.
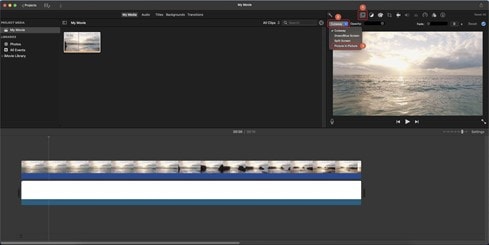
Then, choose your preferred style from the available 3 Border options.
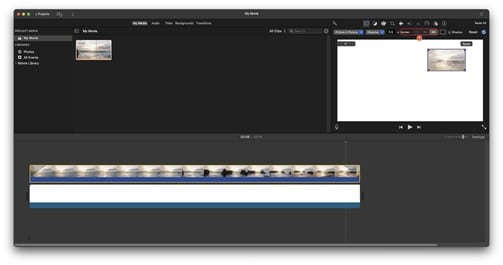
Click to select the video track in the Timeline if not already selected, drag to scale up (enlarge) the video frame in the preview window, click the Border color box from the top of the preview box, and use the options present in the Colors box that appears on the bottom-left area to change the color of the border.
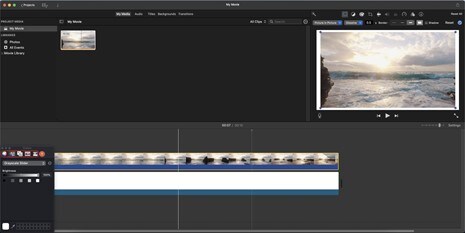
After this, if need be, make some further adjustments to the size of the video clip in the preview window before exporting the project to your preferred format.
Conclusion
We've learned 4 ways to add borders to video, different tools own different features. If you don't want to download software, you can try the kapwing online tool. But if you want a simpler and more straightforward method to add a border to a video, DemoCreator may be a better choice for you. It seems easier to use than iMovie.
An essential demo-making tool that helps learners, educators, freelancers, and gamers to take idea-sharing to the next level.


