OBS Studio, widely known as a tool for broadcasters, added a new built-in feature in their latest update, Virtual Camera, which allows you to use the OBS output as a camera in other apps on your computer. This exports anything you’ve set up in OBS Studio as if it were a camera to your system. As a result, you have a lot of room to be inventive.
In this article
What is OBS Virtual Camera, and how does it work?
The OBS virtual camera can be used to send your OBS video directly to several other meeting platforms. Instead of choosing a camera device in these applications, you may use the output from OBS as a webcam by clicking the “Start Virtual Camera” button.
You may wish to utilize OBS as a webcam source since it has many production features like picture-in-picture, chroma-key (green screen), and so on. This is especially useful if you want to deliver a business presentation or amuse your coworkers by using an interesting green screen backdrop. In this post, we will introduce how the OBS virtual cam is used and how it can record screens.
How to Use OBS Virtual Camera on Zoom?
The OBS virtual camera can link your OBS scene to many other applications that can select camera devices, such as Zoom, Discord, Skype, and Google Meet. As an example, we will explain how to use the OBS virtual camera in Zoom.
Step1
Please download the latest version of OBS studio.
Step2
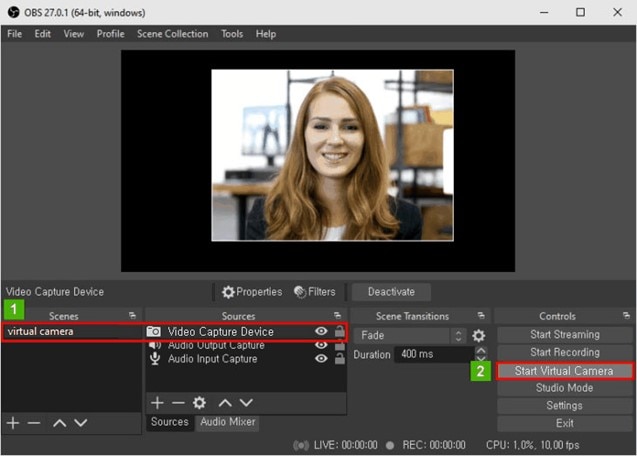
Add sources you want to share, such as video or display capture, and click the ‘Start Virtual Camera’ button.
Step3
Start the Zoom application and select the OBS Virtual Camera as a camera in video settings.
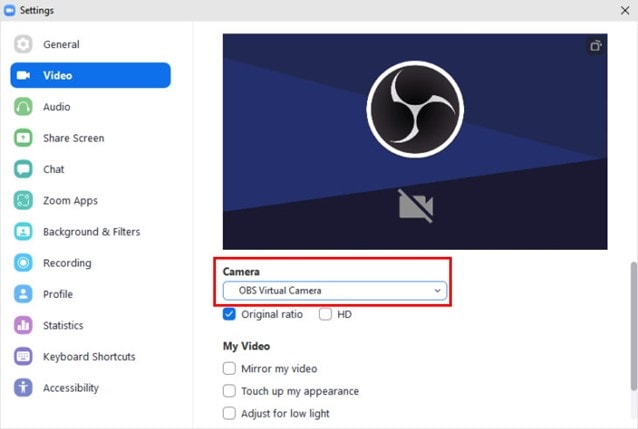
You’ll notice that whatever is shown in OBS is mirrored in Zoom. This process works the same way for other programs, such as Skype, Discord, and Teams.
Notes need to mind on OBS virtual camera
How to use:
OBS VirtualCam has two main methods for outputting video from OBS. The first is the Preview output, which is enabled from the Tools menu. This output will provide exactly what you see in the Preview in OBS, including any changes or scenes you might switch to. This is the most common method, and probably what you would want to use.
Preview Output:
1. Select Tools -> VirtualCam in the main OBS Studio window
2. Press the Start button, then close the dialog
3. Open your program (Zoom, Hangouts, Skype, etc.) and choose OBS-Camera as your webcam
The next method is a filter that you can add to any scene or source if you only want to output that specific scene or source, and nothing else.
Source Filter:
1. Add a VirtualCam filter to the scene/source you want to output to the virtual camera
2. Choose a camera target then press Start
3. If the button does not change to Stop, it means the camera is already in use, and you must choose a different camera or stop the other output first.
4. Open your program (Zoom, Hangouts, Skype, etc.) and choose the camera you selected as the target for your webcam
Related FAQs:
Why are the resolution and framerate sometimes not the same as my OBS output settings?
If you open an OBS-Camera device in a 3rd party application before starting the output in OBS, OBS-Camera will default to 1080p 30fps. If you start OBS first, it will use whatever is set as the Output resolution and framerate in OBS Studio's options, under Settings -> Video.
Does this plugin support other platforms?
For Linux, you can use the Video4Linux sink plugin for OBS Studio. Directions on how to configure it are available from that link. Work is underway to provide a similar plugin for macOS, but there is no ETA.
Known issues
- Skype from the Windows Store doesn't work with the OBS Camera, please use Skype Desktop Edition instead.
- Unity can't get an image from virtual cam, please use register batch reg_path.reg in the release page to manually add a dummy device path.
Use DemoCreator Virtual Camera on Zoom
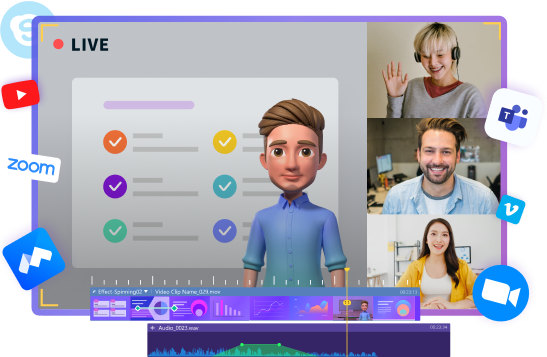
Different from OBS, Wondershare DemoCreator is an essential demo-making tool that helps learners, educators, freelancers, and gamers to take idea-sharing to the next level. You can not only record and edit videos but also create video presentations and video demos in one stop.
Not only Zoom, but DemoCreator also supports connecting other platforms like Skype, google meet and live streaming platforms. You can create a video presentation in DemoCreator demo-making mode. Compared to a normal meeting, using DemoCreator virtual Camera and then broadcasting to the meeting platforms will make your meeting scene more attractive.
Below are the steps about how to use DemoCreator Virtual with Zoom:
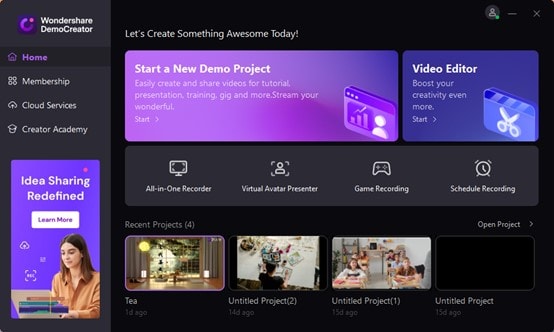
Step1 Launch DemoCreator and Zoom
Step2 Select “Start a Demo Project” on DemoCreator
The Demo mode allows you to easily create and share videos for a tutorial, or presentation. Also, in this mode, you can set up other cameras.
Step3 Set Virtual Camera on Zoom
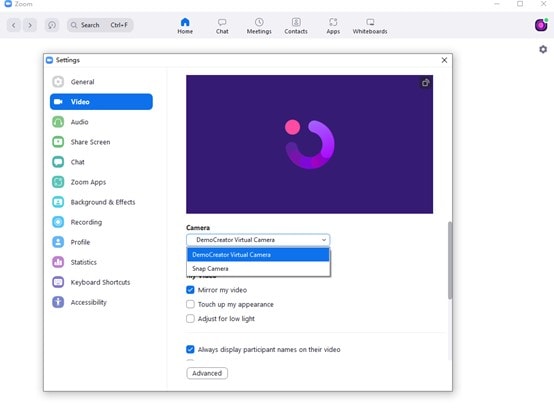
Open Zoom, and go to settings. Then Select DemoCreator Virtual Camera as the camera.
An essential demo-making tool that helps learners, educators, freelancers, and gamers to take idea-sharing to the next level.
