

Webcams and other cameras have become a mainstay on most modern-day streaming channels. They bring a sense of personalization and relatability to a stream and allow viewers to see a streamer’s body language and visual reactions to certain events.
When they’re first plugged in, webcams produce a rectangular source that rarely looks great on top of other content. The best way to help them fit in with your overall theme is to frame them in a border.
There are a few options for you to consider if you need to make a webcam border in OBS studio. Some of them require external software or plugins, but few of them can be done with only OBS Studio available.
In this article
How to Create Custom Webcam Borders with OBS
Method 1: Color Source Border
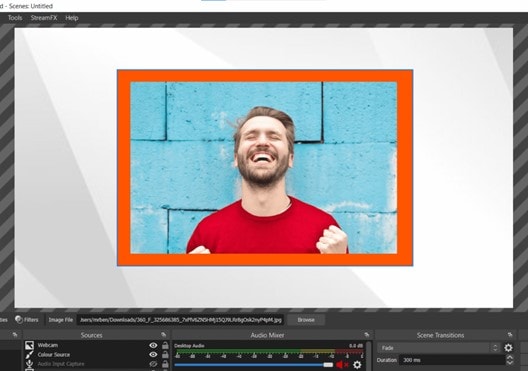
A color source border can be created with the default OBS studio installation. It creates a very simple but effective single-color frame around the edges of your webcam.
Add your video capture device source to your scene.
Go to your source list and add a new color source to your scene.
Select your border color, leave the width and height as it is, and click okay.
Drag the color source underneath your video capture source in the source list.
Select both your video capture source and your new color source and click CTRL+D to center both sources.
Select your color source and drag the edges of the source in so that all sides are equidistant from the webcam source. You can drag the bounds in or out depending on how thick or thin you want the border.
Finally, group your webcam source and color source together in a folder. This will ensure you cannot move them individually and the border will be fixed to the webcam source.
Method 2: Gradient Source Border Plugin
Download the Windows installer for the gradient source plugin here.
Run the EXE file inside the zip folder and restart OBS studio.
Add your video capture device source to your scene.
Go to your source list and add a new gradient source to your scene.
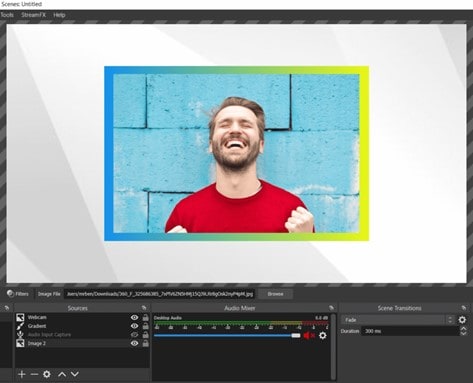
Inside the gradient source settings menu, you can change the number of colors, direction, and size of the gradient. You can see what your chosen settings will look like in the settings preview area. Choose two or more individual colors and click ok.
Drag the gradient source underneath your video capture source in the source list.
Select both your video capture source and your new gradient source and click CTRL+D to center both sources.
Select your gradient source and drag the edges of the source in so that all sides are equidistant from the webcam source. You can drag the bounds in or out depending on how thick or thin you want the border.
Finally, group your webcam source and gradient source together in a folder. This will ensure you cannot move them individually and the border will be fixed to the webcam source.
An Easier Way to Add Webcam Borders
Wondershare DemoCreator is an all-in-one video presentation tool. DemoCreator is not only a screen recorder but also a video editor that provides numerous video effects and special packs. Except for the basic video-editing suite, DemoCreator is embedded with more animations, motion effects, transitions, and audio effects, DemoCreator is aimed to make video editing easy for everyone.
DemoCreator offers 50+ animation effects, including text behaviors and video clip motion, which can help you make your video creation more engaging and attractive. For border overlays, DemoCreator includes not only stable video borders but also animated video borders.
With the latest update, DemoCreator further enhances its webcam border customization features, making it an even more powerful alternative to OBS Studio. The new version introduces six stylish webcam border effects and an intelligent background blur feature, designed to improve on-screen appearance and enhance privacy protection.
Unlike OBS Studio, which often requires third-party plugins for similar effects, DemoCreator provides a built-in, one-click solution, allowing users to preview and apply border effects in real-time before recording. Whether you're recording tutorials, presentations, or live-streaming, DemoCreator ensures a seamless, professional, and polished webcam recording experience—outshining OBS in both ease of use and creative flexibility.
Below are the steps about how to add borders to a video:
Step1 Select Video Editor
DemoCreator is an all-in-one tool. So, if you want to go to the editor to make further video editing, you need to select “Video Editor” mode in the DemoCreator start-up window.

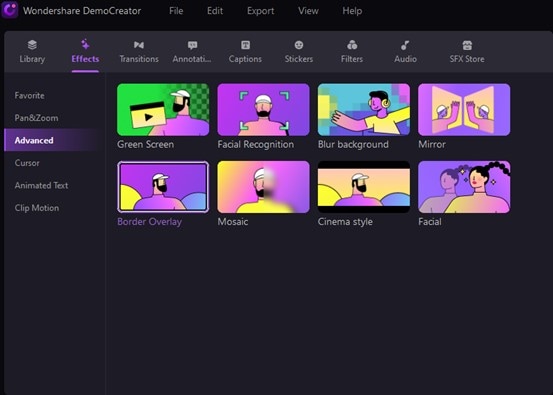
Step2 Import Video Files and Select the “Border Overlay”
After selecting the “Video Editor”, then come to the Editor panel. First, you need to import your media files. Then find Border Overlay under the Effects>Advanced.
Step3 Drag Media Files and Border Overlay to the Clip
First please drag your media files (webcam recording files) to the timeline. Then drag the Border Overlay effect to your clip. If your clip shows the “Border Overlay”, that means it has been added successfully.
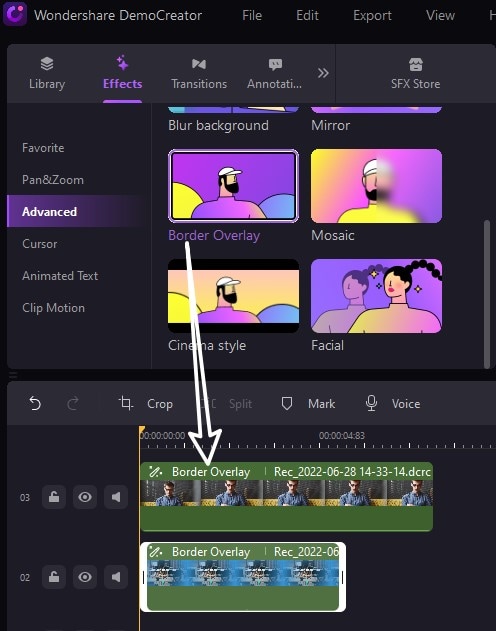
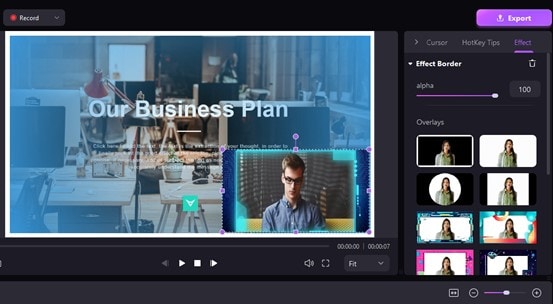
Then at the right properties window, choose the borders you want. The animated border overlays are included. After selecting, you can preview the effects in the preview window.
Conclusion
In this article, there are 2 ways to create webcam borders. OBS is an open-source tool for video editing and screen recording. if you want a professional tool, then choosing OBS to add webcam borders will be your better choice. But it may be more difficult to learn and use. If you want an easier tool to add borders and make further video editing, the DemoCreator would be your best choice.
An essential demo-making tool that helps learners, educators, freelancers, and gamers take idea-sharing to the next level.


