
In the world of live streaming and video production, smooth transitions are crucial for maintaining viewer engagement and professionalism. The "Move Transition" plugin for OBS Studio has become a popular tool for achieving dynamic and fluid scene changes. Instead of abrupt cuts, this plugin allows elements to smoothly glide and move across the screen, creating a more polished viewing experience. This guide will walk you through the process of downloading, installing, and configuring the Move Transition plugin in OBS, and also introduce you to Wondershare DemoCreator, a powerful alternative that simplifies the transition process.
In this article
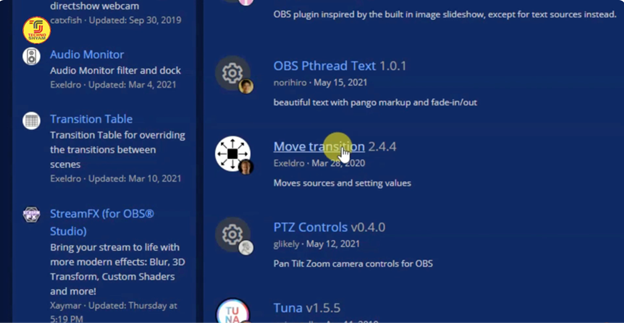
Part 1: Download & Install the Move Transition Plugin for OBS
The Move Transition plugin for OBS enhances scene switching by adding smooth, animated movement instead of abrupt cuts. It allows sources like text, images, and video overlays to transition seamlessly, creating a more professional live stream or recording. This plugin is widely used by streamers and content creators to make their transitions visually appealing and dynamic.
How to download the Move Transition plugin for OBS
Step 1Visit the official OBS plugin repository
Start by searching for the Move Transition OBS plugin on the official OBS forums or GitHub repository. Make sure to download from a trusted source to avoid compatibility issues. Look for the latest version that matches your OBS Studio installation and operating system.
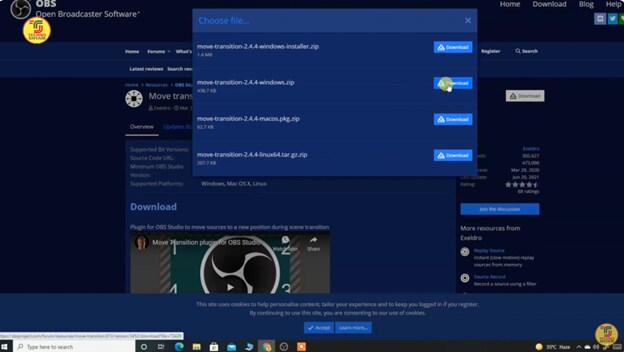
Step 2Download the Move Transition plugin file
Find the most recent version of the Move Transition plugin that is compatible with your system. Click on the download link and save the plugin file to your computer. Ensure you choose the correct version for Windows, Mac, or Linux to prevent installation errors.
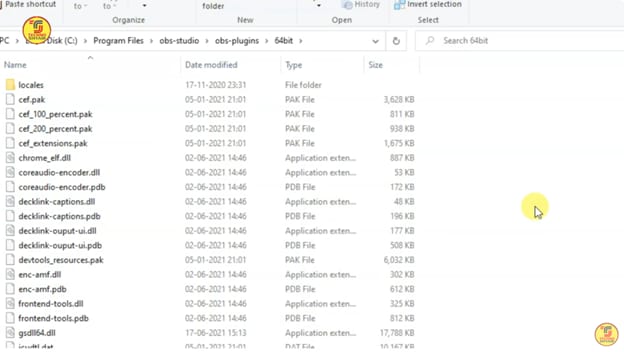
Step 3Extract and move the files to the OBS plugins folder
Unzip the downloaded Move Transition plugin archive to access the installation files. Locate your OBS Studio installation directory and open the plugins folder. Move the extracted files into this folder to ensure OBS can detect the plugin.
Step 4Restart OBS and enable the plugin
Launch OBS Studio and go to Scene Transitions in the settings panel. Check if Move is listed among the available transition options. If it doesn’t appear, confirm that the files were correctly placed in the plugins folder and restart OBS again.
Part 2: How to Use Move Transition in OBS
The Move Transition plugin in OBS allows for smooth, animated scene transitions instead of abrupt cuts. Proper setup and configuration help create a more professional look for live streams and recordings. Follow these steps to enable and optimize the Move Transition plugin in OBS.
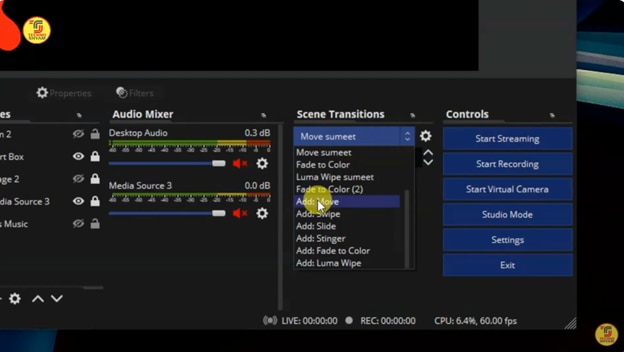
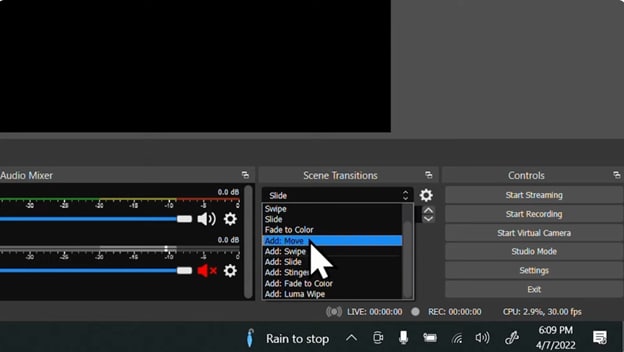
Step 1Add and enable Move Transition
Open OBS Studio and navigate to the Scene Transitions panel. Click the + icon, select Move, and set it as your default transition. Click the gear icon next to it to open the transition settings.
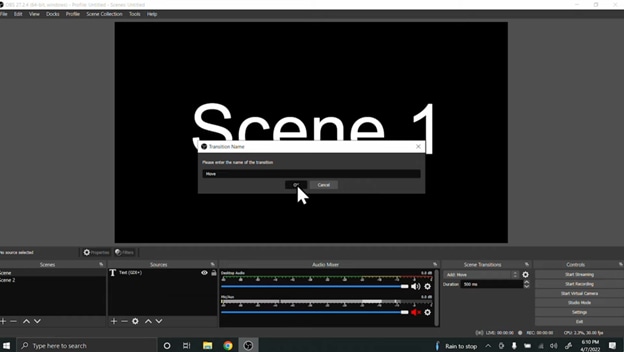
Step 2Configure transition duration
Adjust the transition duration (in milliseconds) to control the speed of scene switching. A duration of 500-1000 ms is recommended for smooth movement, while 1500-2000 ms works better for slower, cinematic effects.
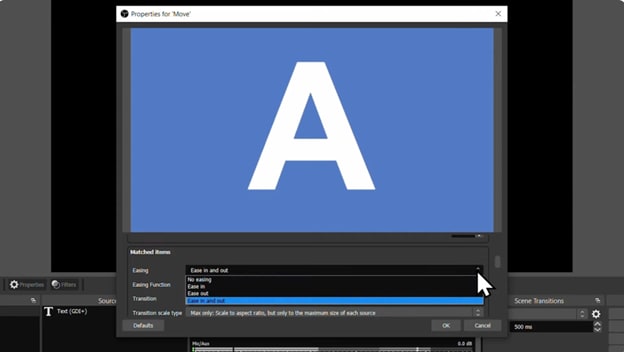
Step 3Enable easing functions
In the Move Transition settings, enable easing functions like Ease In, Ease Out, or Ease In-Out for smoother motion. These settings control how elements accelerate and decelerate, making scene changes look more natural.
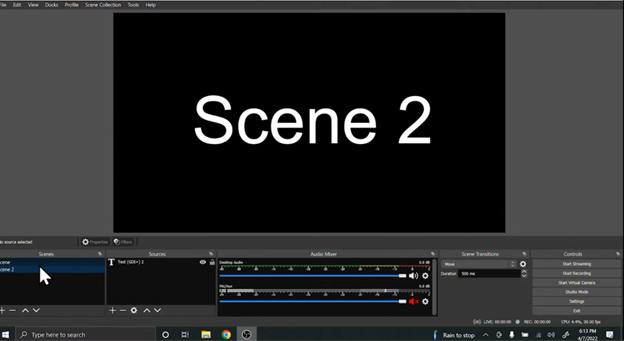
Step 4Customize animations
Modify positioning, rotation, and scaling in the settings to create unique animations for overlays, text, or webcam sources. This adds a dynamic touch, making transitions more engaging and visually appealing.
Part 3: Best Practices and Troubleshooting Tips for Fixing Plugin Issues
Using the move transition OBS plugin enhances scene switching, but improper setup or outdated versions can cause performance issues. Below are key best practices to optimize transitions and troubleshooting tips to fix common plugin-related problems.
- Fixing move transition not working: If the plugin isn’t appearing in OBS, ensure the files are in the correct plugins folder and restart OBS. If the issue persists, try reinstalling the plugin or updating to the latest version.
- Optimizing performance: High transition durations can slow performance and cause lag. Lower the transition duration, disable unnecessary animations, and close background applications to improve smoothness.
- Checking compatibility issues: Older OBS versions may not fully support the move transition OBS plugin. Always update OBS to the latest version to prevent compatibility problems and crashes.
- Resolving unexpected source movements: If scene elements shift incorrectly, check the Move Transition settings and adjust source alignment. Ensure sources are properly positioned in both scenes to avoid misalignment.
- Fixing OBS crashes after enabling the plugin: OBS may crash due to conflicting plugins or an incomplete installation. Try disabling other plugins, reinstall the Move Transition plugin, and run OBS as an administrator to prevent crashes.
Part 4: Wondershare DemoCreator – The Best OBS Alternative
For those who find the Move Transition OBS plugin difficult to set up, Wondershare DemoCreator offers a built-in, hassle-free alternative. With preloaded transition effects and an easy-to-use interface, DemoCreator simplifies scene switching without requiring external plugins or complex configurations. It also provides advanced video editing tools, making it a complete solution for content creators.
Why Wondershare DemoCreator is a Great Alternative to OBS
- Built-in transition effects without external plugins: DemoCreator provides a library of preloaded transitions, eliminating the need for third-party plugins to achieve smooth scene switching.
- User-friendly interface with drag-and-drop scene switching: Unlike OBS, DemoCreator offers an intuitive drag-and-drop editor, making it easy to add transitions and switch between scenes seamlessly.
- Advanced video editing tools for content creators: Along with transitions, DemoCreator includes powerful video editing tools like text overlays, animations, and audio enhancements for a professional finish.
- Lightweight software with optimized performance: Unlike OBS, which can be resource-intensive, DemoCreator is optimized for smooth performance even on lower-end systems, reducing lag and crashes.
- One-click export and easy sharing: After editing, users can export videos in multiple formats like MP4, MOV, and GIF, making it easier to share content directly to YouTube or other platforms.
How to add transitions in Wondershare DemoCreator
Step 1Import your video or start screen recording
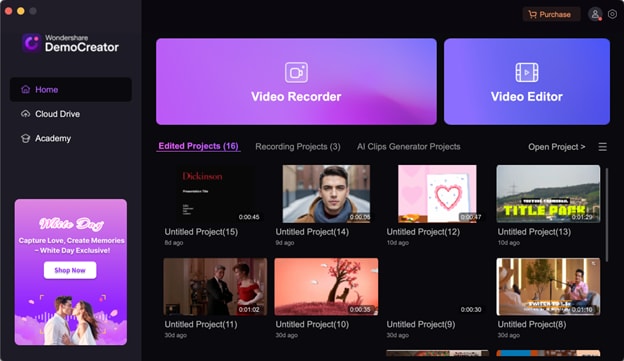
Open Wondershare DemoCreator and click on Video Editor from the main dashboard. This will take you to the editing workspace where you can start working on your project. To begin, either import an existing video by clicking on the import media option or start a new screen recording by selecting the Record button at the top left. Once imported, your clips will be displayed in the Library panel, ready for editing.
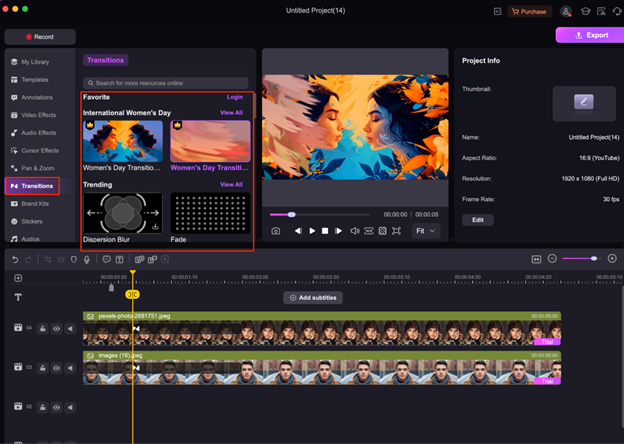
Step 2Open the transition effects panel and apply effect
Once your video is imported into the timeline, navigate to the Transitions tab on the left panel. Click on it to open a library of transition effects categorized under different styles like Smoke, Creativity, and Foggy. Browse through the available options and preview them to find the best transition for your video. After selecting a transition, drag and drop it between two clips on the timeline. This will apply the effect, creating a smooth transition between scenes. You can adjust the placement to refine how the transition appears in your video.
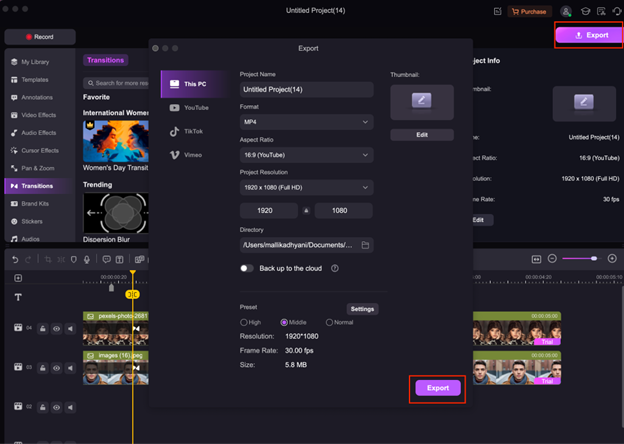
Step 3Adjust the transition settings and export your video
Once the transition is applied, fine-tune its duration, direction, and style for a smoother effect. Click on the transition in the timeline to open its settings and adjust its timing to fit your video’s flow. After finalizing the transition, click the Export button in the top-right corner. Choose your preferred video format (MP4, MOV, or others), resolution, and frame rate before saving. Once exported, your video is ready for sharing or uploading to platforms like YouTube.
Conclusion
The Move Transition plugin in OBS allows for smooth scene changes, enhancing the quality of live streams and recordings. This guide covered the steps to download, install, and configure the plugin for seamless transitions. By adjusting duration, easing functions, and custom animations, users can optimize their scene movements for a more professional look. For those seeking an easier solution, Wondershare DemoCreator offers built-in transitions without the need for external plugins. Its drag-and-drop interface and advanced editing tools make it a beginner-friendly alternative to OBS. Experimenting with different transition settings will help improve video content, making it more dynamic and engaging for viewers. Whether using OBS Move Transition or DemoCreator, smooth transitions can elevate production quality.
FAQs
-
1. Can I use the Move Transition plugin with other OBS plugins?
Yes, the Move Transition OBS plugin works alongside most OBS plugins, but conflicts can occur. Some animation or transition plugins may interfere with its functionality. If you notice issues, disable other plugins one by one to identify the conflict. -
2. Why is my Move Transition not working?
If the OBS Move Transition plugin is not working, ensure it is correctly installed in the OBS plugins folder. Restart OBS and check if the transition appears under Scene Transitions. If the issue persists, try reinstalling the plugin, updating OBS, or verifying that other conflicting plugins are not interfering with its functionality. -
3. Can I use Move Transition on Mac?
Yes, the OBS Move Transition is compatible with macOS, but installation requires placing the files in the correct plugins directory. After installation, restart OBS and check if the transition appears in the settings. If it does not work, ensure you are using a macOS-supported version of OBS and the latest version of the plugin. -
4. Does Move Transition increase CPU or GPU usage in OBS?
The Move Transition plugin is lightweight, but excessive transitions or high-resolution scenes can increase CPU/GPU load. If you notice lag, lower the transition duration and avoid unnecessary animations. Running OBS on a dedicated GPU can also improve performance. -
5. Does Move Transition work for webcam overlays in OBS?
Yes, the Move Transition plugin OBS supports webcam overlays, allowing smoother transitions between scenes. Ensure the webcam source exists in both scenes, or OBS will not animate it properly. You can also adjust easing and movement settings for custom webcam effects.


